Connect Live Chat to your helpdesk with OneDesk
This guide is meant to help you connect live chat to your helpdesk solution and grant you an instant ability to handle questions and other forms of support.
The things you need to connect live chat to your helpdesk:
-A OneDesk account (even our trial version works too!).
-Your Intercom account.
-A Zapier account (the free version should be more than enough).
-The Private link to access our OneDesk app in Zapier:
https://zapier.com/developer/invite/42966/4e4907110b905debeb6a129130fa5c0b/
How the process works in theory:
Zapier is meant to help you connect applications together that fit different needs. You can add entire extra practices that your business needs by connecting them via this medium.
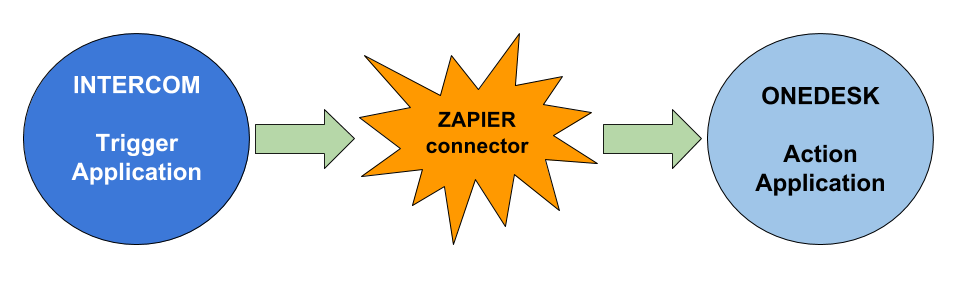
In our case we will connect OneDesk with Intercom to create live chat conversations that then sync back to the first application.
The formula to create these integrations is rather simple. It follows this principle : if something happens in the first application, then make this happen in the second application. This allows for many variations on the same principle and therefore for hundreds of integration possibilities. In our case, of course, we will be linking OneDesk to Intercom; so the forumla should look a little bit like this: When a new conversation happens in Intercom create a new item in OneDesk.
This can be further complimented by having another integration between these applications take place where any further messages sent from this conversation will create comments in items.
In essence, this will let you live chat with customers and clients and keep track of the conversations and the demands or questions they might have in your OneDesk helpdesk software.
How to build it in practice:
The next step is to actually build this integration.
After having signed-in to Zapier, you will have to click on the “Make a Zap” orange button at the top of the screen.

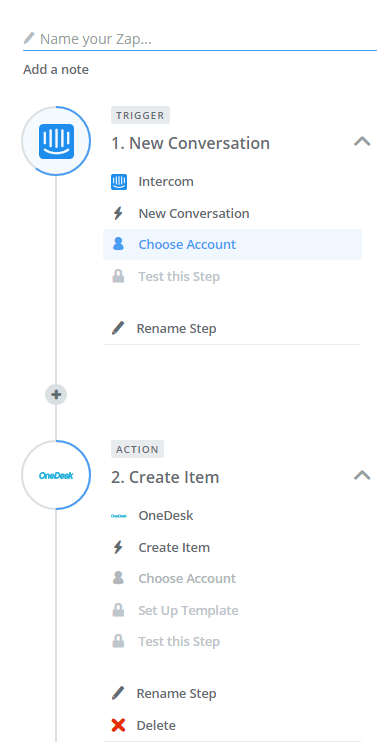
Once done, you will make your way to the main page to construct your automation. Here you will have to select two applications for the formula you are building. The first in our case should be Intercom and the second, corresponding to the action application phase, should be OneDesk.
Once these applications are chosen, you then have to choose both the trigger and the action that needs to take place in both. The first one, the trigger, should be new conversation in Intercom. The second is called the action and should be a new item in OneDesk.
The next step is to log in to both applications and test the steps to make sure they work. But the most important part is to pick how these actions and triggers pass information to each other, and which information you want for either. This is where you can really design something that fits your needs and make specific changes to reflect a particular necessity of your business type or for the structure you already use. You will be able to pull different information from the conversation into the item in OneDesk and make sure everything from the name to the author gets assigned the way you pick it.
![]()
Once all that is done and you are happy with the result of the tests, all you have to do is name your new integration to keep track of it and activate the grey slider in the top right that says “this zap is OFF”. Simply slide it to ON and you’re all set, you have now officially managed to connect live chat to your helpdesk.
Photo Credit: “Sound Studio” / Neil Cummings / CC BY