
Connecting Wufoo to your helpdesk using OneDesk
This is a short guide that will help you in connecting wufoo to your helpdesk and manage forms and the specific clients that they are meant for.
The pre-requisites:
-A OneDesk account (even our trial version works too!).
-Your Wufoo account.
-A Zapier account (the free version should be more than enough).
-The Private link to access our OneDesk app in Zapier:
https://zapier.com/developer/invite/42966/4e4907110b905debeb6a129130fa5c0b/
How it works:
Using Zapier you can connect two different applications together. This is done by working around a simple formula that goes a little bit like this: If something takes place in the first application, then take this action in the second platform.
This is very easy to use and means that you connect almost anything to anything!
Today we will be connecting Wufoo to OneDesk in order to create items out of forms completed by customers. This will work along those lines: 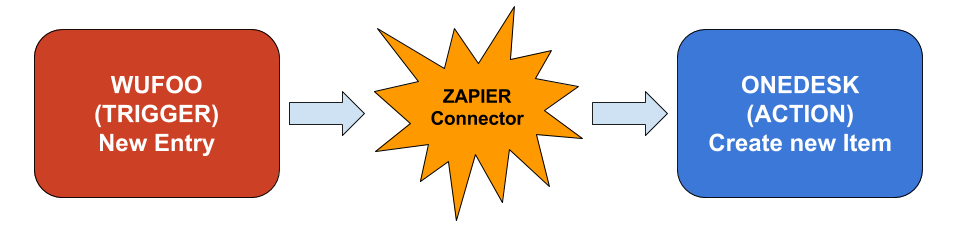
Why connect Wufoo to your helpdesk?
There are many situations where having pre-made forms available to customers can be a boon for business. This would, for example, allow for custom orders to have a grounding in specifications you can decide on in advance. It would also make sure that all your orders or contracts give you a certain level of precision when they come in.
If you handle a few products, forms based on each and for different specificities can also become indispensible to help manage your work queues and the feedback you gather.
The play-by-play:
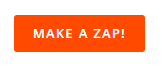
First and foremost, get onto the Zapier site and find the big orange button:
Once that is done, you will need to pick how you want to complete the formula for your integration. In this case it will be picking Wufoo as the Trigger application (the first one in the formula) and picking OneDesk as the action application (which is the second one).
The formula we are making this time is this: If a new entry happens in Wufoo, then create a new Item in OneDesk.
This means we now have to pick those triggers and actions in the two applications we have selected. So first select New entry from the Wufoo application, then select new item from the OneDesk application.
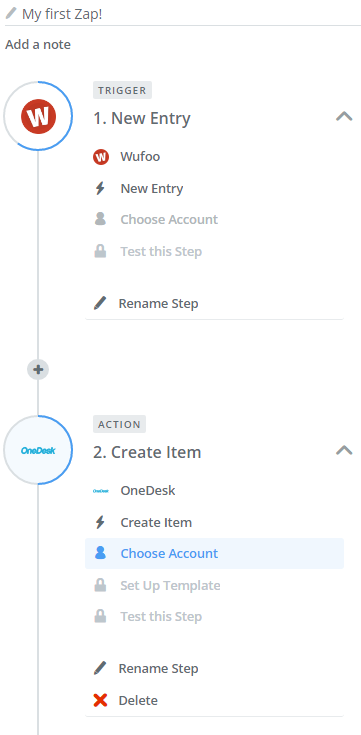
That is basically it! Now you have to login to both applications to complete their respective steps and pick what info you want transferred and how it should take place. This is really where you make this integration your own.
Once that is done too you should test the two steps to make sure they work just the way you need them and verify how it will all look.
![]()
Then simply name your step and find the grey slider to turn the integration on and start making use of it. There you have it, you have been successful in connecting Wufoo to your helpdesk!
Photo Credit: ”Flower Crown”/ Jorge Jaramillo / CC BY