This articles is outdated. For up-to-date articles see the OneDesk Knowledgebase.
The customer portal helps customer service and help desk teams gather feedback and ideas from customers anytime, and from anywhere. It’s easy to activate, and can even be embedded in your website.
When sending a submission via the customer portal, customers must categorize their item as one of the following: Question, compliment, idea or problem.
This way, the type will automatically be marked when you receive it in your OneDesk account.
To make things even easier, you can add custom fields to the customer portal to allow customers to categorize their submissions more specifically. For example, you can set up custom fields to identify different products, releases and more.
Only administrators can add custom fields to the customer portal. Here’s how:
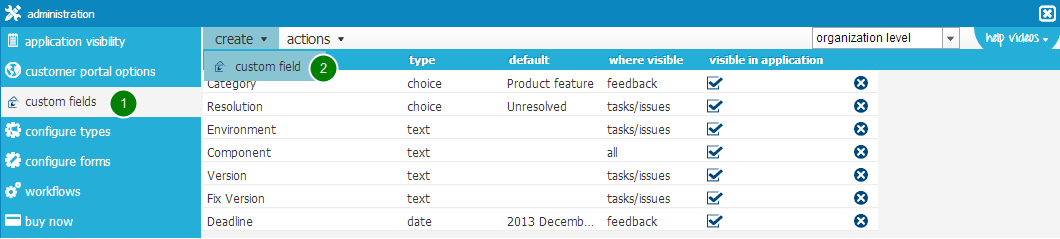
– Under your name, go to Administration.
– Go to the custom fields tab (1).
– Click create, and select custom field (2).
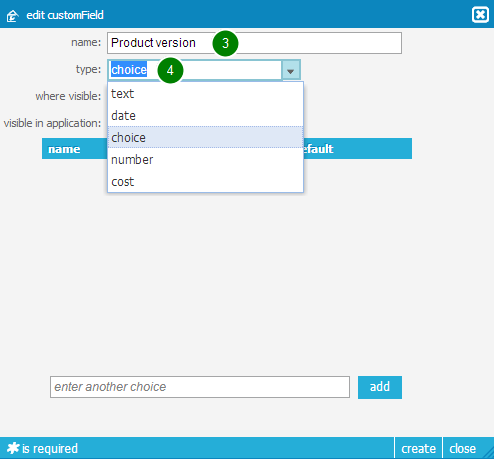
– Name your custom field (3).
– Choose a type (4).
In this example, we have chosen “choice” as the type. This means people will be able to choose from a drop-down.
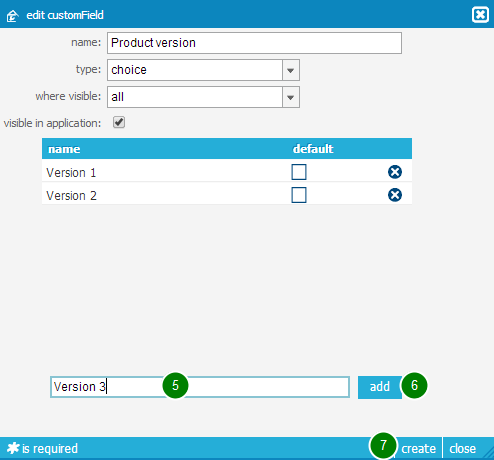
– Create each choice, or other type of value (5).
– Click add after each one (6)
– When you are done, click create (7).
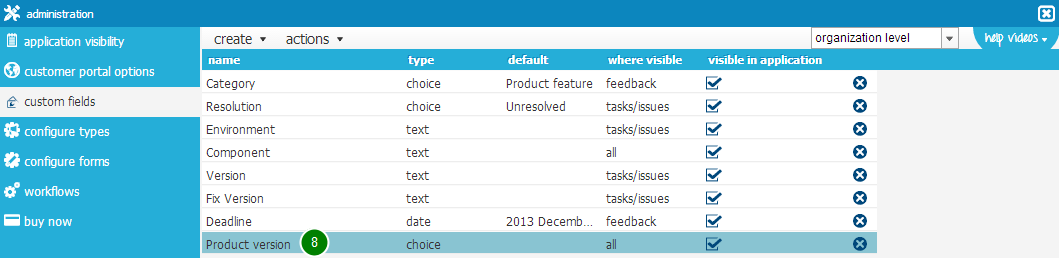
Once created, you will find it in the custom fields list (8).
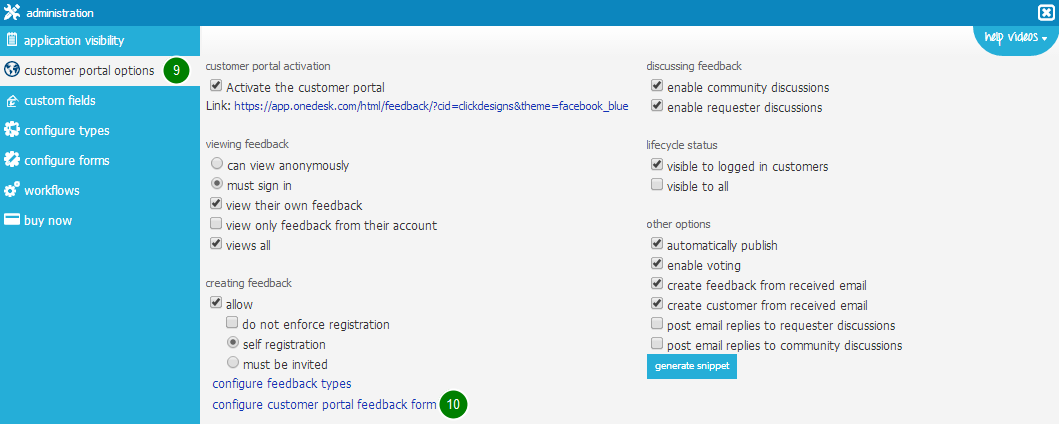
– Go to the customer portal options tab (9).
– Select configure customer portal feedback form (10).
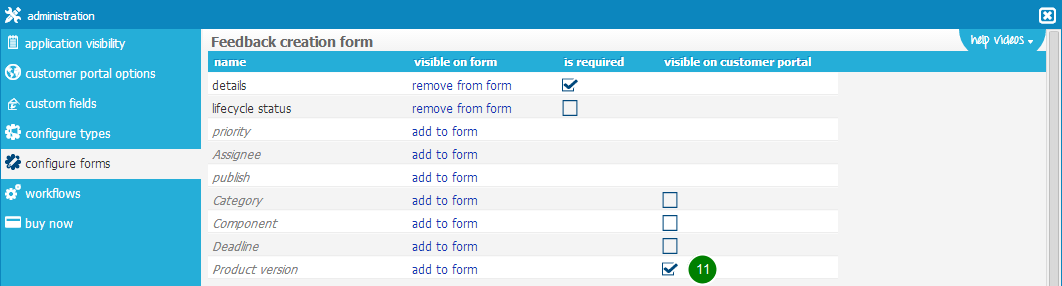
– Find the custom field you just created and place a check mark under the visible on customer portal column (11).