OneDesk’s Customers & Accounts application allows you to keep all information about your customers and their companies in one place.
The customers & accounts can be accessed through the applications drop-down.
The application is divided into two modes. In the customers mode, you can create and invite customers. It is important to note that adding/creating customers is different from inviting customers. After adding/creating as many customer records as you wish, you may invite them. They will then receive a registration e-mail inviting them to collaborate with you through OneDesk.
Learn how to create and invite customers in under one minute with this short video:
Creating customer accounts
There are two ways customer accounts can be created.
It can be created as you are creating the customer.
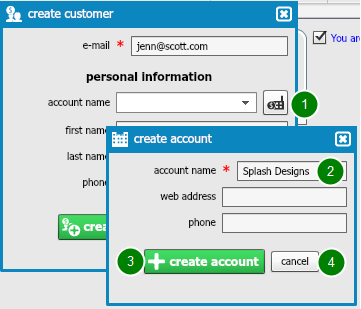
– Click on the create new account button next to the account name field (1).
– Enter the customer company information in the create account window that appears (2). The account name field is required; the rest are optional.
– Click create account (3).
If you decide that you do not want to create the customer company, click cancel (4).
If you decide to create the customer account after you create the customer:
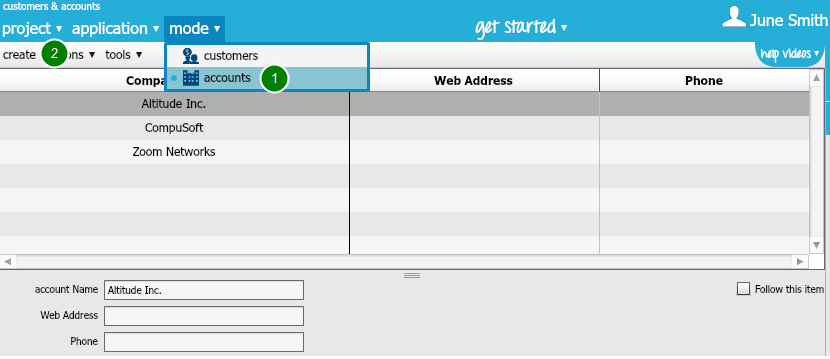
– Go to the accounts mode (1).
– Click create (2).
A create account window will appear.
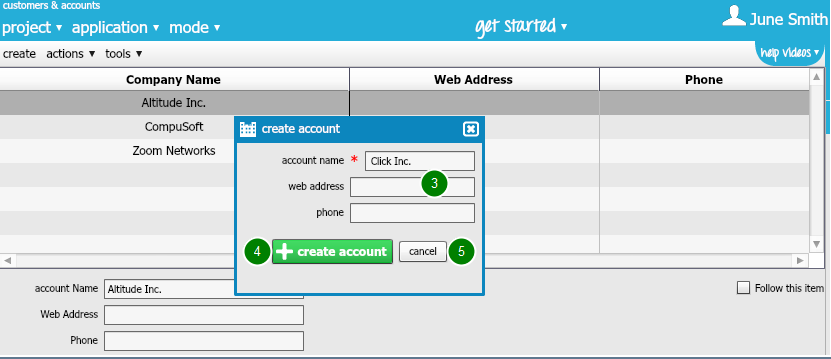
– Enter the account name, and optionally, the web address and phone number (3).
– Click Create Account (4).
If you decide that you do not want to add the company, click Cancel (5).