Creating and working on projects

Launch a new project

  1. Create a project by clicking Add > Project. Fill out the name, dates, and other properties as necessary.
  2. Next, fill your project with tasks. Create tasks to breakdown requirements into actions to achieve a project goal. When creating tasks, estimate the planned work and assign them to users. Typically, tasks are assigned to one person. Consider breaking tasks into subtasks, to better divide up work.
  3. Next, schedule tasks and set dependencies. You can manually schedule tasks from the task detail panel or by using the Calendar or Gantt views. You can make things easier by using the smart scheduler.

Tip: Save time on future projects by creating templates. Set a project as a template, allowing you to easily kick off new projects. You can copy over tasks, assignments, work estimates, and more.

Learn more:

Working on tasks

Navigate to a task detail panel from the task grid or your user dashboard. All the information you need to work on the task and collaborate with your team is contained on the task detail panel.

In the conversations tab you can message and notify your colleagues. Try typing @ to loop in a colleague. This will add the user as a follower of the task. Followers will get notified of new messages.

Click Assign to assign a user to a task. The assignee is responsible for completion of the task. Users get notified when assigned to tasks.

The activities tab lets you check the history of changes made to the task.
You can attach files to the task or to messages, if applicable. Attach any necessary files or documents needed for the task.


Hover the numbers below to learn about parts of the detail panel.

1

This bubble indicates the task's status. 

Status can be changed manually or through automation.

2

You can see who is assigned to the task here.

Click assign to change who is responsible for the task. 

3

Click 'Start work' to run the timer. 

Log time to track billable hours or monitor team performance. 

4

Update the task description or attach files. 

5

Requesters or Followers will receive new messages about this task. You can loop in your colleagues by adding them as a follower.

6

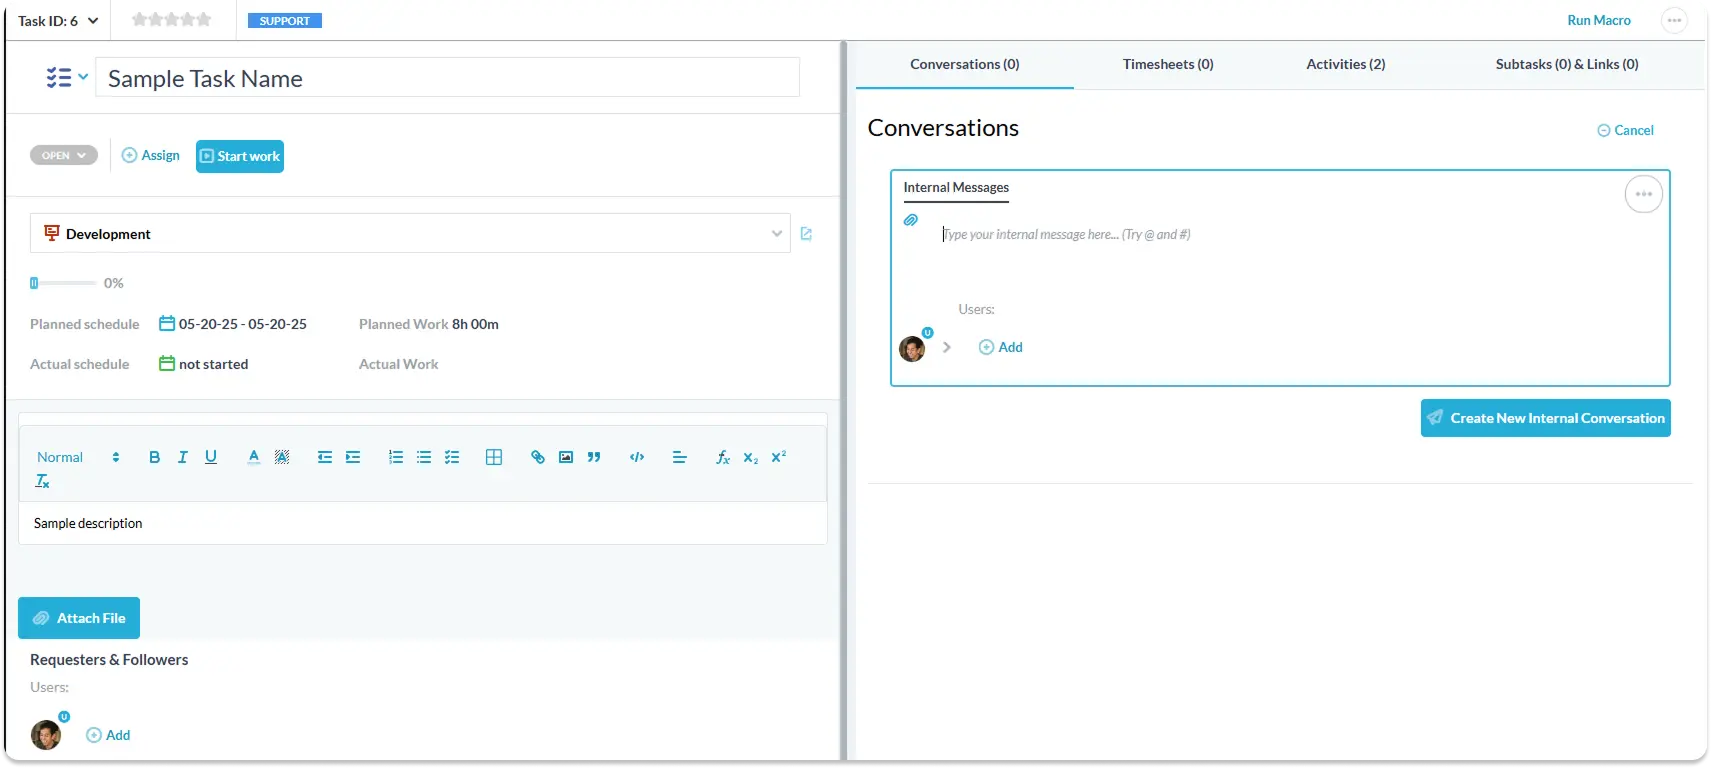
Send a new message about this task. Try @ mentioning to loop in your teammates. 

7

'Create new conversation'

You can have multiple conversation on a task. This can help you stay on topic. 

8

Switch between other tabs to view this task's:

Timesheets, Activities, Subtasks.

Scroll to Top
Cookie Consent with Real Cookie Banner