As you may have heard, OneDesk has recently released the new version of the mobile app. The mobile app is available on iOS and Android for your users and offers a lot of new features and functionality. The mobile app is connected to your main web application, allowing you to access or update your tickets and tasks, log time, and communicate with your team or customers. Most administrative settings are not in the mobile app and should be accessed from the main web app.
The Mobile App vs. Mobile Browser App
We also have the mobile responsive version of OneDesk. The Mobile-Friendly OneDesk (MFOD) as it is called, is accessible from any mobile browser and functions similarly to the mobile app. The main differences are: 1) the MFOD is accessed from a mobile browser, while the mobile app is installed on your mobile device. 2) Customers do not login to the installed mobile app. Rather, customers can use their mobile browser to access the MFOD. Customers can make use of any customer-facing applications: Messenger, Webforms, Knowledgebase, or the Tickets/Tasks Portal. This article focuses on the features available for users.
For the difference between users and customers check out our Glossary.
For more information on mobile for customers see: Mobile Customer Experience & Settings
Installing the App
The app can be downloaded from the App Store for iOS or Play Store for Android. Once downloaded, the app will be available on your phone. Login using your OneDesk credentials (the email and password you use to login to the main web app).
Mobile Tickets and Tasks application
On the bottom bar are all the applications we can use in the mobile app. – tickets, tasks, messenger and forms. First let’s talk about the tickets and tasks applications. Both work similarly, the main difference being the default properties and general use of each item.
For details on the difference between tickets or tasks see: What’s the difference between tickets and tasks?
Side Panel – View Filters
Keep in mind, the overall items (tickets or tasks) you see in your mobile app corresponds to what you see in the main web application, including your permissions. So for example, if a non-admin user does not have access to the tickets app, they will not be able to see it on the mobile app either.
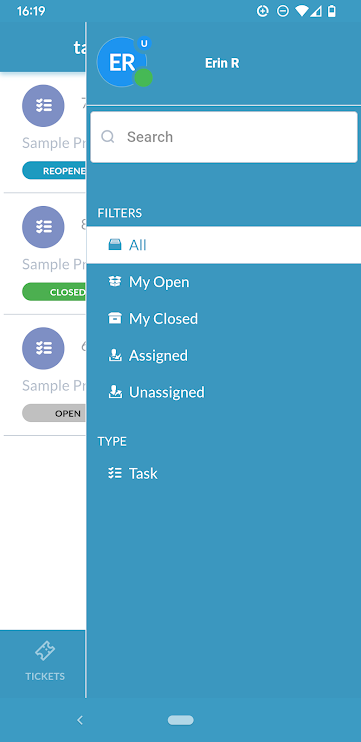
Tap the top right hamburger menu (the three lines) of your tickets/tasks app to access the side panel. The side panel allows you access to your profile and your view filters. You can update your profile image and language preferences by clicking your profile. Otherwise, from this side panel you are able to search for tickets/tasks, as well as filter your ticket/task list based on different conditions. By default you have the following filters:
- All – No filter
- My Open – Filters to all tickets not in a closed state
- My Closed – Filters to all tickets in a closed state
- Assigned – Filters to tickets assigned to you
- Unassigned – Filters to tickets assigned to nobody
- By Type – Filters to a specific ticket type
There is an additional filter you can turn on called Followed – Filters to tickets you are following.
Turn on or off your mobile view filters from the main web app by going to Administration → Tickets and/or Tasks. Also see Mobile User Experience & Settings.
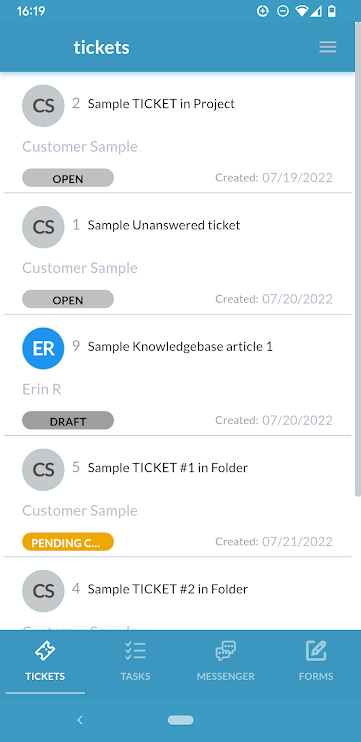
Working on tickets or tasks in the mobile app
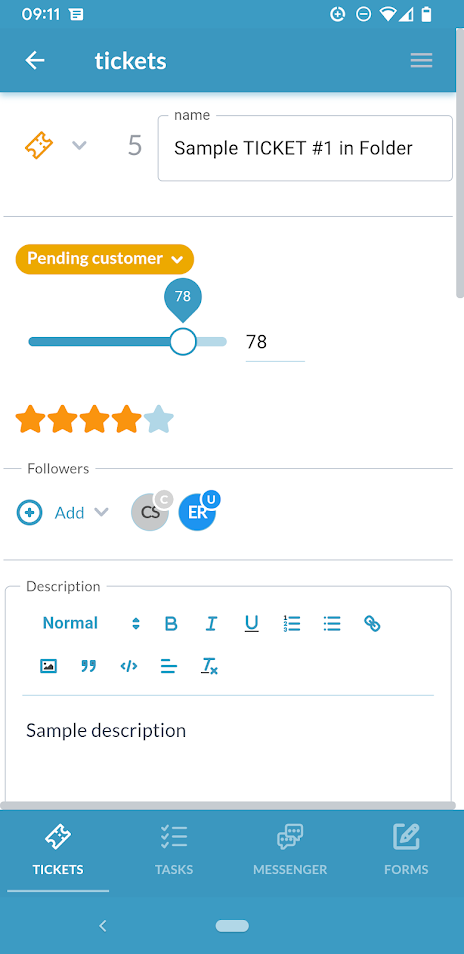
Tap on the ticket or task you want to view or work on to bring up its details. You can update many properties from the mobile ticket/task detail panel.
Here is a full list of what you can do from the ticket/task detail panel in mobile:
- Change the ticket type.
Tap the ticket/task icon to change the type. The ticket/task types you have correspond to the types enabled in your main web app. See: Ticket Types.
- Update the title or description.
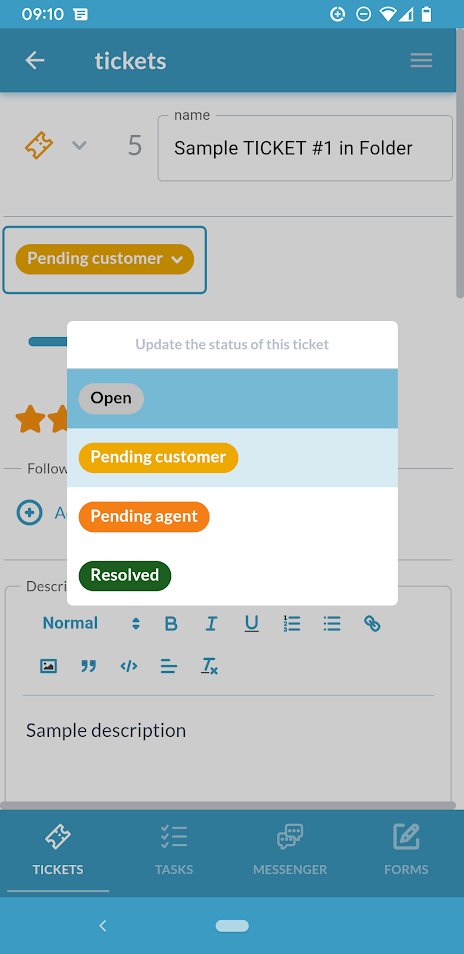
- Change the status by selecting the status bubble.
- Scroll the progress bar to change the percentage complete of the ticket/task.
- Tap the stars to change the priority level.
- Add followers to the ticket/task.
- Attach view, download, or delete a file.
Tap the icons above the file section to attach, view, download or delete.
- (On tasks) change the planned or actual start and finish dates.
- (On tasks) update the agile points.
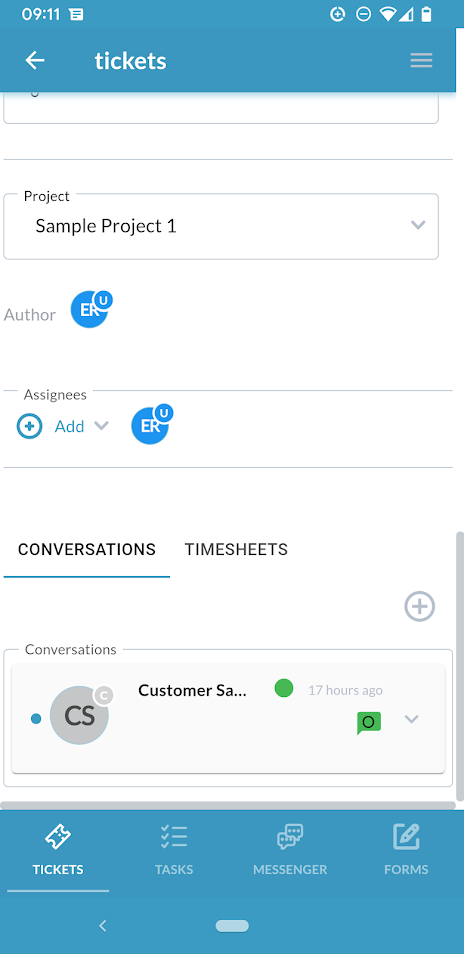
- Change which project the ticket/task is contained in.
- Assign a user or team to a ticket/task.
- See conversation history, start or continue a conversation with a user or customer. Like the main web app, ‘Customer replies’‘ are visible to any customer who is the requester of the ticket/task. While Internal messages can only be seen by users.
- Log time by starting a timer or submitting a timesheet. If you close your app the timer will still be running (until you stop it). If you start a timer you can also use the main app where you will see it running.
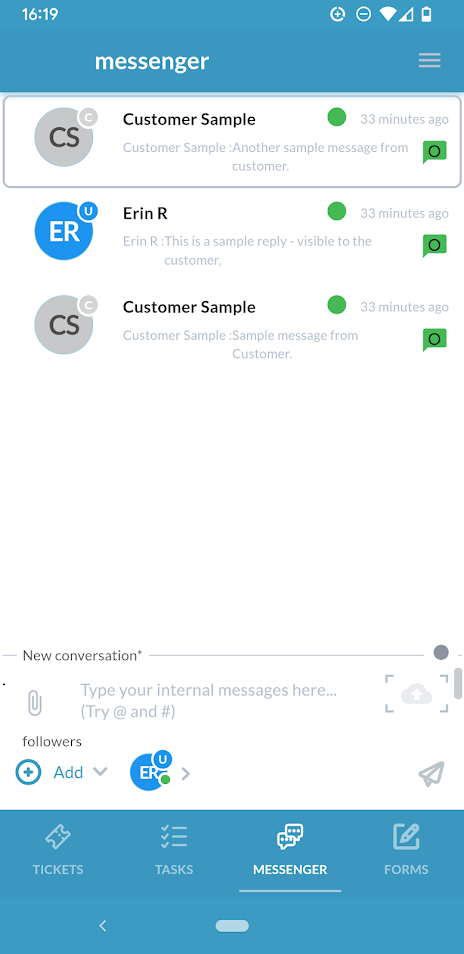
The Mobile Messenger
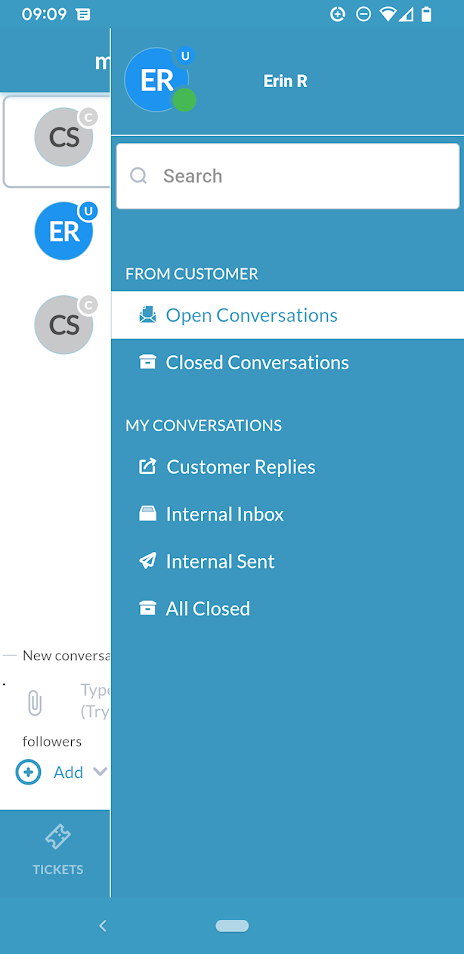
On the top right by tapping on the hamburger menu (three lines) of your messenger app, you can access your conversation filters, which are very similar to the ones in the main app. You are able to search for conversations, as well as filter your conversation list based on different conditions. The following filters are available:
- Open conversations
- Closed conversations
- Customer replies
- Internal inbox
- Internal sent
- All closed
Note: You must use the main web app to close a conversation.
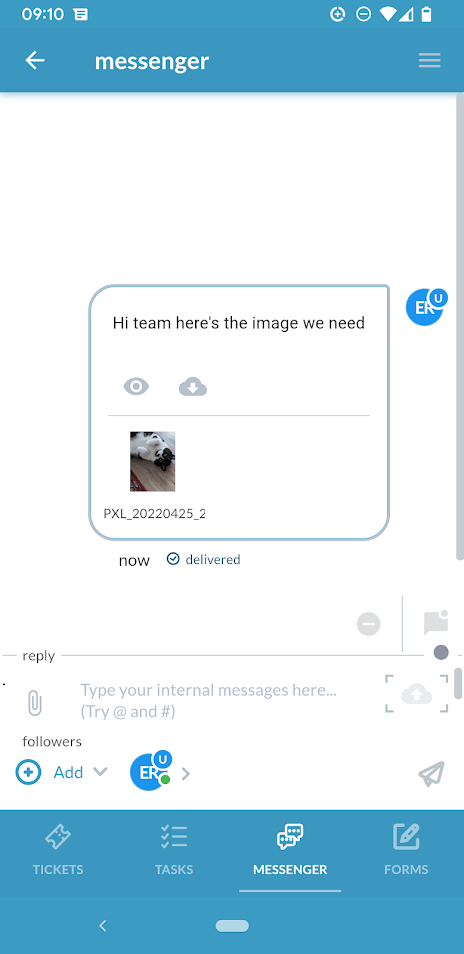
Tap on the conversation to bring it up. You will find messages from customers in the Messenger as well as internal messages. You can also create new internal conversations in the messenger. Internal messages are just with your team and cannot be seen by customers. You can type your message, attach a file, or add someone as a follower to the conversation. Followers will receive notifications about the conversation.
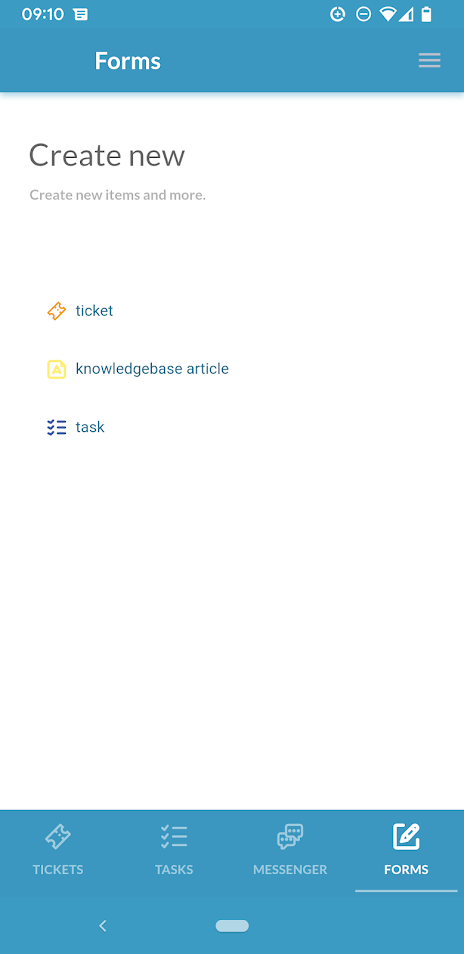
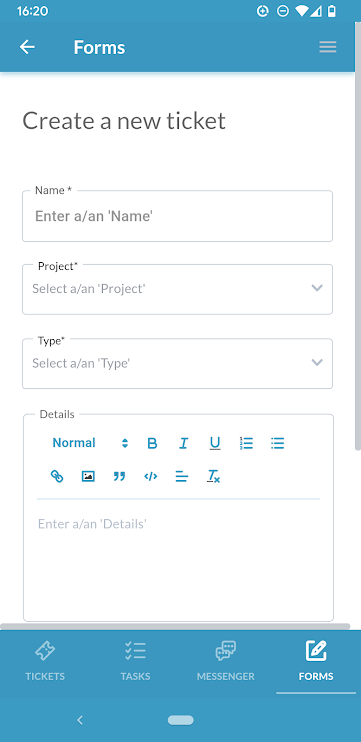
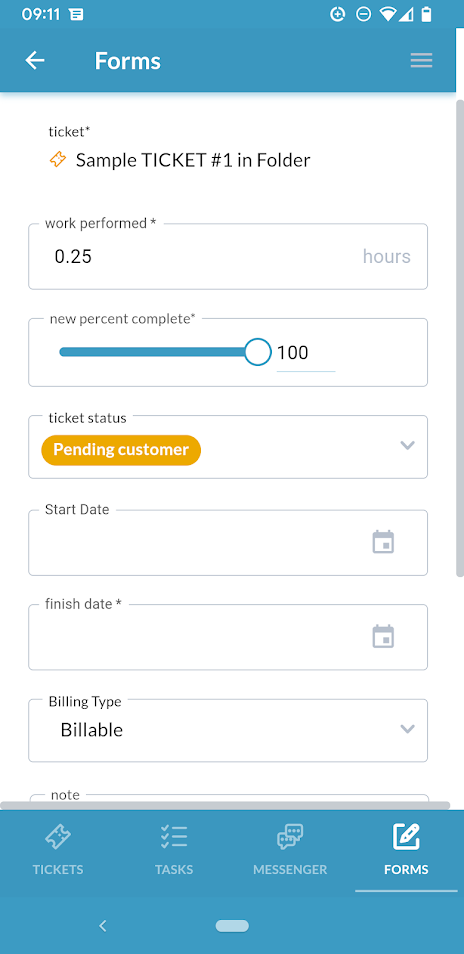
Create Items in Mobile – Forms
Forms, like in the web app, refer to the internal ticket or task creation form. Forms allow users to create a new ticket or task. Forms in mobile correspond to the configurations you have made in your main web app. For instance if you have added a custom field to your internal form it will appear in your mobile internal forms as well.
For details on internal forms see: Configuring Forms
For details on custom fields: Custom Fields