Setting up an auto-forward using Microsoft Outlook is easy. Here we provide the instructions for the web version of Outlook Web App / Office 365, as well as the desktop version.
STEP 1: Retrieve your OneDesk ticket capture email address
In your OneDesk account navigate to :
Administration > Tickets > Types of Tickets
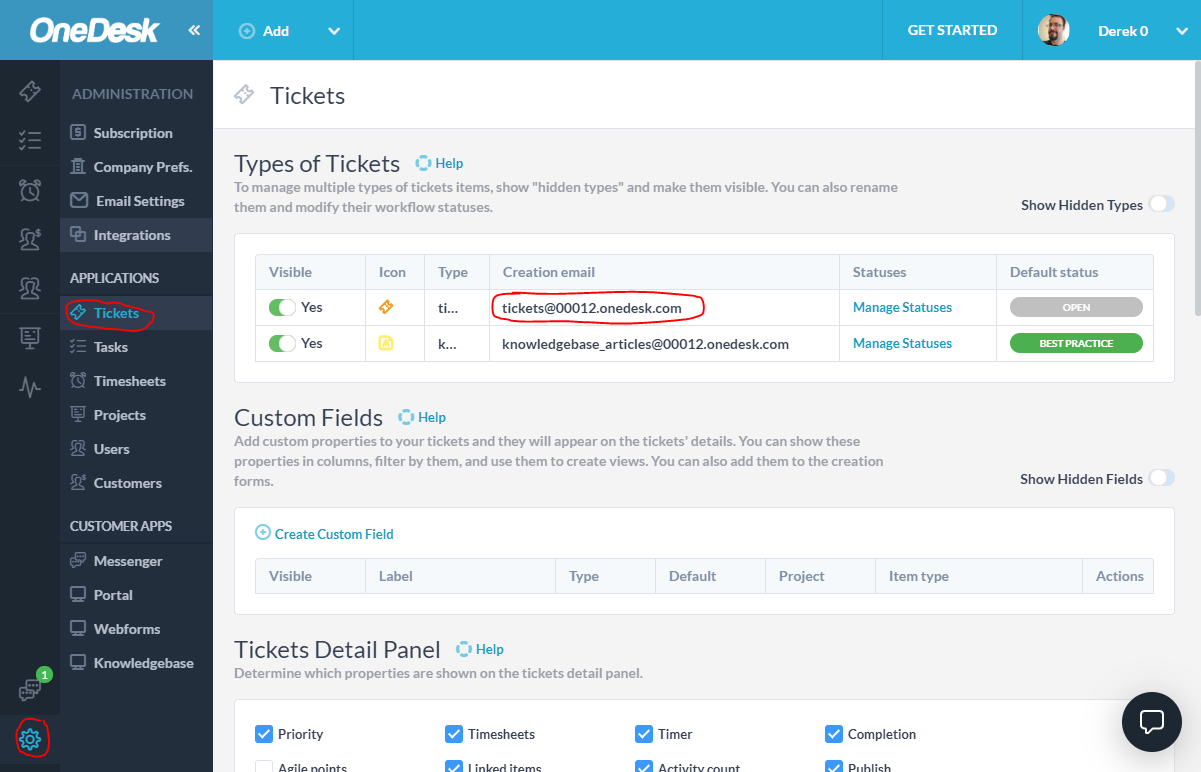
Note that every ticket and task type you enable will have it’s own capture address. This means that you can auto-forward from many different sources to create different types of items in OneDesk, and route each type differently.
STEP 2: Access to your company’s support email address box
You probably currently have an email address that your customers can email when they have issues, requests, or questions (something like support@example.com). You need to auto-forward (redirect) any emails received at this email box to your OneDesk tickets email address. To do this you will need to make a change in your email settings for this account.
You should also read the “How to prevent email loops” article.
STEP 3: Set up the Auto-forwarding in your email account
Use one of the guides below to set up your auto-forwarding in your Outlook account. We have other articles for gmail or Gsuite email addresses.
Auto-forwarding your support email using Outlook.com / Office 365 / Outlook Web App
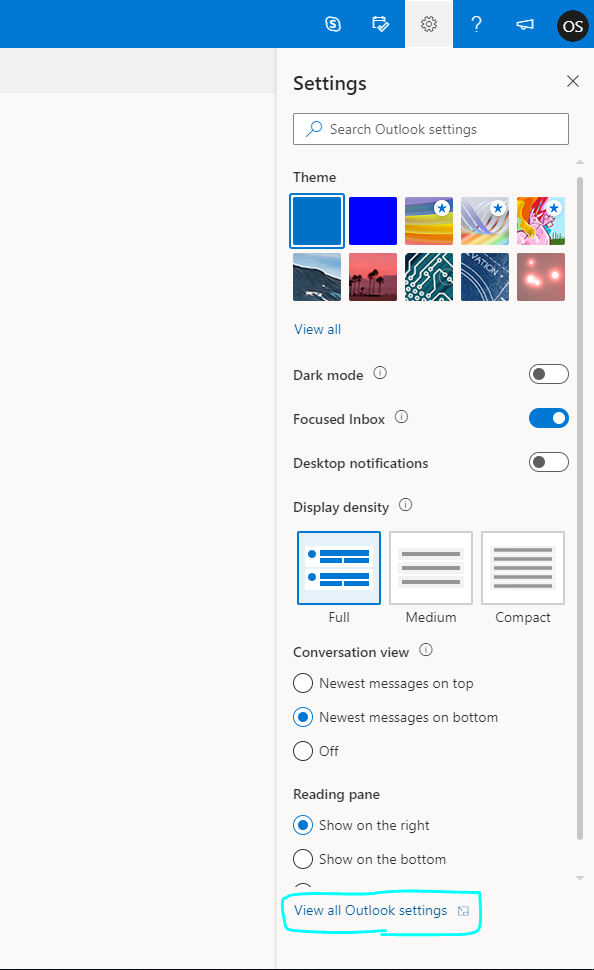
– Click ‘View all outlook settings’
– Select ‘Mail’ and ‘Forwarding’
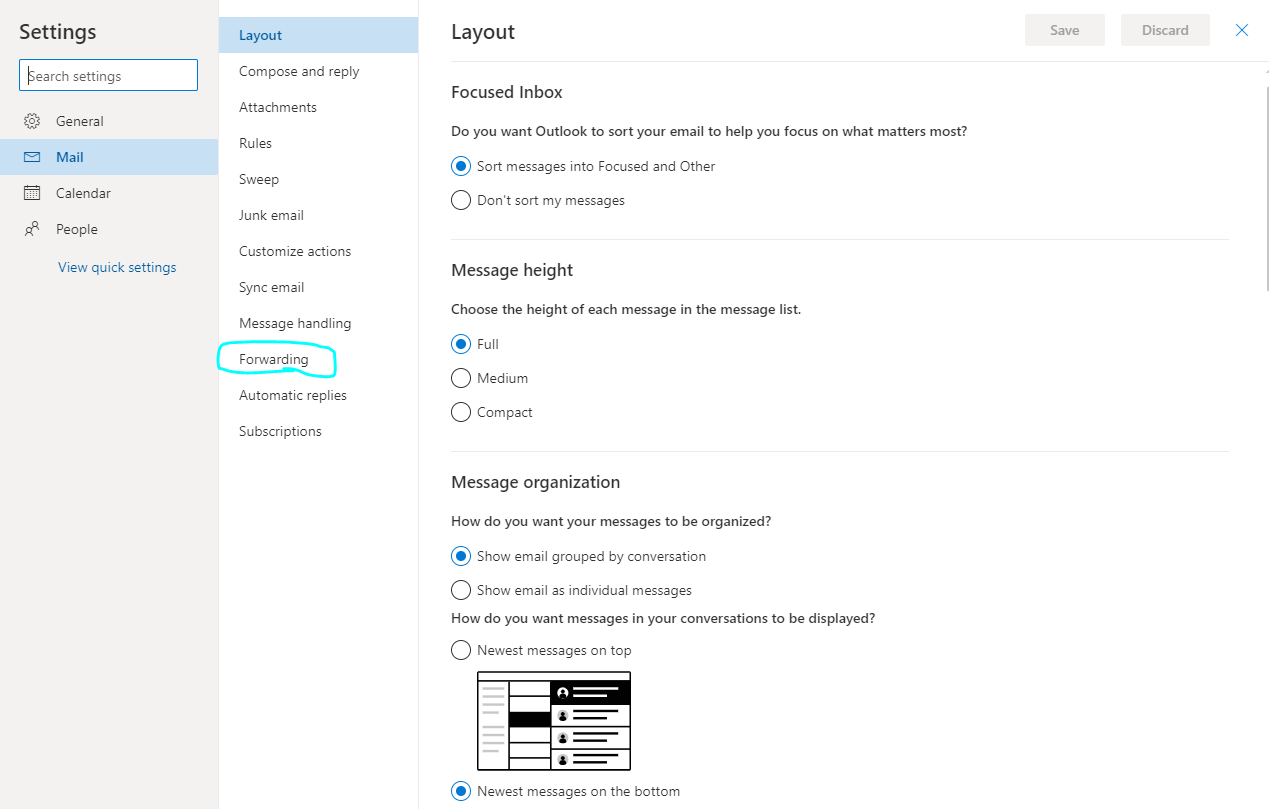
– Check ‘Enable Forwarding’ and enter your OneDesk email address in the “Forward my email to” field: tickets@[yourURI].OneDesk.com

You’re done. That was easy.
Auto-forwarding your support email using Outlook Desktop Version / Microsoft Outlook for Office 365 MSO
Get ready for 9 steps…
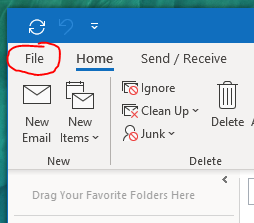
– Click the ‘File’ menu in the upper left corner.
– Click on ‘Manage Rules & Alerts’

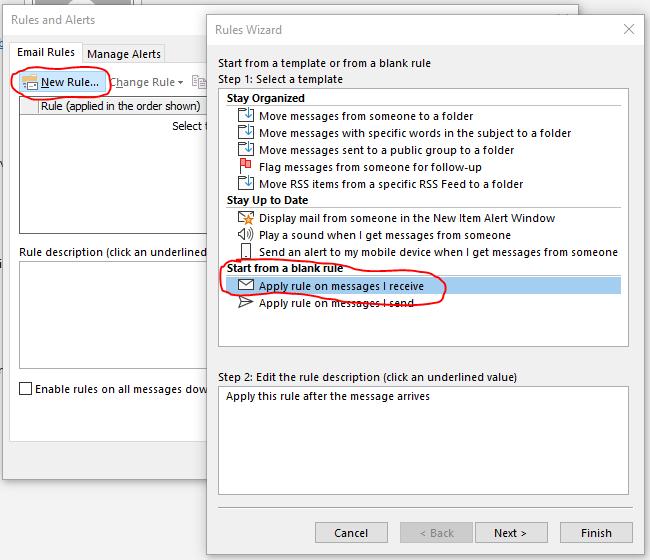
– Click on the ‘New Rule…’ button
– In the popup select ‘Apply rule on messages I receive
– Click the ‘Next’ button
– A confirmation popup will appear, click ‘Yes’
– Click the ‘Next’ button
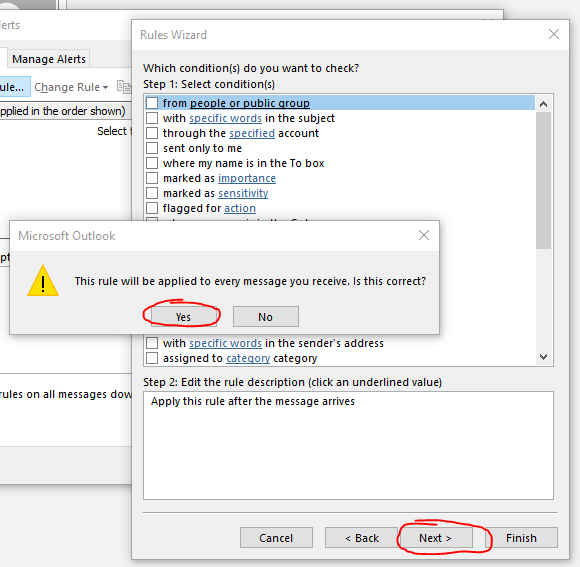
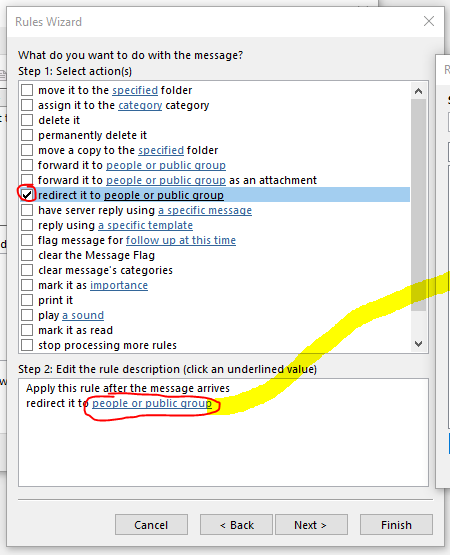
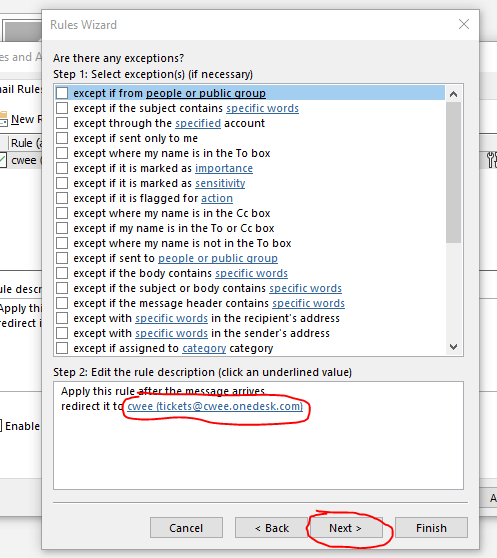
– In the ‘Step 1’ section, check the box ‘redirect it to people or public group’
– Under ‘Step 2’, click the link ‘people or public group’
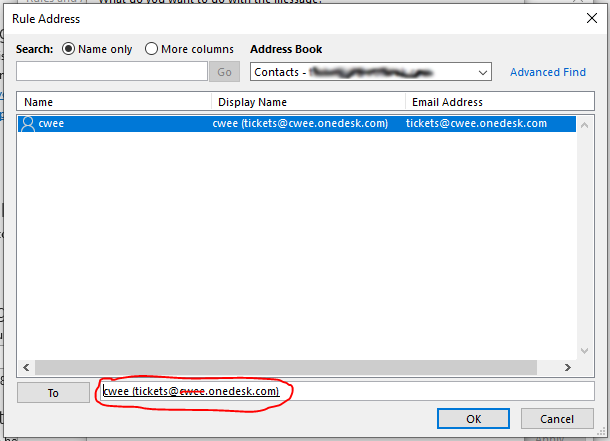
– The ‘Rule Address’ window will appear
– Add your OneDesk ticket capture email address here. This is the address you retrieved in Step 1 above and it is formatted like: tickets@[yourURI].onedesk.com
– Click ‘OK’
– Back in the “Rules Wizard’ window click ‘Next’
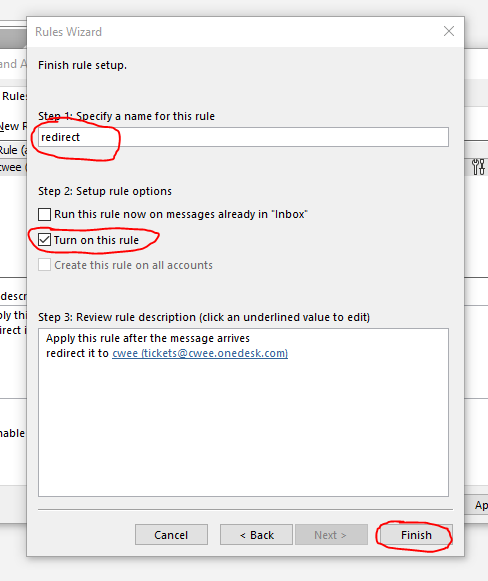
– Give a name to your redirect rule such as “Redirect to OneDesk”
– Make sure the box ‘Turn on this rule’ is checked
– Click the ‘Finish’ button.
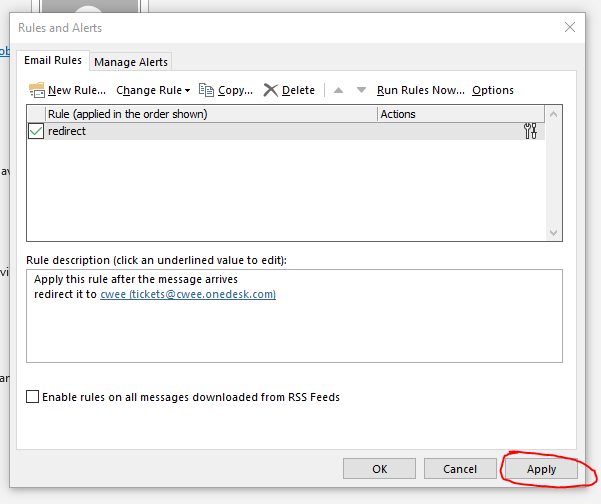
– Back in the ‘Rules and Alerts’ popup click the ‘Apply’ button
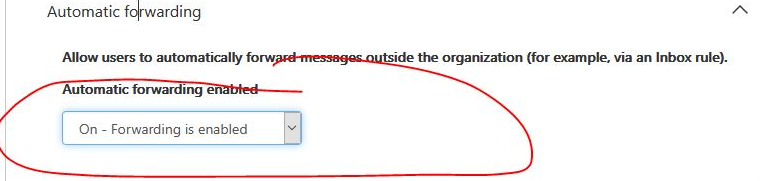
Note: Users with Office 365 Exchange Online mailboxes:
The Exchange Online Protection (EOP) provided with Microsoft Exchange Online mailboxes may block outgoing emails from your account.
In the Microsoft 365 Defender portal, go to Email & Collaboration > Policies & Rules > Threat policies > Anti-spam in the Policies section.
Within the Outbound Spam filter policies, under Automatic Forwarding, the default setting is “Automatic – System Controlled”. Switch this setting to “On- Forwarding is enabled” if you are having trouble forwarding tickets to OneDesk. For more information on EOP and its settings please see Microsoft documentation.
You’re done 😉
Now any new email received in the email box, will be automatically redirected to OneDesk and create a ticket in your account. Also check out our Quickstart Guide if you haven’t yet already.