Setting up an auto-forward using Gmail / Gsuite is straightforward. Here are instructions to set up an autoforward for Gmail / Gsuite. After this is done, you will be automatically capturing emails and creating tickets and customer records in your OneDesk account.
STEP 1: Retrieve your OneDesk ticket capture email address
In your OneDesk account navigate to :
Administration > Tickets > Types of Tickets
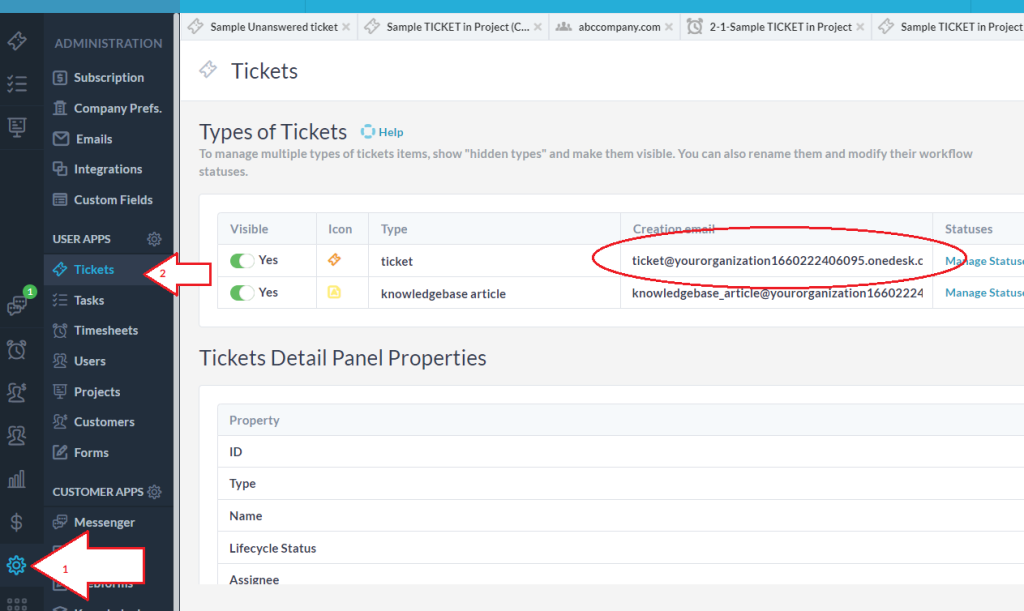
Note that every ticket and task type you enable will have it’s own capture address. This means that you can auto-forward from many different sources to create different types of items in OneDesk, and route each type differently.
STEP 2: Access to your company’s support email address box
You probably currently have an email address that your customers can email when they have issues, requests, or questions. You need to auto-forward (redirect) any emails received at this email box to your OneDesk tickets email address. To do this you will need to make a change in your email settings for this account.
You should also read the “How to prevent email loops” article.
STEP 3: Set up the Auto-forwarding in your email account
Use the guide below to set up your auto-forwarding in your Gmail/Gsuite account. We have other articles for Microsoft Outlook / Office 365 email accounts.
Auto-forwarding your support email using Gmail or Gsuite
– Click the gear icon in the top right of your Gmail account
– Select ‘Settings’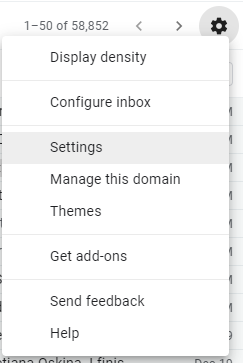
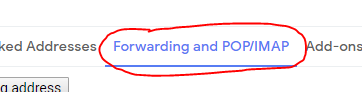
– In settings, click the ‘Forwarding and POP/IMAP’ tab
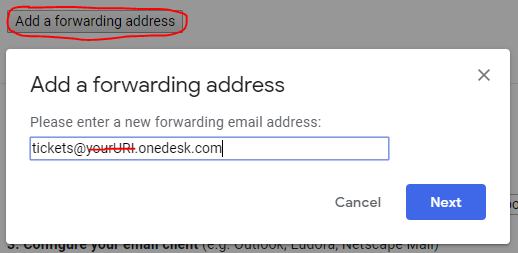
– Click the ‘Add a forwarding address’ and in the popup enter your Onedesk ticket capture email address retrieved in Step 1 above.
– It will be formatted like tickets@yourURI.onedesk.com (but with your own URI instead)
– Click the ‘Next’ button
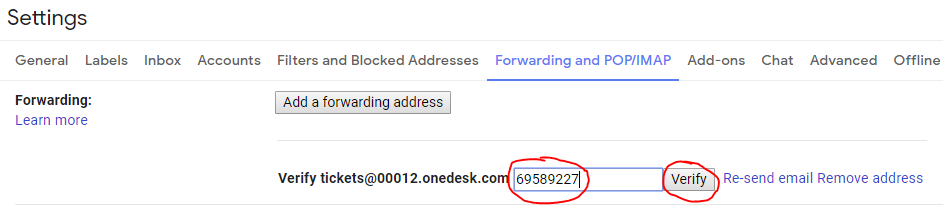
– The popup will display a message that a confirmation code has been sent to that email address.
– Click ‘OK’ to close the popup
– Now in your OneDesk account you can retrieve this confirmation code. Wait a few seconds for the email to arrive.
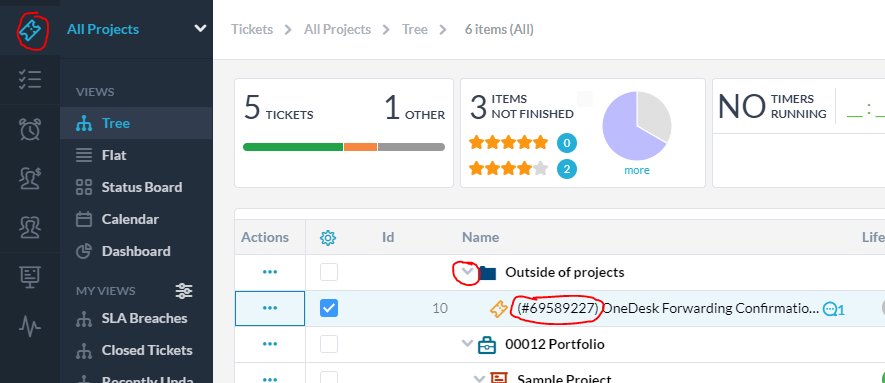
– Select the ‘tickets app’ icon in the top of the left bar. Ensure you are in the ‘Tree’ view (this is the default)
– Click the arrow next to the ‘Outside of Projects’ folder to expand the folder and see the new ticket
– In the Subject of the ticket you will see the confirmation code
– back in your gmail account settings, enter the code and click the ‘Verify’ button
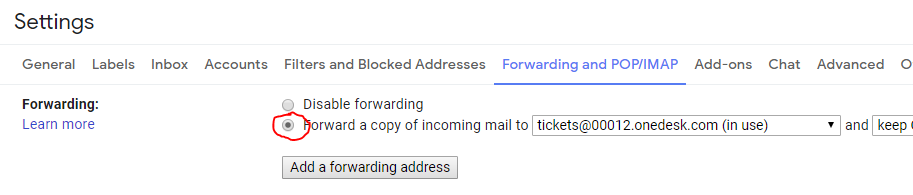
– Select the radio button ‘Forward a copy of incoming mail to [ tickets@yourURI.onedesk.com ]
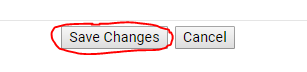
– At the bottom of this page click the ‘Save Changes’ button
Now you can send a test ticket…
– From a different email address (representing a customer) send an email to your support email address
– After a couple of seconds this will be created as a new ticket in OneDesk

– You will receive a couple of email responses. The first is the auto-response on the new ticket. The second is the invitation as a new customer to join the customer portal. Both these emails can be modified or turned off.
Check out our Quick Start Guide as well if you’d like to start using OneDesk as soon as possible.