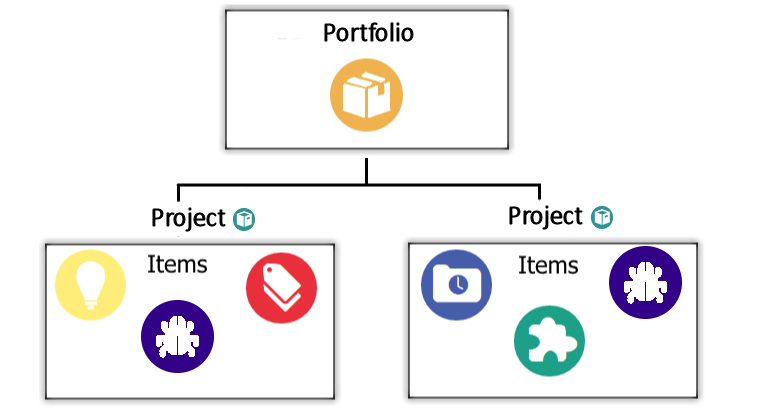
To understand how OneDesk organizes your stuff, you only need to get a few concepts: Items, Project, and Portfolios.
- ITEMS – The basic things you are managing
These are the things you are managing and tracking, such as tasks or tickets. They are classified under Ticket, Features, and Tasks. You can also create other types if you want. - PROJECTS – groups of ITEMS
These hold collections of items. They represent things like projects and releases, but you can create other types of projects if required. Inside projects your items can be placed in a folder structure to keep them organized. - PORTFOLIOS – groups of PROJECTS
Portfolios hold projects. Use them to organize related projects or releases together. You can nest “portfolios” to any depth, and a project can be in more than one portfolio, so you can create very flexible structures.
Navigating inside OneDesk
OneDesk lets you access your items and containers in a few ways. To navigate with confidence you need to know about the Project selector, Views and Filters.
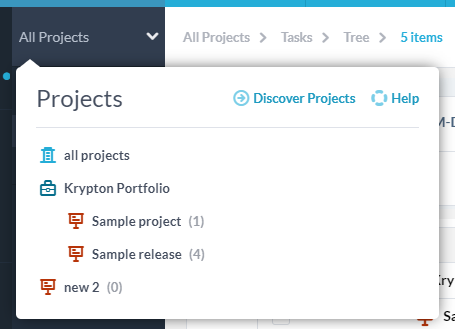 1. PROJECT SELECTOR – The level of the project hierarchy you are looking at
When you’ve organized your items into projects, and your projects into a structure, you have a very flexible way of looking at your different projects. The PROJECT SELECTOR in the top left corner of your screen allows you to set the hierarchy-level you want to focus on. For example, if you set your scope to “Krypton Portfolio” you will see all the PROJECTS and ITEMS inside that PORTFOLIO.

2. APPLICATION – The category of items, and how you want to display them.
Applications are icons found in the left bar. For example selecting “tasks”, will show you your tasks application where you can plan and execute your project tasks. Selecting tickets will show your helpdesk application, selecting users will show your users application, etc.
Inside each application you can also select the view (see below).
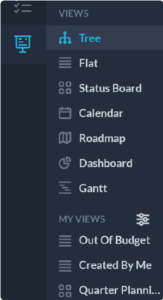
3. VIEWS – Filter, group, and lay-out the items found in the applications
Views are found beside the application bar on the left. Standard views include layouts such as Tree, Flat, Gantt, Cards, Calendar, Roadmap, and Dashboard, but you can create your own custom views. OneDesk has some pre-created custom views like “My Todo” and “Task Inbox”, which you can delete or modify. Click the icon next to “MY VIEWS” to create your own view, where you can select the layout, filters, and grouping. You can save and share these views so everyone in your company can use them. Column visibility, order, and sorting can also be saved to the view.
PROJECT SELECTOR, APPLICATIONS, and VIEWS work together to give you fine-grained control over what you want to look at. You can also SEARCH inside a view by keyword or item ID.