

Canned Responses in OneDesk
There are multiple ways to set up and automate the sending of responses in OneDesk. Canned responses can assist in answering frequently-asked questions you receive from customers, addressing requests you get repeatedly, and more. This lets you declutter your helpdesk and saves you and your team time when it comes to sorting and replying to customer requests.
You can send a canned response in the followings ways:
Inserting a message into a manually-selected collection of tickets or items
Inserting a message when a ticket is received with a specified keyword or phrase
Sending an email template when a ticket is received with a specified keyword or phrase
About Inserting Messages
Inserting a message lets you send a message reply in OneDesk’s internal messaging application. You can chose to automate the inserting of a message or to create a macro and then manually select which items to apply that macro to. The benefit of inserting a message is the following:
- Enables you to keep track of the flow of conversation between you and your customers directly inside of OneDesk.
- Allows you to select the most appropriate tickets or items to insert a reply to.
- Save the messages you write for later on and use them with the click of a button.
When sending canned messages internally, you can insert properties in the messages:


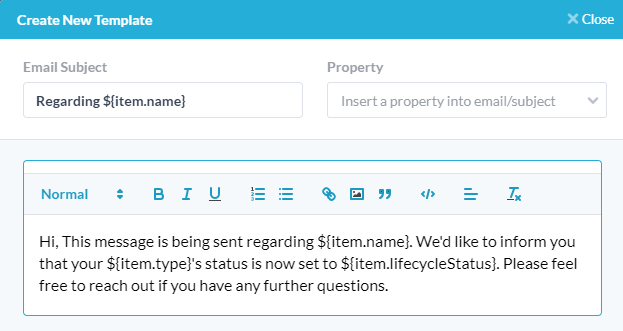
About Sending an Email Template
Sending an email template lets you send a direct email message to your customers from OneDesk and allows you to:
- Use a pre-written email template with inserted properties

- Keep track of emails sent, delivered, or failed in the past 72 hours


The benefit of this approach is:
- You don’t need to manually select which items to apply it to.
- No human has to instigate the action, so less time wasted for your team.
- You can select from multiple properties.
The downside of sending email templates based on keywords is:
- The accuracy of these automated replies is not perfect and relies heavily on the keywords or specifications you select.
- Since the email is sent outside the message flow, you are not keeping a trail of all the messages between you and your customers.
How to Send a Message Response Manually
To send a macro response manually:
Step 1: Click on the application you want to create the macro in.


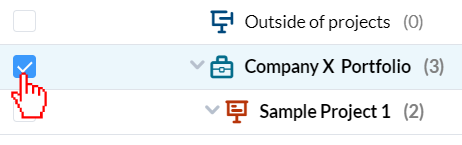
Step 2: Select all the tickets you wish to send the message to. If you would like to simply create the Macro to save and use later, then just make sure that you only have your organization portfolio selected, or a non-item.

Step 3: Click Tools in the top navigation bar.

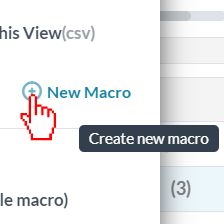
Step 4: Click New Macro.
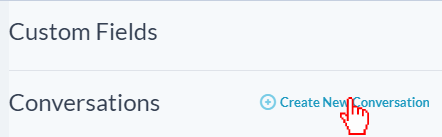
Step 5: Click Create New Conversation and type out the message you wish to send to your Customer.
Note: Ensure you have “Customer Replies” selected at the top of the message box.

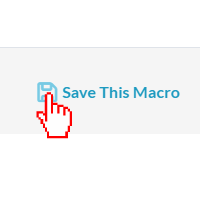
Step 6: Click Save This Macro to save it for use later or Apply This Macro to apply it to the tickets you selected.


How to Send a Message Response Automatically
Step 1: Click the More Applications icon on the bottom left side of the OneDesk application.

Step 2: Click the cog icon to navigate to the administration section.

Step 3: Click on the application in which you would like to create the automation (tickets, tasks, features, or projects).
Step 4: Set the automation keyword or key phrase that will lead to the message (E.g. keyword “password” for a password reset).
Step 5: Click insert/create message from the action drop-down and select who to send the message as. You can pick an individual user or the company bot. Write out your message reply.


Step 5: Click Apply & Save.
How to Send An Email Template Automatically
Step 1: Click the More Applications icon on the bottom left side of the OneDesk application.
Step 2: Click the cog icon to navigate to the administration section.
Step 3: Click on the application in which you would like to create the automation (tickets, tasks, features, or projects).
Step 4: Set the automation keyword or key phrase that will lead to the message (E.g. keyword “password” for a password reset).
Step 5: Click send email template from the action drop-down and pick the email template you would like to use. Click Create New Email Template if you would like to write a new one.


Step 6. For send email to, select to whom you wish to send the email message.
Step 7. Click Apply then Save.
Examples of Macro Responses
Responses to How-To Questions


Responses to Password Reset Requests


Responses to Questions About Locating X


Examples of Automated Emails
Responses to How-To Questions


Responses to Password Reset Requests


Responses to Questions About Locating X

