Ticketing & Support Flow

Capturing tickets

In the last onboarding step, we connected our email and deployed our customer applications. These are typically the most common ways tickets are captured.  Other methods include from the ‘Add’ button, via certain integrations, or through import. 

With tickets coming in, let’s learn how we can work on our customer support.

Routing Tickets

OneDesk helps you make sure tickets don’t fall through the cracks. You can manually (see below) or automatically assign and organize tickets. Routing can be performed through automation rules. Automation rules allow you to cut back on repetitive work as well as define your own workflows.

Automations:

  • Run on work items (tickets, tasks, etc.) 
  • Trigger on a defined condition
  • Then perform actions

For instance the automation rule pictured below will assign all incoming tickets by round robin to my agents. 

automatically route tickets

OneDesk has some out-of-the-box automations that might work for your team. You can view or edit your automation rules or create new ones from Administration > Automation Center.

Learn more:

Viewing and resolving tickets

Once tickets are flowing into your OneDesk, you need to find which ones you have to work on and tackle those with the highest priority. That’s where custom views come in. In OneDesk, you can create custom views that sort, filter, or group tickets. Use the filters to create custom views that allow you to see which tickets have been assigned to you and sort those by priority. Or, generate other useful views that can help speed up your ticket resolution time. Custom views can be saved on your ‘views side panel,’ allowing you to easily see what needs to be done across teams and clients.

Working on tickets

Most of the work needed to resolve a ticket can be done within the ticket’s detail panel. You can talk to customers, view attachments, update the ticket status, and more all from one view. 

Communicating with customers & users

No matter if customers are communicating with you through the customer apps, email, or live chat, all communications are centralized in OneDesk. Communicate in-context on a ticket detail panel. View all conversation in the Messenger, located on the far left sidebar.  Send text, links, images, attachments and more, OneDesk gets your communication to whatever channel your customer is using.You can also keep in touch with your users and teams to ensure you are all working on the same page.Below is the ticket detail panel. Learn more about working on tickets by hovering the numbers.
1

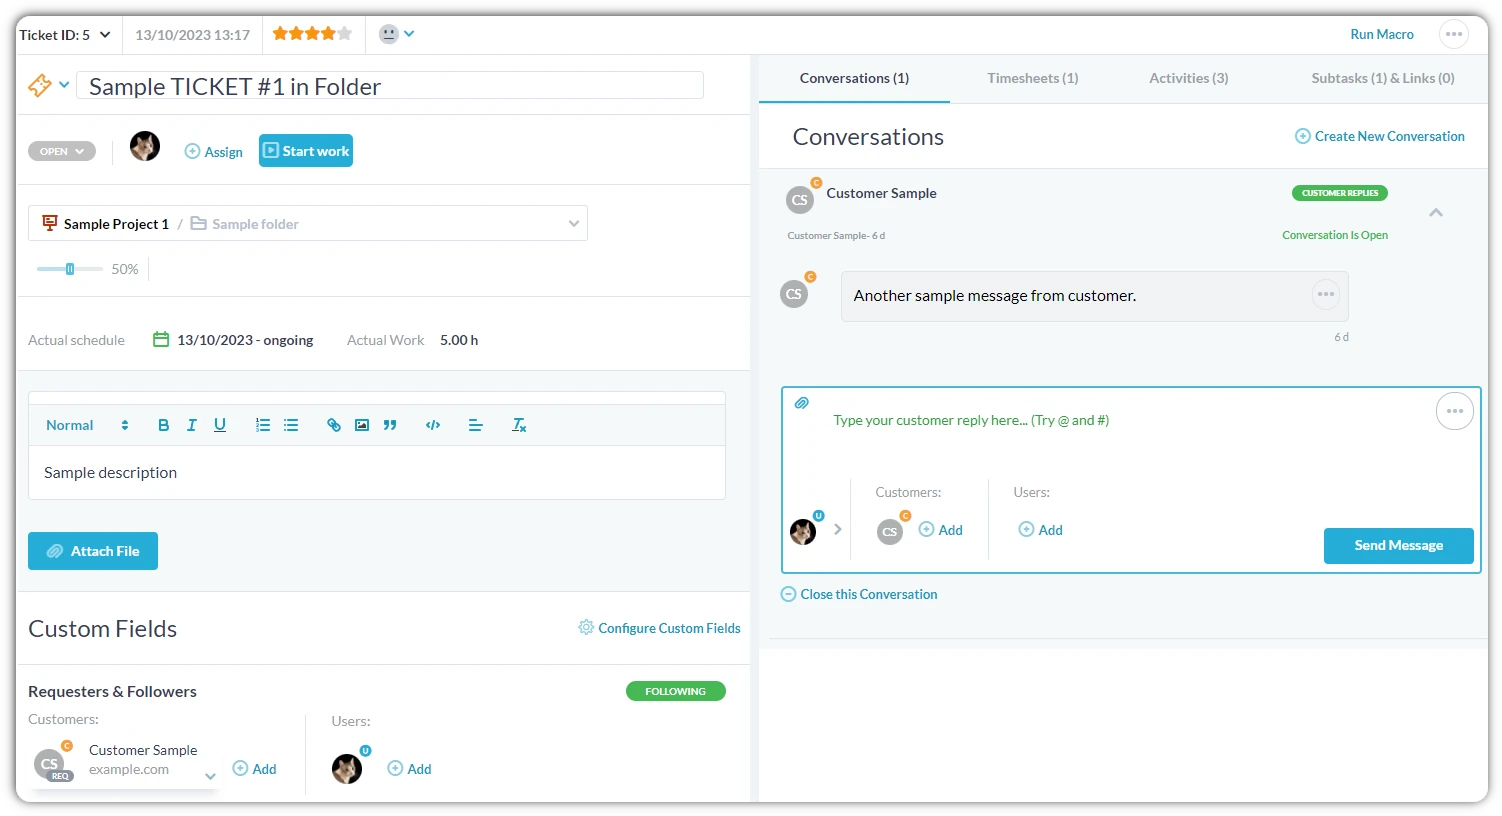
This bubble indicates the ticket's status. 

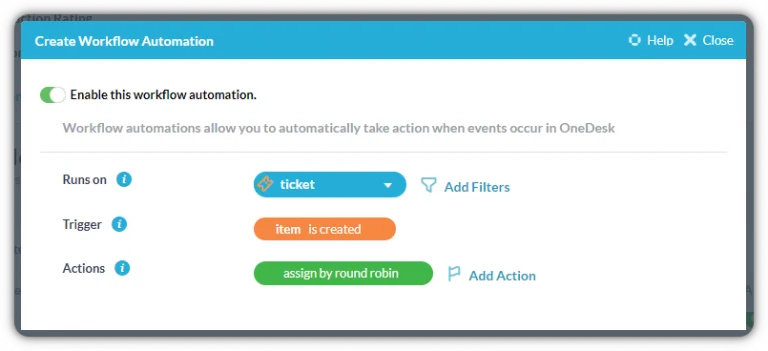
Status can be changed manually or through automation.

The default automation updates the status based on new agent or customer replies. 

2

You can see who is assigned to the ticket here.

Click assign to change who is responsible for the ticket. 

3

Click 'Start work' to run the timer. 

Log time to track billable hours or monitor team performance. 

4

Update the ticket description or attach files. 

5

'Customer Sample' is the requester of this ticket. 

Requesters or Followers will receive new messages about this ticket.

6

Send a new message about this ticket. 

This conversation is marked 'Customer Reply', meaning the message will be sent to any customer  requester or follower on the ticket.

7

'Create new conversation'

You can also have an 'internal conversation' on the same ticket.

Internal messages are only sent to users, and never customers.

8

Switch between other tabs to view this ticket's:

Timesheets, Activities, Subtasks.

Scroll to Top