You may want to have your customers be automatically logged in to your OneDesk customer apps whenever they are on your site and authenticated with your own systems. This post will show you how to set that up using Azure as the identity provider, but the same idea will apply for any provider that supports OpenID Connect.
Enable and Configure SSO for Customers in your OneDesk account
The basic steps to enabling SSO for your customers in OneDesk are as follows:
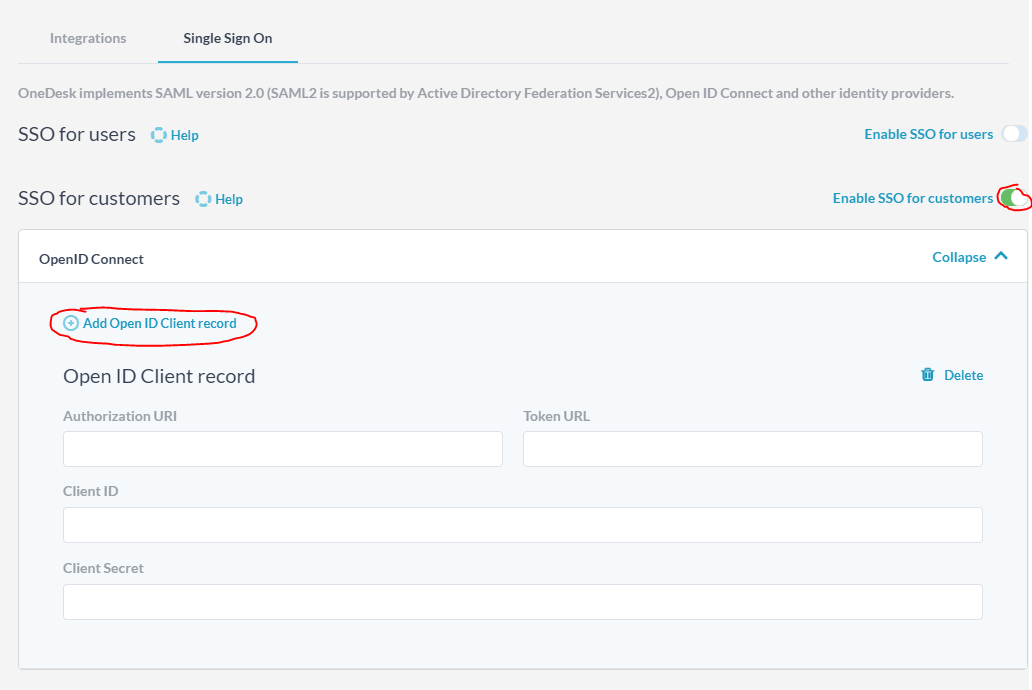
- Go to: ADMINISTRATION > INTEGRATIONS > SINGLE SIGN ON
- Turn on the switch “Enable SSO for Customers”
- Click “Add Open ID Client Record”
- Complete the required fields for Authorization URI, Token URL, Client ID, and Client Secret
- Use the generated URLs to automatically log in your customers to the Widget (for live chat), Knowledge-base or Portal.
Step by step guide using Microsoft Azure Active Directory
1. Add Open ID Client Record
- Go to: ADMINISTRATION > INTEGRATIONS > SINGLE SIGN ON
- Enable SSO for customers, Expand ‘OpenID Connect’, and click ‘Add Open ID Client record’.
2. In Azure, Create a new App Registration
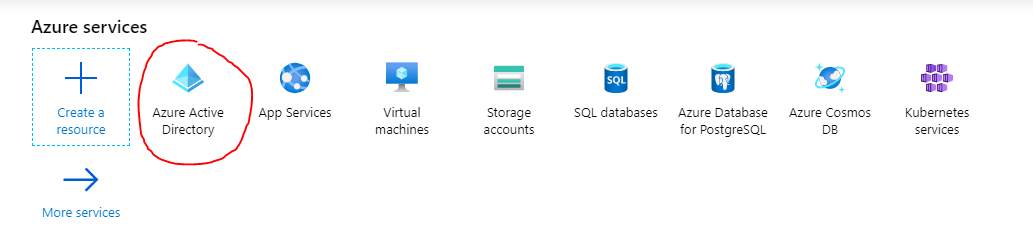
- In Azure, open ‘Azure Active Directory’.
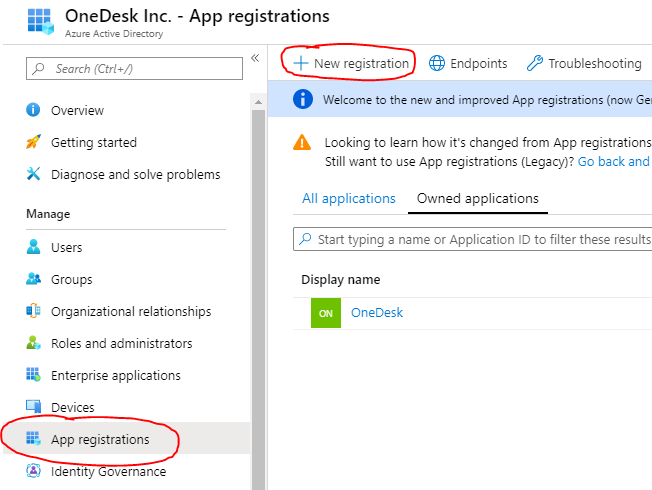
- Select ‘App Registrations’ and click ‘New registration’.
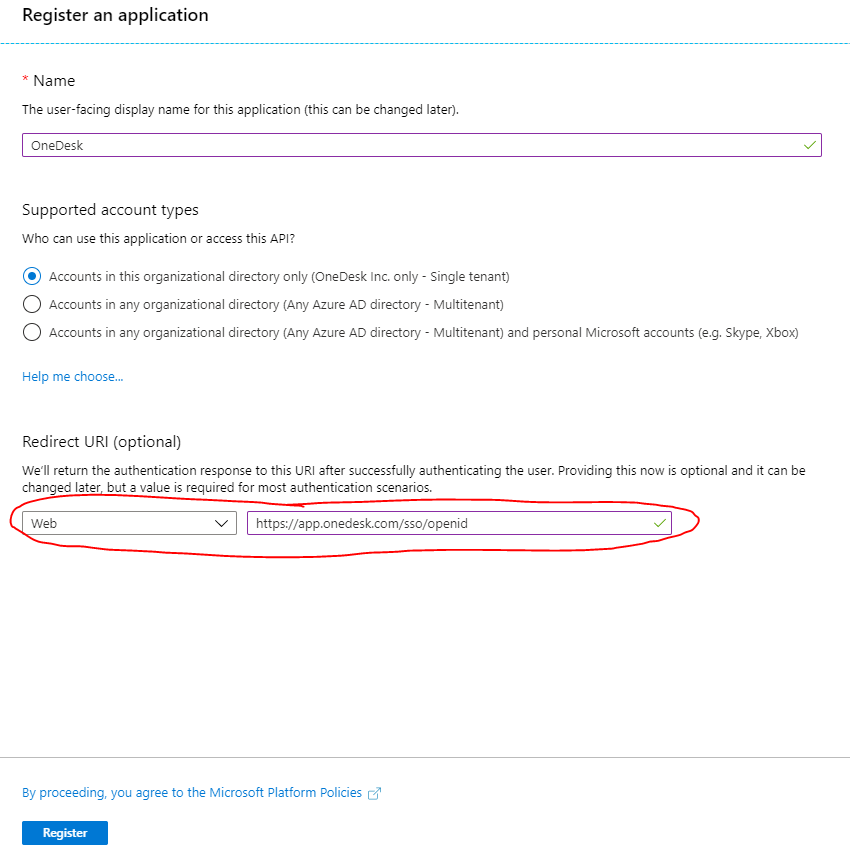
Register the OneDesk application by:
- giving it a name: ‘OneDesk’
- Adding the Redirect URI as ‘https://app.onedesk.com/sso/openid’
- click ‘Register’
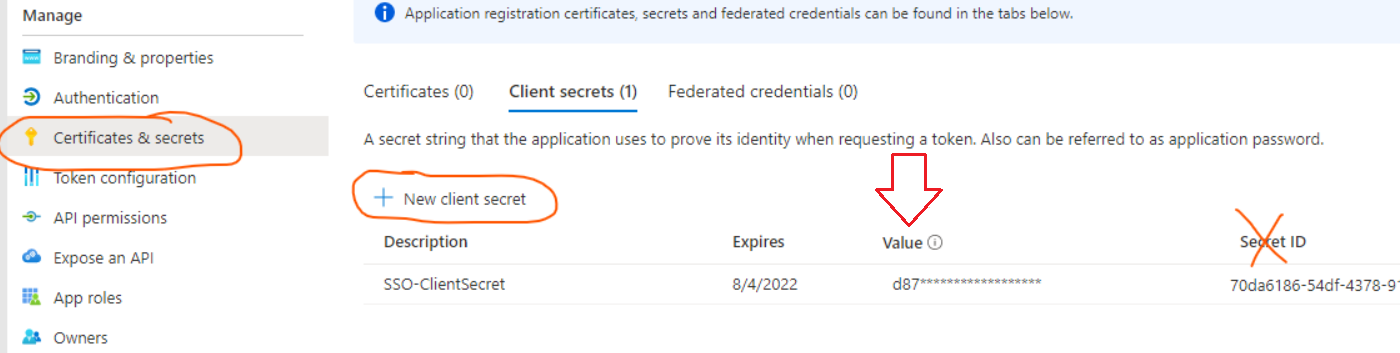
3. Create and copy over a Client Secret
- Click ‘Certificates and Secrets’
- Click ‘New Client Secret’
- Copy the client secret key over to the ‘Client Secret’ field in OneDesk.
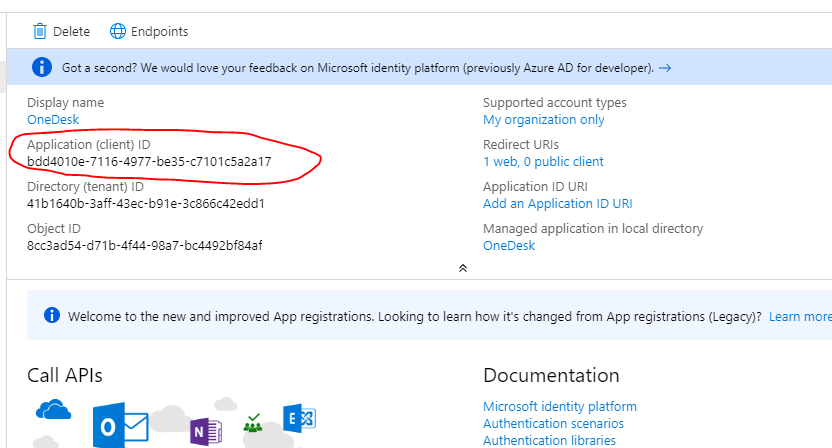
4. Copy over the ‘Client ID’
- In Azure, in the the newly registered app (called ‘OneDesk’), copy the “Application (client) ID’
- Paste it into the ‘Client ID’ field in OneDesk
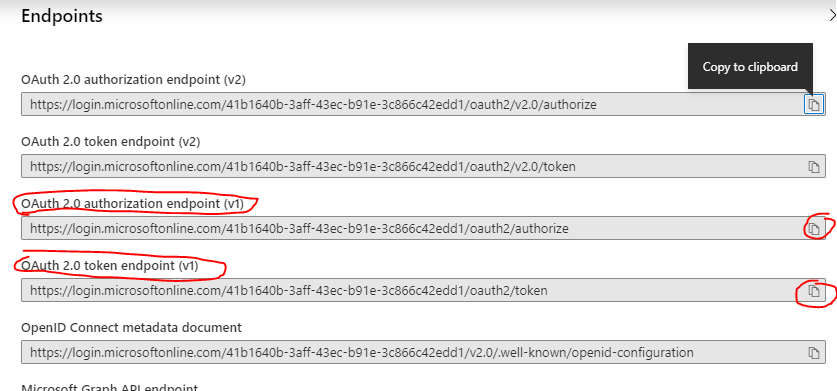
5. Copy the Endpoints to ‘Authorization URI’ and ‘Token URL’
- In Azure, in the the newly registered app (called ‘OneDesk’), click the ‘Endpoints’ button.
- Copy the ‘oAuth 2.0 authorization endpoint (v1)’ to the ‘Authorization URI’ field in OneDesk.
- Copy the ‘oAuth 2.0 token endpoint (v1)’ to the ‘Token URL’ field in OneDesk.
6. Here is the completed OpenID Client record in OneDesk
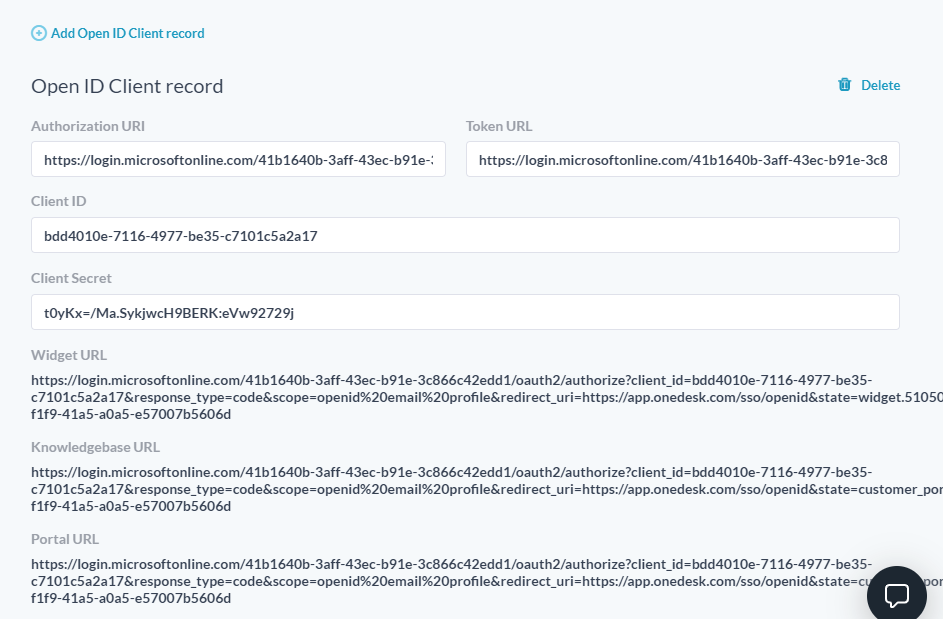
Use the provided URLs to log into OneDesk’s customer apps
As soon as the record is completed, OneDesk will generate a list of URLs, one for each of your Customer Apps. Use the appropriate URL to allow your customers to log into that customer app using their Azure Active Directory credentials. By default there is 1 for the website widget (for live chat and more), one for the Customer Portal, and one for the knowledgebase. Use them as necessary.
Watch a video
Here is a video that shows setting up customer-SSO in OneDesk using Microsoft Azure Active Directory.
Troubleshooting – SSO is not, or has stopped working
- Make sure the client secret has not expired. During initial set-up of SSO, you are prompted to select an expiry date for your client secret. The expiry date can be customized, but it is always necessary to set an expiry. If your SSO has stopped work, ensure your client secret has not expired. If it has expired, the connection will need to be reset.
- Disable SSO and try again. Disabling/disconnecting your SSO and connecting again often fixes the issue.
- Screenshot the error message. Send us a screenshot of the error message your are receiving.
- Book a screensharing with the support team. If the above steps do not work, please book a time with the support team.