
Tickets can be auto-forwarded from your support email to a OneDesk ticket creation email. When this happens, a ticket is captured in OneDesk containing the subject of the email, the email’s body, and any attachments in the email. Additionally, if the requester’s email address being captured does not yet exist as a customer record in OneDesk, they will be automatically added into the database.
However, you may not wish to have tickets showing for all email correspondence which your support email receives. Luckily, there are ways to filter these excess tickets out – one of which is through OneDesk’s customizable workflow automations.
Accessing workflow automations for tickets
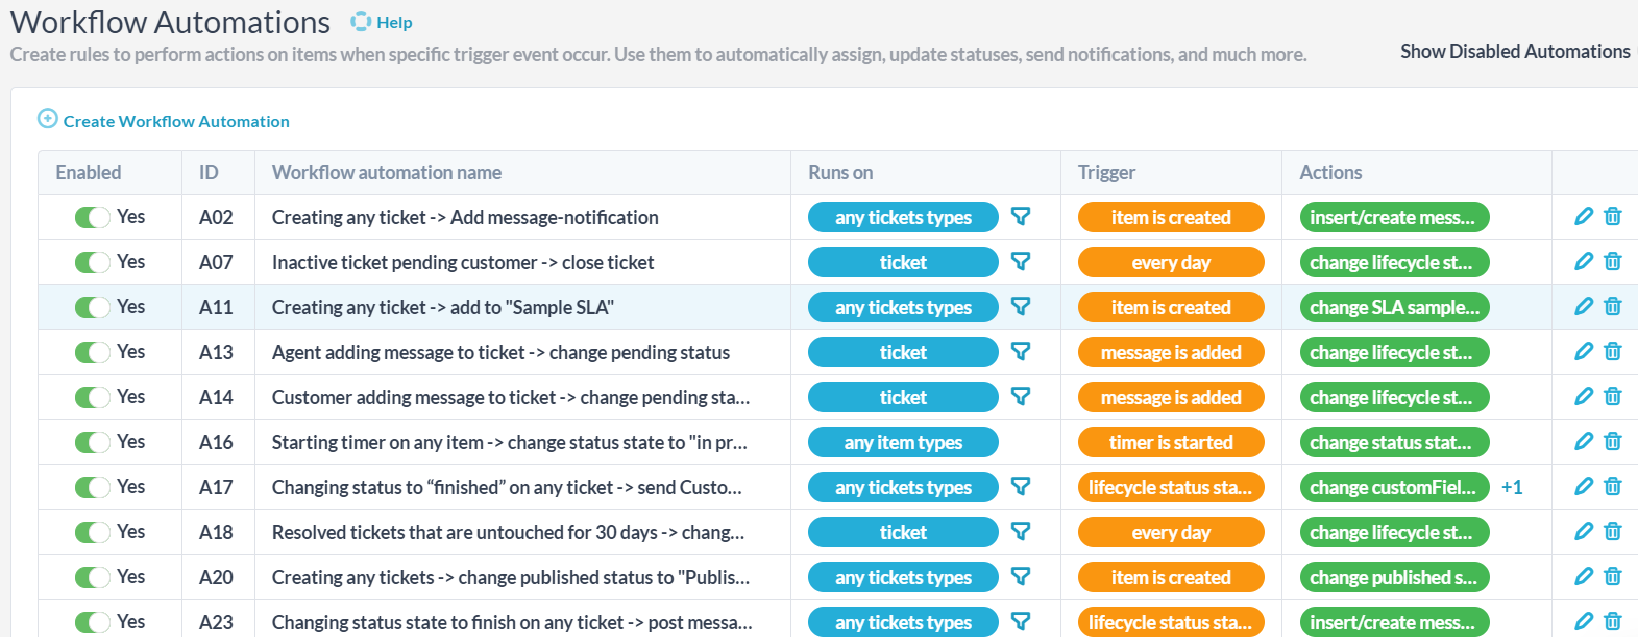
To access the workflow automation section for tickets within OneDesk, first select the “more applications” tab on the bottom left-hand side of the OneDesk interface. Next, select the “administration” cog and scroll down to “tickets” under “user apps”. From here, scroll down to the “workflow automations” section. You can modify any existing automations as you see fit by clicking on the pencil icon to the right-hand side, or create an entirely new automation with the “create workflow automation” button in the top-left.
Option 1: Filtering ticket-creating emails through workflow automations
While OneDesk does not have a dedicated option to prevent certain emails from being made into tickets if they are sent to your auto-forwarding support email, you can use OneDesk’s workflow automations to separate emails received from a specific sender or subject line, and move the resulting ticket elsewhere. By separating the resulting ticket-from-email into an archived project, the new ticket is effectively filtered out from regular tickets, and out of sight.
First we need to create a project to catch the tickets. Select the “add” button at the top of the screen, then “project”, and name your project as you see fit.
Let’s create an automation that filters incoming tickets from a specific email address, then adds them to the newly created project. To do this, select “create workflow automation” on the top-left side of the automations menu.
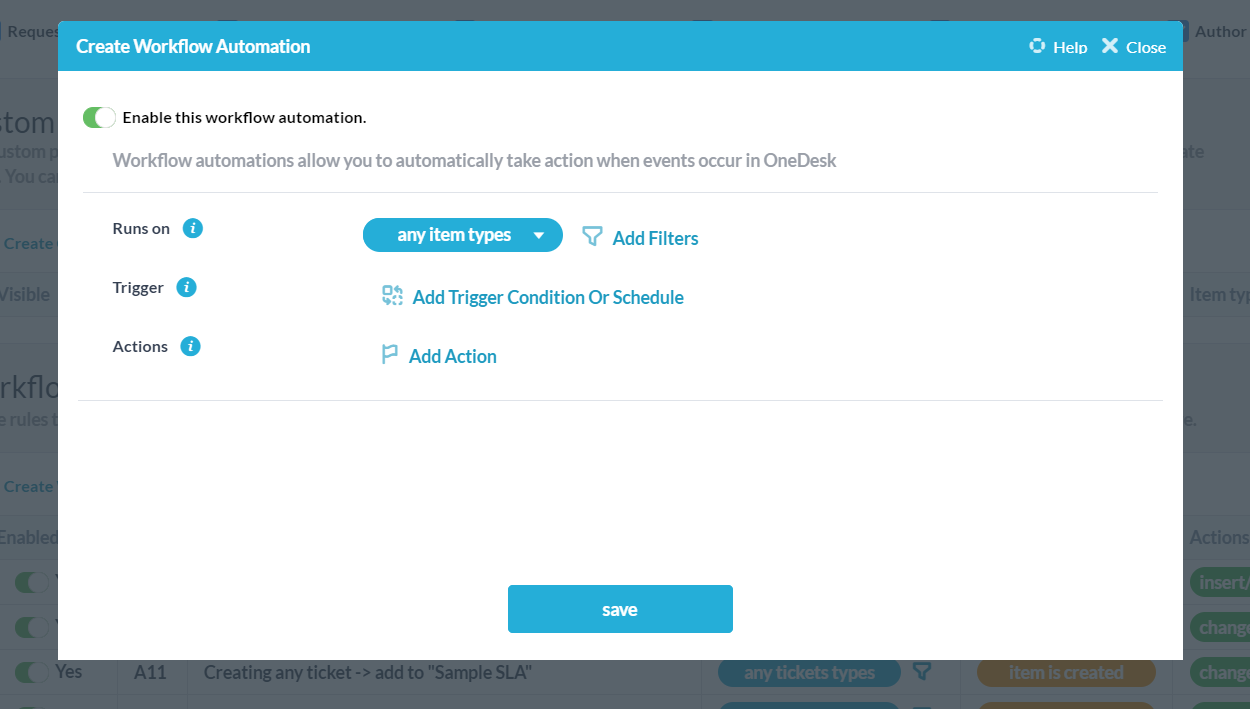
We want this automation to run on tickets which are sent from a specific email address. So we select “ticket” under “runs on”, and then filter this selection such that it only applies to the requester’s email when it contains their specific organization. The trigger should then be “item is created”, and the action will be to change this new ticket’s project to our created project – “Ticket catcher”.
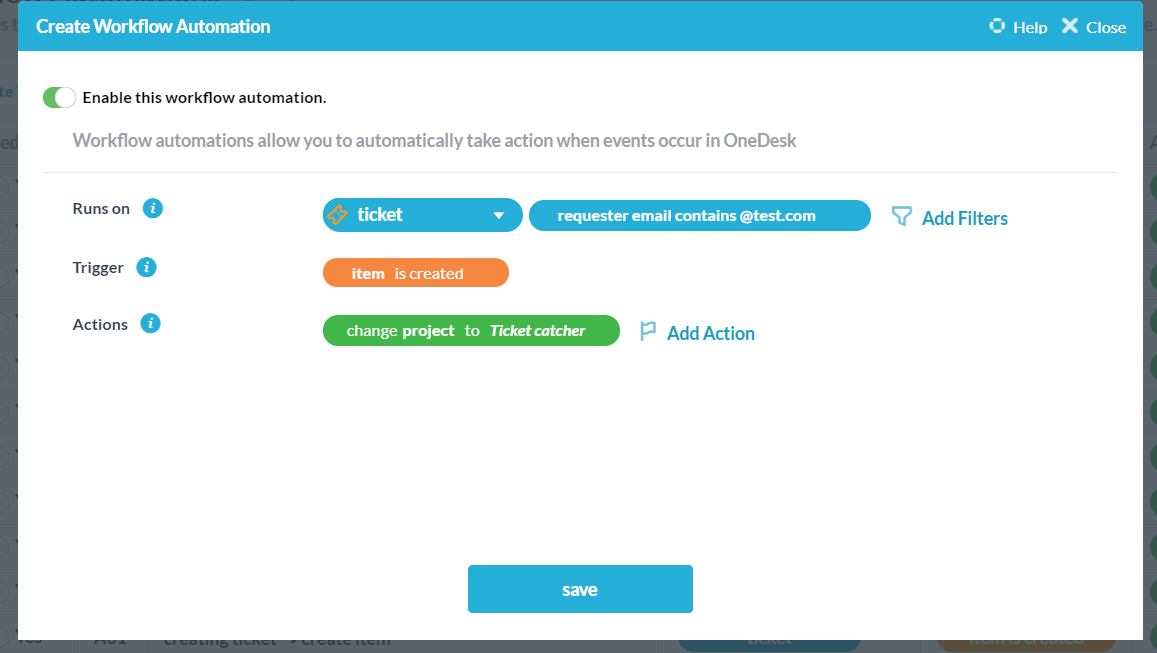
Hit save, and you have created an automation which will send all tickets created from the specified email address to one specific project.
If you wish to remove these caught tickets from your project view, you can archive the project. To do this, access the location where your project is under the projects application, select the three dots on the left-hand side under “actions”, and then choose “archive project”.
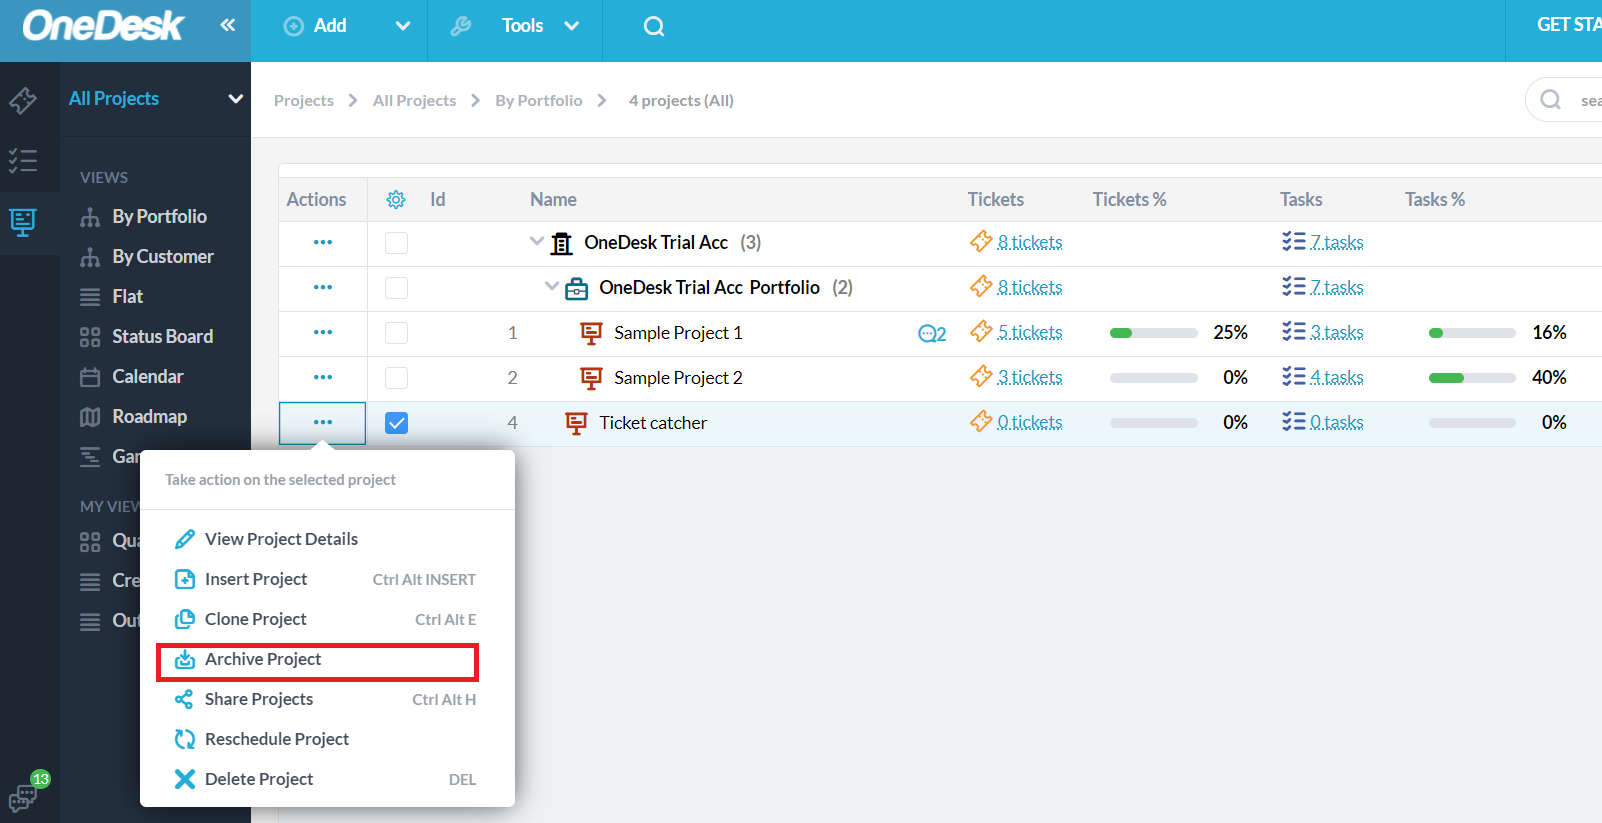
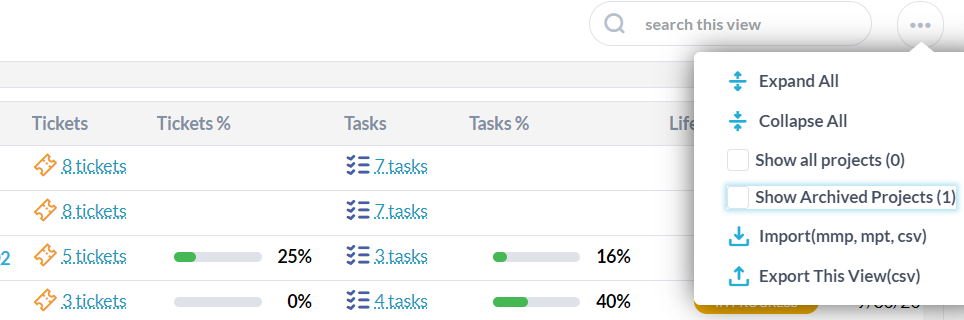
Now that this project is archived, it is hidden by default within OneDesk, but will still capture tickets sent from the specified email address. If you need to access it again for whatever reason, select the three dots on the upper right-hand side, and check the box to “show archived projects”.
Prevent looping with follower-exceptions
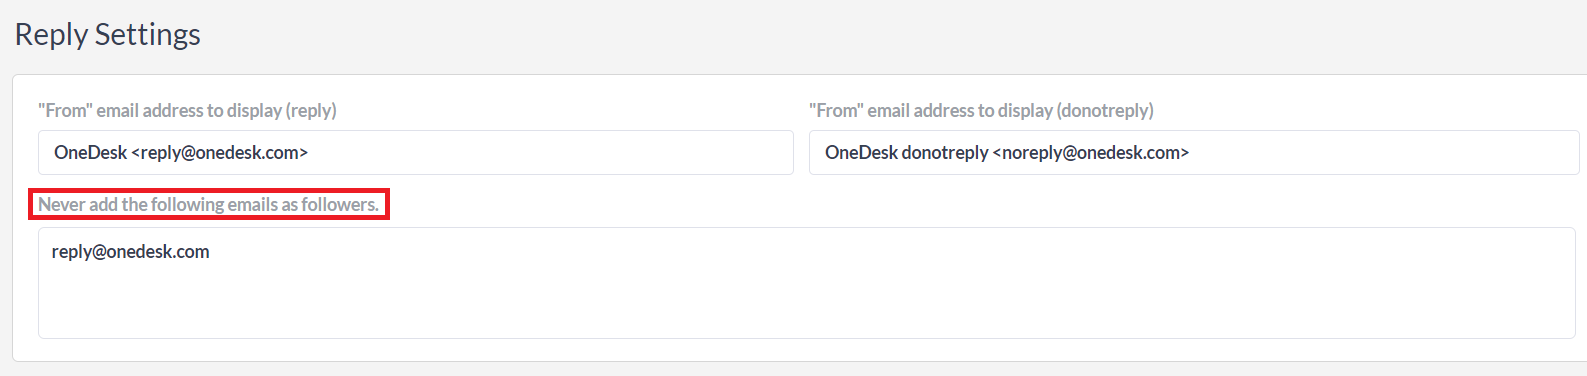
Additionally within OneDesk, you can set certain email addresses to never be added as a follower of a ticket-from-email that they have sent. This is of importance when you are replying to yourself for instance, as you will then be creating tickets of your own replies in a loop, and is why by default “reply@onedesk.com” is added to this list.
To access these settings, select “emails” from the menu after selecting the “administration” cog-wheel from “more applications”. Then, select the “appearance settings” tab, and scroll to the bottom. Under the heading “reply” settings”, there is the “never add the following emails as followers” field. You can add or remove as many emails to this section as you wish.
Related resources
Workflow automations
Best Practice: Common workflow automations
Archiving tickets and tasks
How to prevent email loops