Macros allow you to take actions or make change in bulk on items in OneDesk. This helps you to reduce the time you spend on repetitive tasks such as updating multiple items one-by-one.
How to create & save a Macro
You can create a macro in the tickets, tasks, features, and items application. To create a Macro, follow these steps:
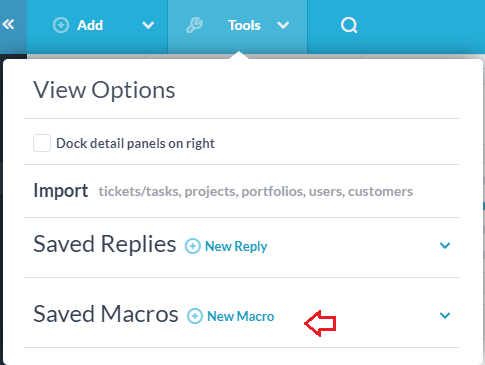
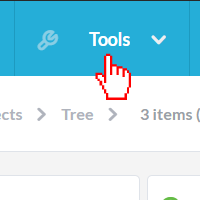
Step 1: Click Tools in the top navigation bar
Step 2: Click New Macro.
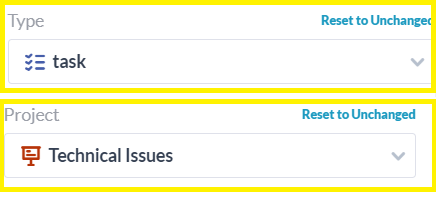
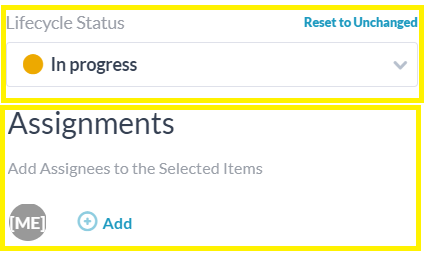
Step 3: Select the changes you want to make to the item whenever this Macro is run. For instance you can change item properties, add a conversation, change assignees, etc.
Step 4: Click Save This Macro
Note: if you select Apply, instead of saving the Macro will run one time on any items you’ve selected.
How to apply a saved Macro
You can apply Macros you’ve saved to bulk edit items by following these steps:
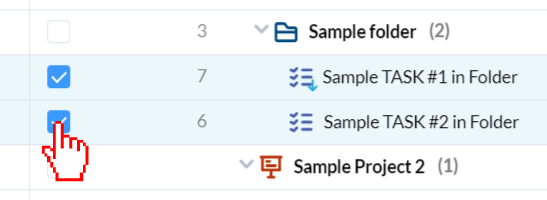
Step 1: Select the items you want to edit. (Tip: click the first item, then while holding shift select the last item to select all items in the range.)
Step 2: Click Tools in the top navigation bar.
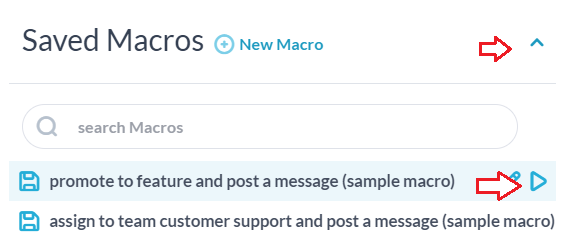
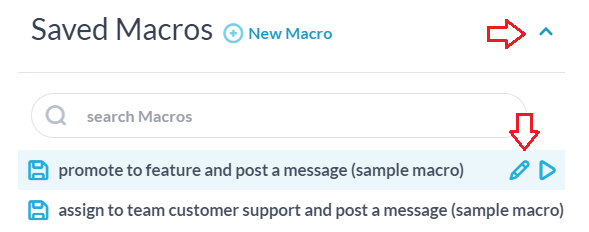
Step 3: Click the arrow next to saved Macros to display your saved macros, if you have many saved Macros search to find the Macro.
Step 4: Hover over the Macro and hit run
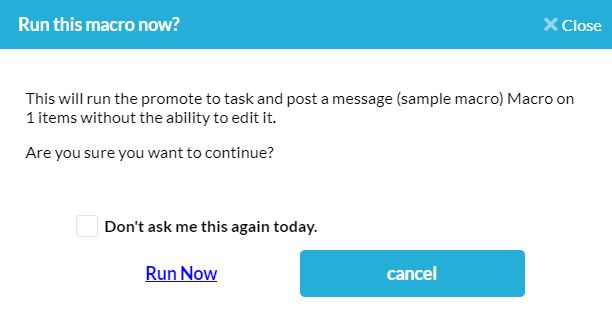
Step 5: You will see a warning asking if you are sure. If yes, select Run Now
How to Edit or Delete a Macro
To edit an existing macro, complete the following steps:
Step 1: Click Tools in the top navigation bar.
Step 2: Click the arrow next to saved Macros to display your saved macros, if you have many saved macros search to find the macro.
Step 3: Hover over the macro and select the pencil icon to edit the Macro.
Step 4: In the new screen, you can now edit the macro or select Delete This Macro in the lower right to delete.
Useful Macros
1. Assign to me and set to “In Progress”
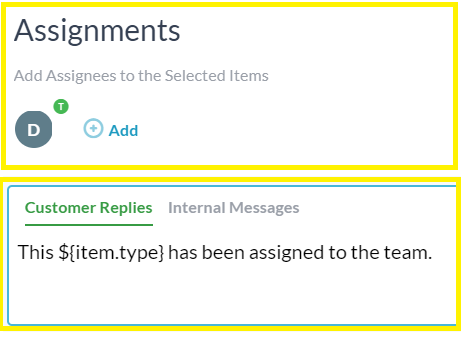
2. Assign to my team and post a message
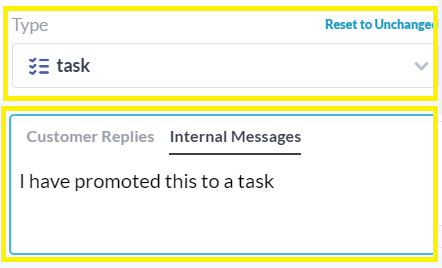
3. Promote to Task and post a message
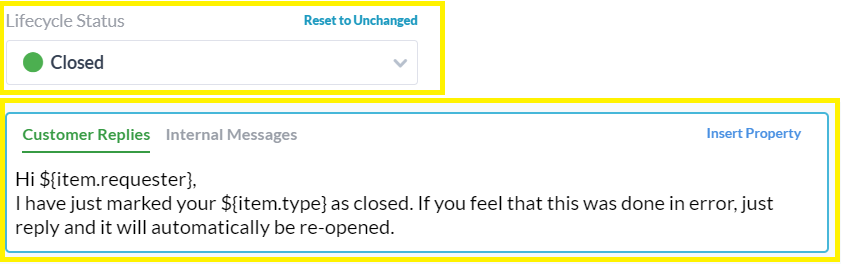
4. Close several tickets and notify the requester about change
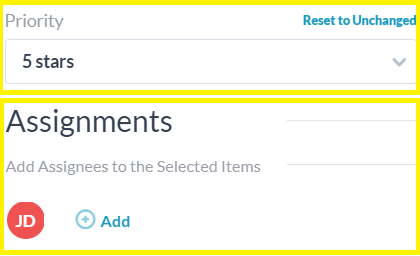
5. Change ticket priority and assign to an individual
6. Change several tickets to tasks and move to a different project