What is Inserting?
OneDesk allows you to create items such as tickets and tasks by adding them manually. Usually, you will need to fill out the internal creation form for that given item. However, inserting an item allows you to bypass filling out the form and to insert items with the inline item insertion function. This function lets you add multiple items into a given location quickly by providing the minimum amount of information needed, usually just an item name.
You can use inline inserting to add any item types. For adding projects, you will not be able to insert it with only a name, as more information is needed to create a new project.
Note that any fields you have set as ‘required’ to be filled out on a creation form are not requested for inserting an item. For example, if the “description” field is required when creating a new ticket, but someone inserts a ticket, they will not be asked to fill out the description field, even though it is set to required.
How to Insert an Item
You can insert an item by selecting a pre-existing item to insert a new one below it. Whatever item you select, the new item you insert will reflect that item type. Always ensure you select the item type you wish to replicate. If the item type is not in the correct location, no worries. You can click and drag it to the correct location later on. Your new item will not replicate a subtask status. It will replicate a task from a subtask, or a ticket from a subticket.
In Tree View
Step 1: Locate where you want your new item to be and check the box next to the item above the intended location.
Step 2: Click the three dots icon on the left side.
Step 3: Click Insert New Item.
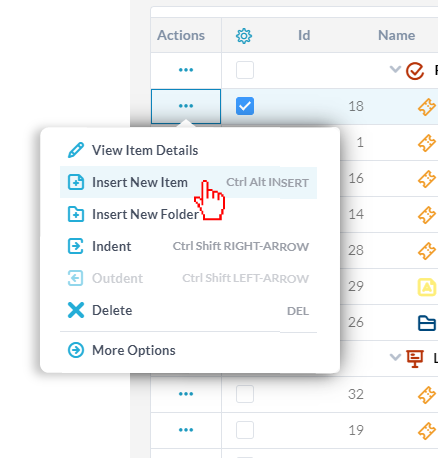
Step 4: Enter the name of your new item.
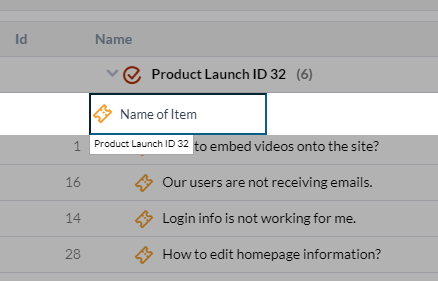
Step 5: Hit Enter to create your item.
Step 6: To create a second item, just type out the second item’s name and hit enter. Repeat to create as many new items as you desire.
To exit, click anywhere outside of the insertion box or hit the Esc key.
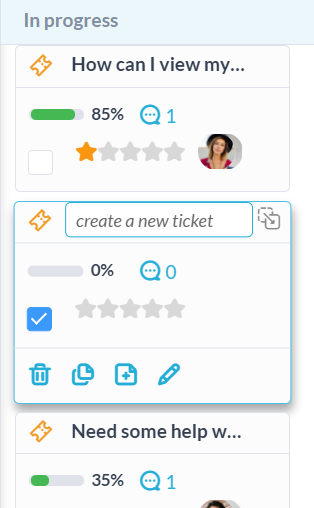
In Status Board/Card View
Step 1: Locate the column where you want your new item to be and click the card of the item above the intended location.
Step 2: Click the ![]() icon to add a new item.
icon to add a new item.
Step 3: Give the ticket a name and click enter.
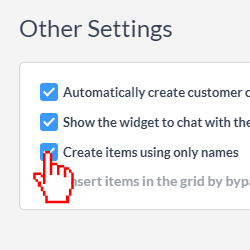
How to Disable Item Inserting
You might not want to allow your users to create items with only a name. There might be information that you want to require for the item creations. You can disable item inserting from your Administrative section.
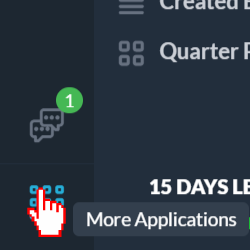
Step 1: Click on the More Applications icon on the bottom left side of the OneDesk application.
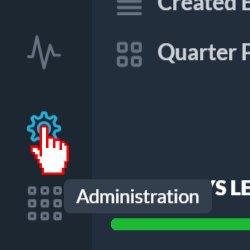
Step 2: Click on the cog icon to get to the Administration section.
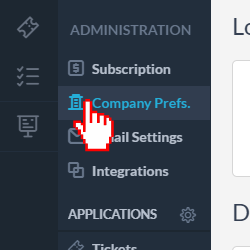
Step 3: Click on Company Preferences in the navigation panel.
Step 4: Under Other Settings, uncheck Create items using only names.