Azure Active Directory Integration with Project Management Software

OneDesk integrates Helpdesk and Project Management software with your Azure Active Directory account.
Azure Active Directory

Connect Azure Active Directory to your OneDesk Account

Add Single Sign-on for your OneDesk users or customers using Azure Active Directory. Connect OneDesk’s helpdesk and project management software to your Azure Active Directory account to make it easier for your users to sign in and to manage their access to OneDesk.

What does the Azure Active Directory Integration let you do?

With the Azure Active Directory integration enabled, you can allow your users to log into OneDesk using their existing Active Directory credentials. If these users do not already have OneDesk accounts, this integration can automatically create them for you. With the integration enabled for customers, they can log into customer apps using their existing credentials.  

Integrating OneDesk’s helpdesk and project management software with your Azure Active Directory account is easy. Just follow the steps below or watch the video.

Video - Setting up Azure Active Directory SSO for Users

How to Connect OneDesk to Azure Active Directory – Step-by-Step

1) Get the app on Azure Active Directory.

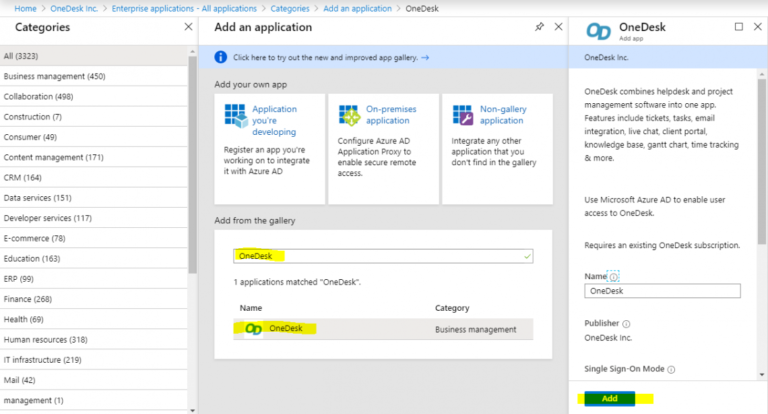
Go to the OneDesk App page on the Azure Marketplace and click the “Get it Now” button.

Sign in to the Microsoft Azure Marketplace.

You will be presented with the Microsoft Tutorial: “Azure Active Directory single sign-on (SSO) integration with OneDesk”. This is a useful tutorial, and you can choose to read through it for more detail.

2) In the Azure Portal, find and add the OneDesk App.

Do the following steps in order.

  • Go to : https://portal.azure.com/
  • Click the “Azure Active Directory” button at the top.
  • Select “Enterprise Applications” in the left side-panel.
  • Click the “new Application” button at the top.
  • In the “Add from the gallery” box, search for “OneDesk”.
  • Click the OneDesk Result.
  • Click the “Add” button the is shown on the right.

3) Set up single sign on.

Inside the OneDesk app on the Azure Portal, click “Set up single sign on”.

Then click the “SAML” method.

4) Copy the App Federation Metadata URL.

In the next screen, copy the ‘App Federation Metadata URL’ from section #3.

5) Enable SAML SSO in your OneDesk account.

Back in your OneDesk account:

  • Navigate to Administration > Integrations > Single Sign On
  • Turn on the ‘Enable SSO for users’ switch
  • Select SAML and expand the panel

6) Paste your ‘App Federation Metadata URL’ into the ‘Your Identity Provider Metadata URL.

  • In OneDesk, paste the ‘App Federation Metadata URL’ you copied earlier, into the ‘Your Identity Provider Metadata URL’ field.
  • Check the “Enable User provisioning’ checkbox.
  • Click the ‘Validate Metadata’ button

7) Under ‘Advanced Settings’ map your attributes

Map the attributes in the fields as shown in the image below for

  • Email
  • First Name
  • Last Name

8) Download the file from your OneDesk Metadata URL

Copy and paste your OneDesk Metadata URL into a browser address bar and download the resulting XML file.

9) Upload that file to Azure Portal

Back in the Microsoft Azure Portal, inside the ‘OneDesk Single sign-on’ app:

  • Click the “Upload metadata file” button
  • Select the XML file you just downloaded from OneDesk
  • Click the ‘Add’ button
  • Click the ‘Save’ button on the “Basic SAML configuration” page

You’re done!

10) Add & Assign Users to the Application

Don’t forget to add your users to the OneDesk app.
In the OneDesk app in the Azure portal, click the ‘Add user’ button. Add your users and assign them to the app.

Scroll to Top