Joomla Integration with Project Management Software

Connect Joomla to your OneDesk Account
What does the Joomla Integration let you do?
Once the Joomla extension is installed, you are able to easily add OneDesk’s customer apps to your site to allow your customers to interact with you and to ask for your support. Thanks to OneDesk’s customer-facing applications, you can allow your customers to use live-chat, a customer portal, customizable ticket submission forms, and a searchable knowledgebase. These applications can be customized in-app to match your webpage’s colors and branding and are connected directly to your OneDesk account, letting you manage full-features helpdesk ticketing, email communications, project management, and more
Read more on the Joomla site: https://extensions.joomla.org/extension/onedesk/
The steps below make integrating OneDesk’s helpdesk and project management software with your Joomla website easy.
How to Set up the OneDesk Module in Joomla – Step-by-Step
To set up the OneDesk module in Joomla, complete the following steps:
Step 1: Log in to your Joomla account as an administrator.
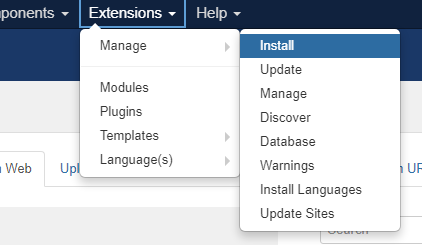
Step 2: In the top navigation bar, click Extensions.
Step 3: Hover over Manage.
Step 4: Click Install.
Step 5: Enable the Install from Web option (if not previously enabled) and search for OneDesk.
Step 6: Click on the OneDesk module.
Step 7: On the next page, click Install.
Step 8: On the following page, click Install again.
How to Configure
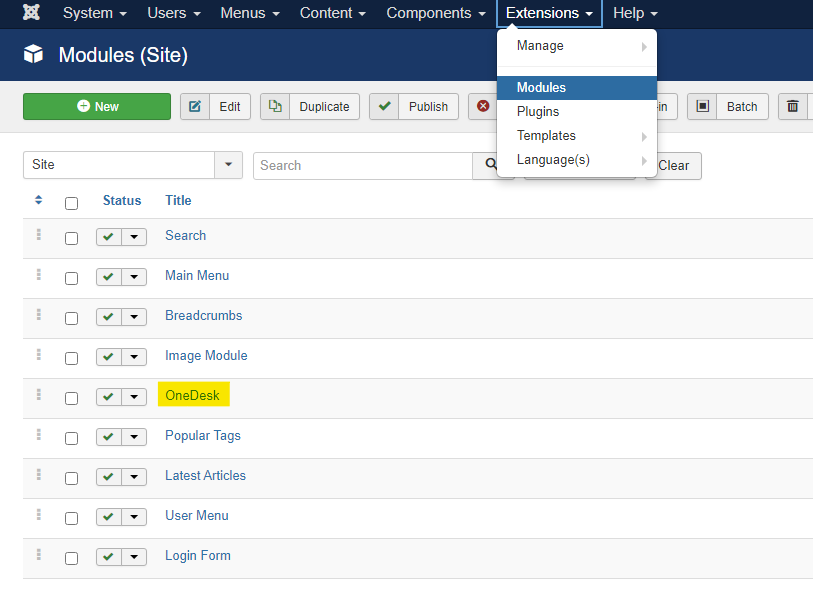
Step 1: In the top navigation bar, click Extensions.
Step 2: Click Modules.
Step 3: Select OneDesk.
Step 4: In the module, modify the URI, Location, and other options as needed.
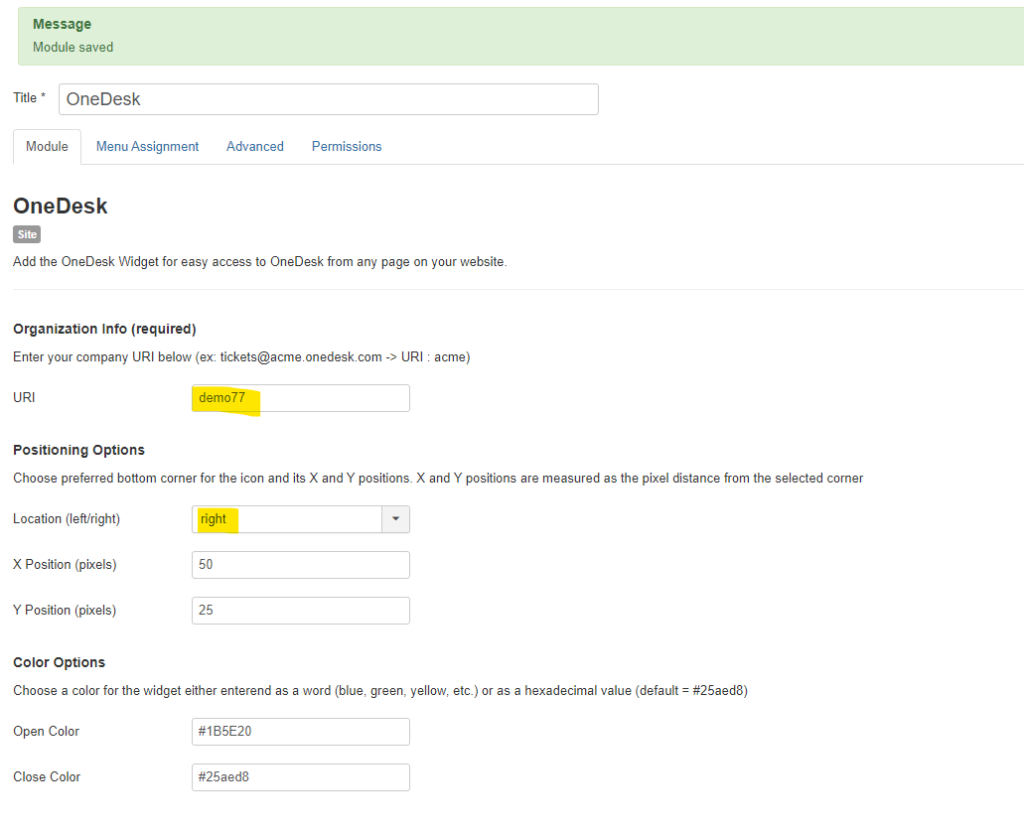
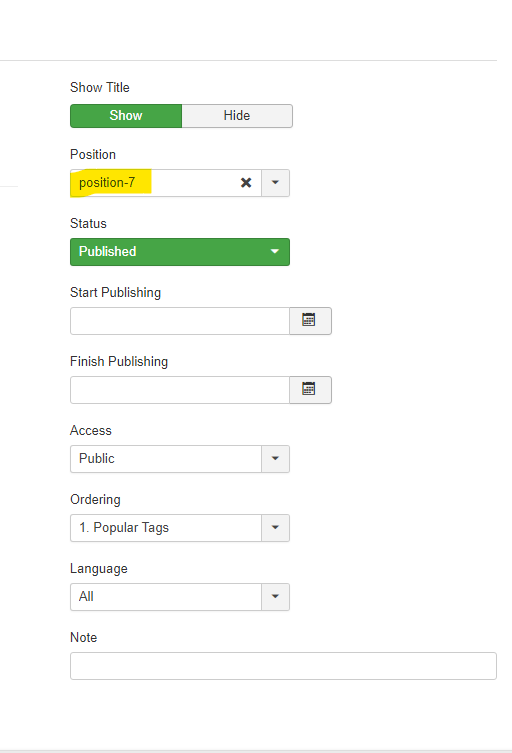
Step 5: On the right side of the screen, modify Position to “position-7” and status to “Published”.
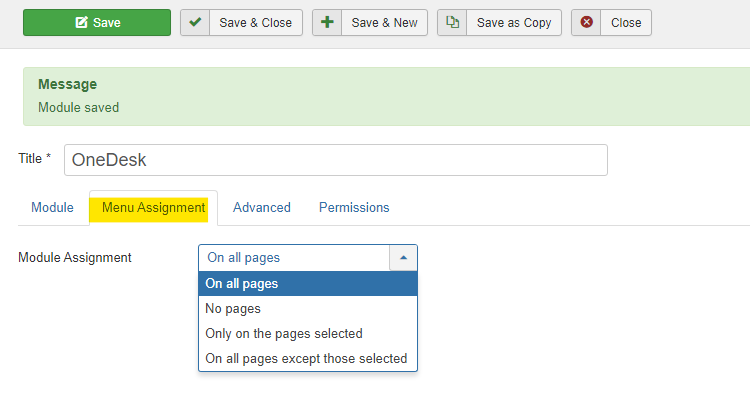
Step 6: Click Menu Assignment from the tabs at the top
Step 7: Select the required pages from the dropdown menu.
Step 8: Click Save.
Step 9: Open up your website to preview changes.