Okta Integration with Help Desk and Project Management Software
OneDesk integrates Helpdesk and Project Management software with your Okta account.

Connect Okta to your OneDesk Account
Add single sign-on (SSO) for your OneDesk user and customer accounts by connecting with Okta. Easily manage your credentials within Okta.
What does the Okta integration let you do?
With the Okta integration enabled, your users or customers will be able to sign into their OneDesk accounts using the credentials managed by Okta. Read about the integration of OneDesk’s helpdesk and project management software for Okta on the Okta website.
Integrating OneDesk’s helpdesk and project management software with your Okta account is simple. Just follow the steps below.
How to connect OneDesk to Okta – Step-by-Step
OneDesk’s Okta integration is possible with SAML or OpenID Connect. The following will guide you through your preferred set-up.
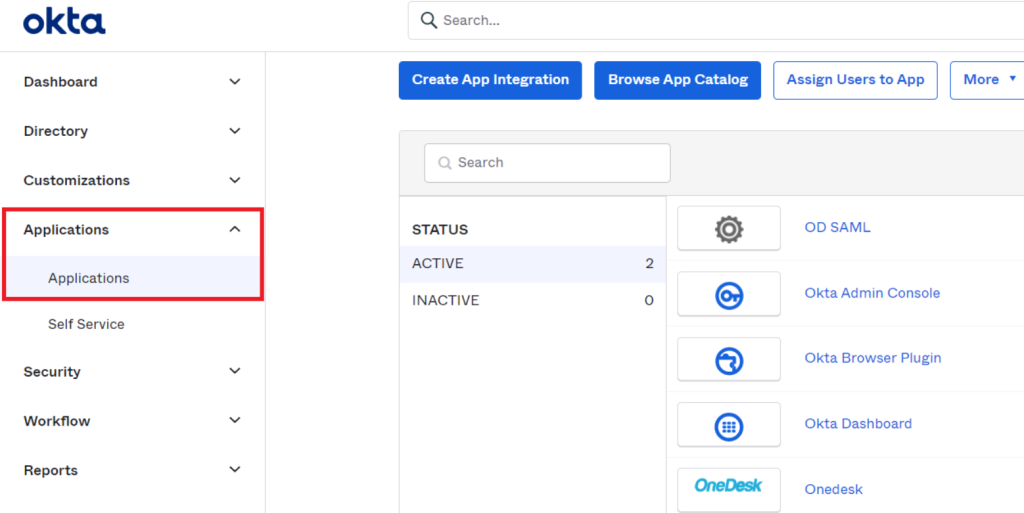
1) Sign into your Okta Account and open ‘Applications’
- Sign in to your Okta Account.
- Open the ‘Applications’ section from the left side menu > click ‘Applications.’
2) Add an Okta Application
- Click the ‘Create App Integration’ button.

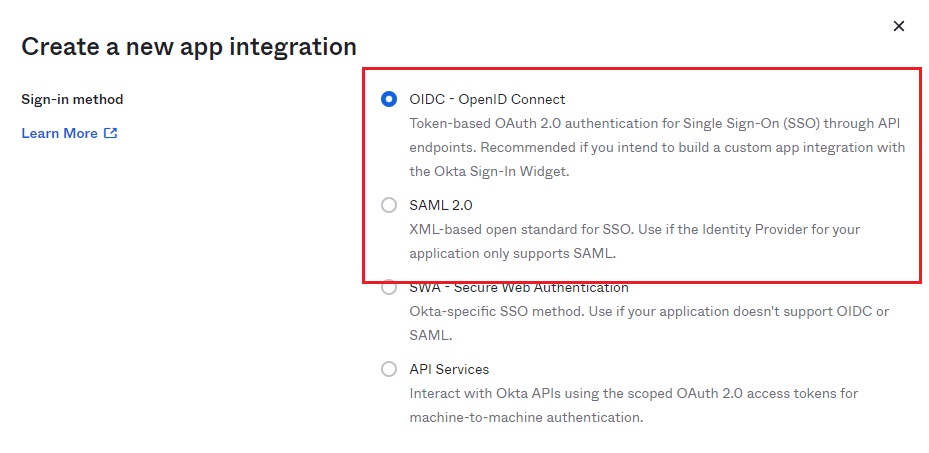
3) Choose SAML2 or OpenID Connect
For SSO for user and customer accounts, OneDesk supports both OpenID Connect and SAML2.
If you wish to continue with SAML2 please skip ahead to section 4B. For OpenID Connect, the next step (4A) will proceed using OpenID Connect.
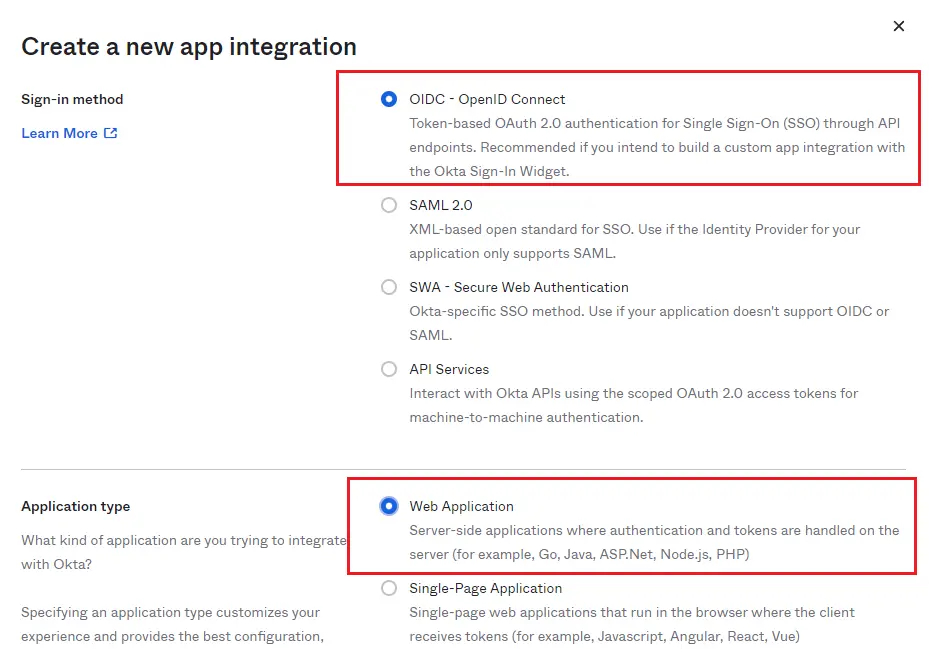
4A) OpenID: Create OpenID Connect Integration
- For the Sign-in method, select OpenID Connect.
- Select ‘Web Application’ as the Application type.
- Click ‘Create.’
5A) OpenID: Create OpenID Connect Integration
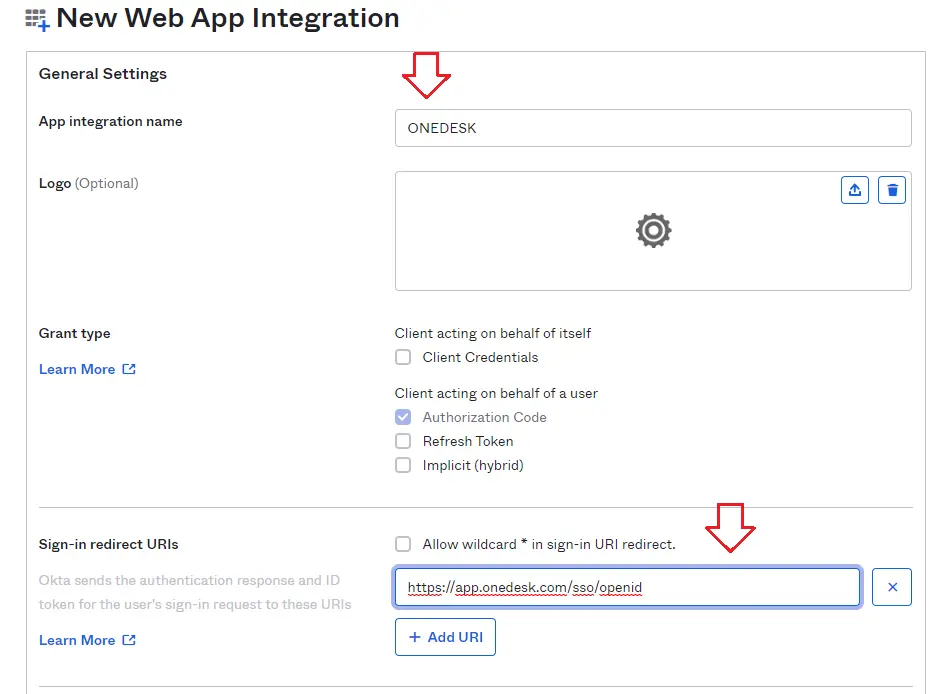
- Choose an Application Name such as ‘ONEDESK’
- Set the Sign-in Redirect URI to: https://app.onedesk.com/sso/openid
- Select the controlled access according to your preference.
- Click the ‘Next’ button.
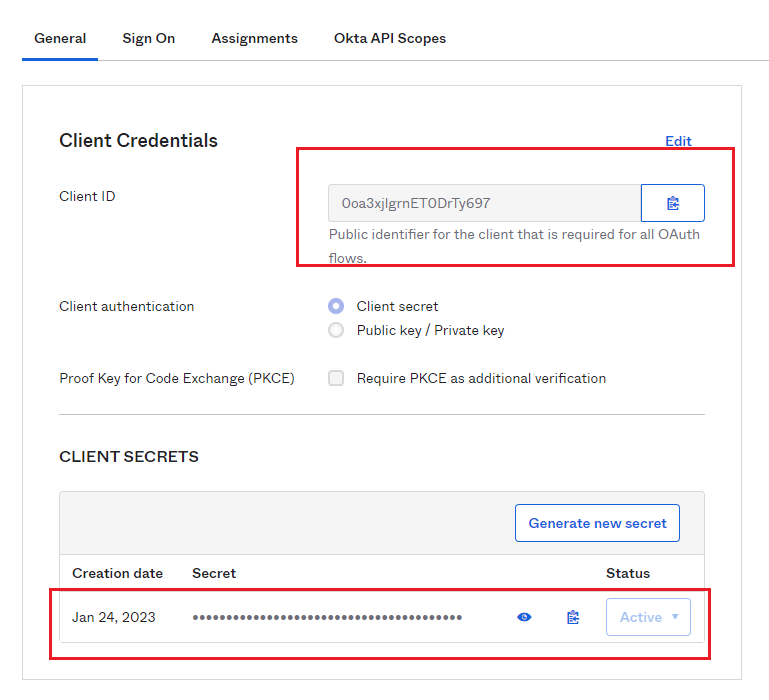
6A) OpenID: Copy your Client ID and Client secret from Okta
- Find the section with your Client ID and Client Secret.
- You will need to copy and paste each into your OneDesk account.
- In a new tab, login to your OneDesk account and head to Administration-> Integrations -> Single Sign On.
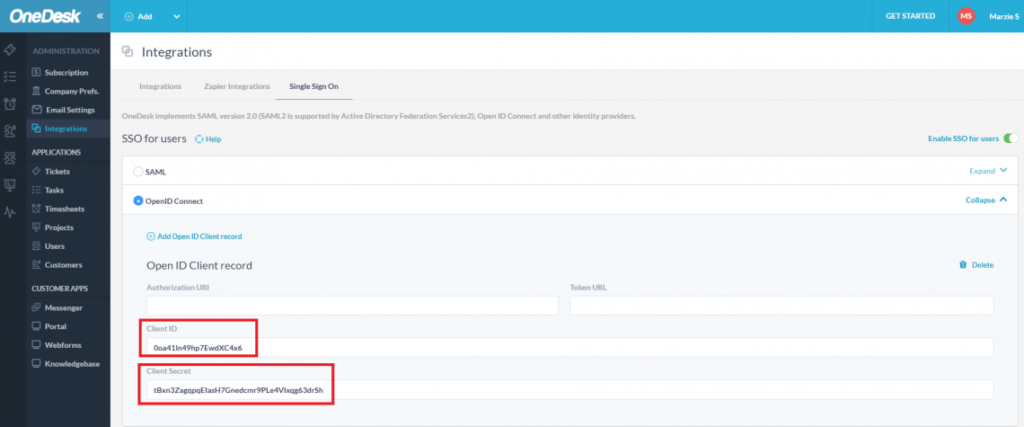
7A) OpenID: Paste the Client ID and Client Secret into OneDesk
- Inside your OneDesk Account navigate to
Administration > Integrations > Single Sign-On > SSO for Users (or) SSO for Customers. - Select OpenID Connect.
- Paste your Client ID and Client Secret into the appropriate fields.
8A) OpenID: Retrieve the Authorization URI and Token URL from your Okta Metadata file
The Authorization URI and Token URL can be found in your Okta account by following these steps:
- From the left sidebar click ‘Security’.
- In the menu click ‘API’.
- Click the ‘default’ link next to the appropriate Authorization Server.
- In the resulting page, click the metadata URI. This will open the metadata file in your browser.
- Copy the ‘Authorization Endpoint’ & ‘Token Endpoint’ from this file (click the last image to expand).
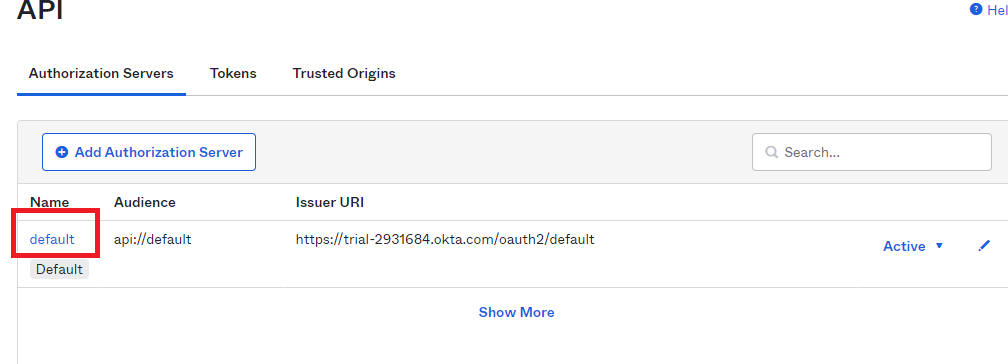
Click the ‘default’ link
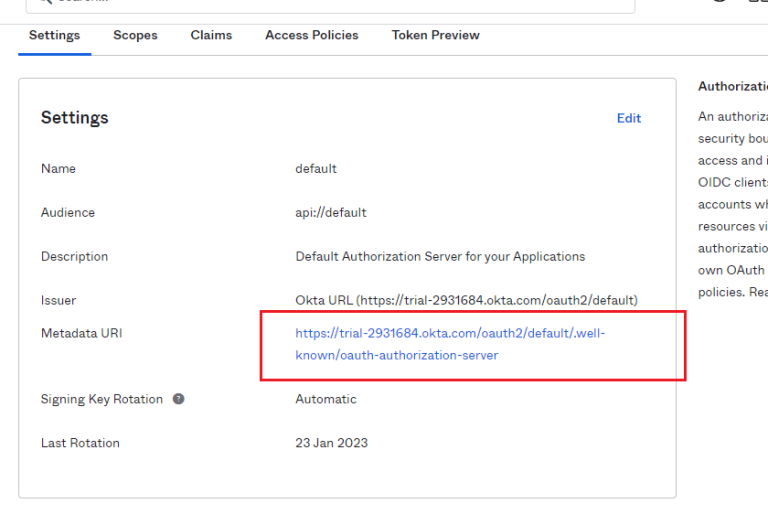
Click the metadata URI

Copy ‘Authorization Enpoint’ and ‘Token Endpoint. (Click to expand image)
9A) OpenID: Paste these endpoints into the Authorization URI & Token URL fields in OneDesk
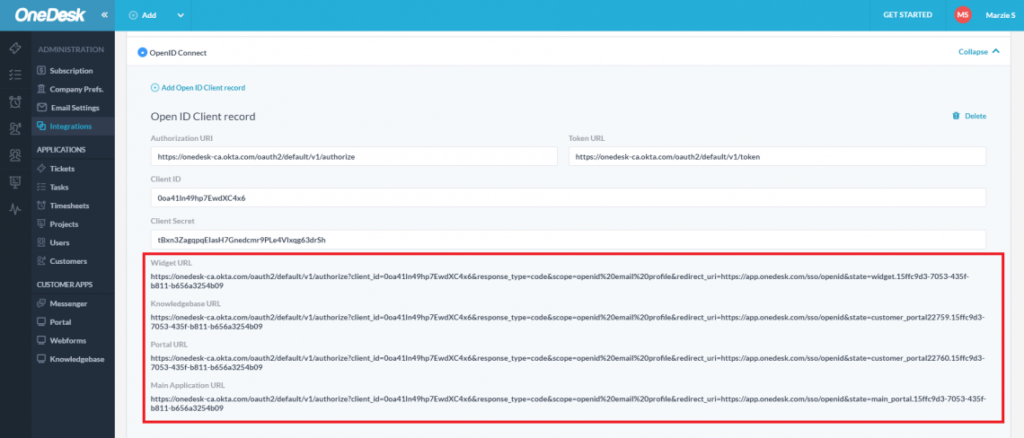
- Back in OneDesk, paste the Authorization & Token endpoints into the Authorization URI & Token URL fields.
- OneDesk will generate the Login URLs your users or customers will use to login to OneDesk. Provide the appropriate URLs to them for the various OneDesk applications.
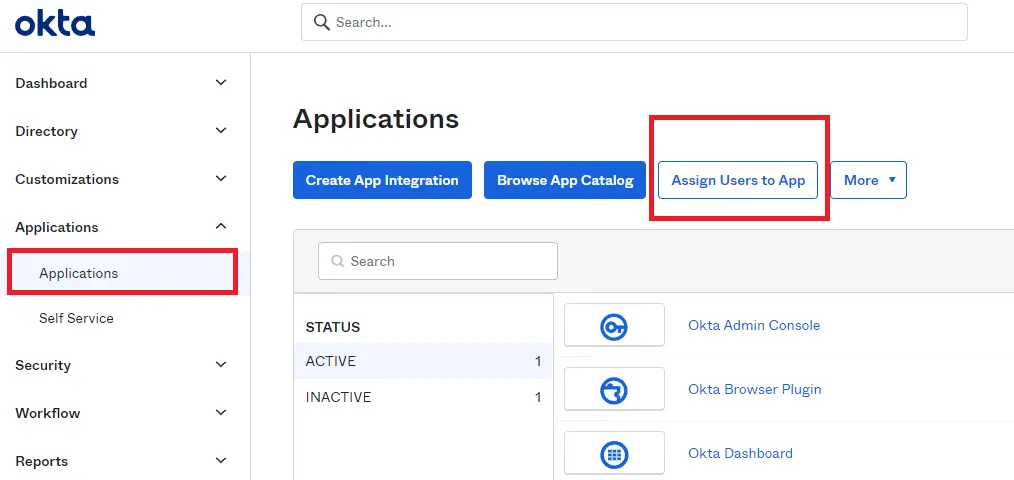
10A) Assign Users to this Application
In Okta you must assign People (users) or your customers to the OneDesk application.
- In Okta open the OneDesk Application you created.
- Select ‘Assign to People
NOTES:
- Users must be activated in OKTA by Admin (Under Directory > people)
- A user and customer cannot use the same email address
4B) SAML2: Create SAML 2.0 App Integration
This step continues from Step 3 above for those who selected to use SAML as their Sign on method.
- For the Sign-in method, select SAML.
- Click ‘Create.’
- Login to your OneDesk account in a new tab.
5B) SAML2: Retrieve Your OneDesk Metadata URL
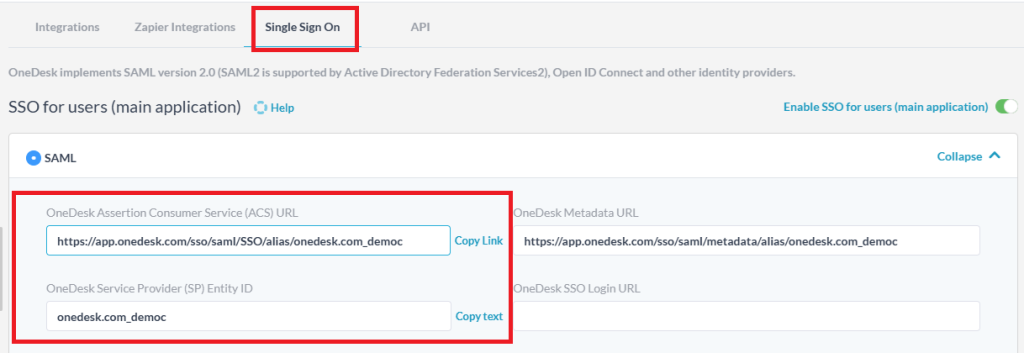
- In OneDesk, navigate to Administration > Integrations > Single Sign On > SSO for Users.
- Select SAML.
- Copy your ‘SP Entity ID’ and paste it into Okta ‘Audience URI’ (see image below)
- Copy your ‘ACS URL’ and paste it into your Okta ‘SSO URL’ (see image below)
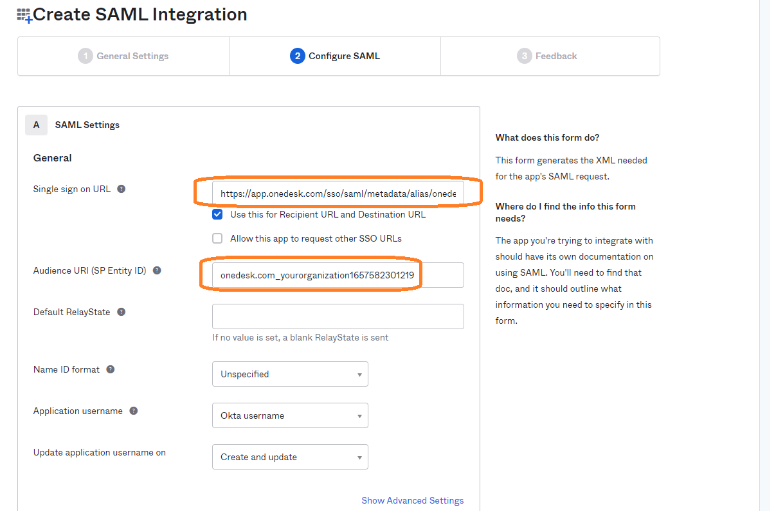
6B) SAML2: SAML Settings
- ‘Name ID format’ should be set to ‘Email Address.’
- Application username set to Okta username
- ‘Update application username on’ should be set to ‘Create and update.’
- The other steps are optional.
7B) SAML2: Get Identity Provider Metadata
Select ‘I’m an Okta customer adding an internal app’ and hit FInish.
- Upon finishing, scroll down to Certificates on the Application page.
- Find the active certificate, and under Actions, select ‘View IdP metadata. ‘
- Copy the URl of the opened page.

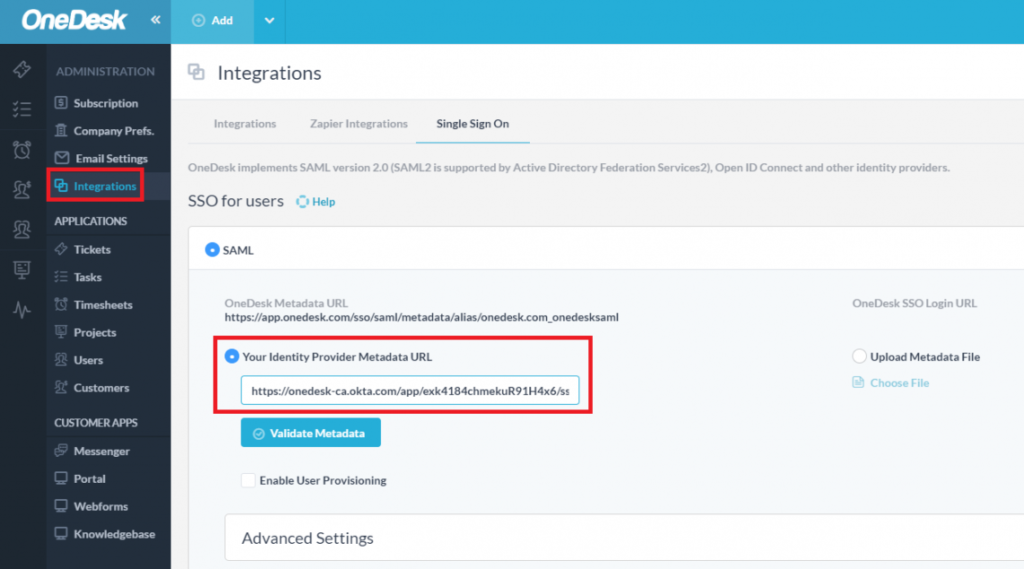
10B) SAML2: Paste your Identity Provider Metadata URL into OneDesk
- Inside OneDesk, paste the URL into the Identity Provider Metadata URL section.
- Click the ‘Validate Metadata’ button. The IDP Entity ID will be automatically generated.
You can optionally click the ‘Enable User Provisioning’ checkbox.
Should now be able to copy the OneDesk SSO Login URL link. (You may need to clean your cache. See the last step).
11B) Assign Users to this Application
In Okta you need to assign users to the OneDesk application.
- In Okta open the OneDesk Application you created.
- Click the ‘Assign to People’ action.
- Check off the desired users and hit Next.
NOTES:
- Users must be activated in OKTA by Admin (Under Directory > people)
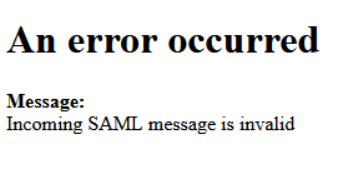
Troubleshooting tip:
If you receive an error like the one pictured to the right, it is likely a caching issue.
Please clean cache before access SSO Login URL. This issue is due to the way Okta handles cookies and caching.