WordPress Integration with Help Desk and Project Management Software

Connect WordPress to your OneDesk Account
Add the web widget containing: live-chat, a client-portal, customized forms, and a knowledge base to your WordPress website. Our WordPress Integration lets you connect OneDesk’s helpdesk and project management software to your WordPress website to boost your customer service.
What does the WordPress Integration allow you to do?
With the WordPress plugin installed, you can easily add the OneDesk customer apps to your site. Impress your customers with live-chat, a client ticket portal, customized ticket forms, and a knowledgebase. These customer-facing apps are connected to your OneDesk account, allowing you to offer full-featured helpdesk ticketing, email communication, project management, and much more.
You can see it on the wordpress site at: https://wordpress.org/plugins/onedesk/
Integrating OneDesk’s helpdesk and project management software with your WordPress website is easy.
Just follow the steps below.
How to Connect OneDesk to WordPress – Step-by-Step
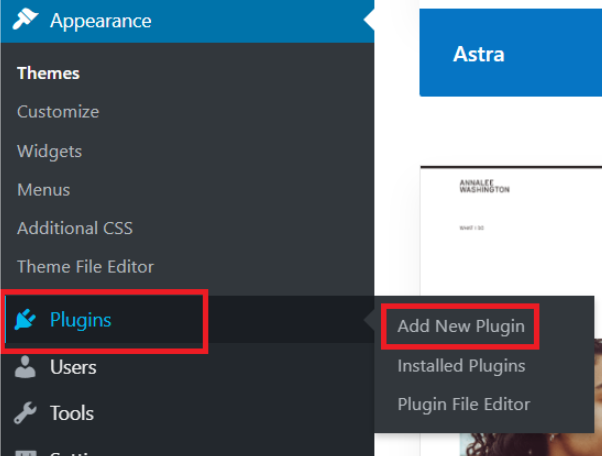
1) In WordPress, click ‘Plugins’
Log into your WordPress account and click on ‘Plugins’ in the left panel. Then select Add New Plugin.
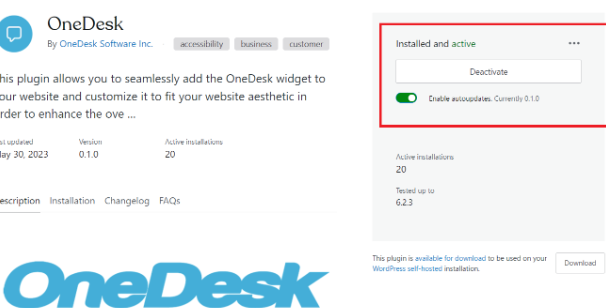
2) Search for “OneDesk” and install the plugin.
Search for “OneDesk” in the available plugins and choose to activate/install the OneDesk plugin
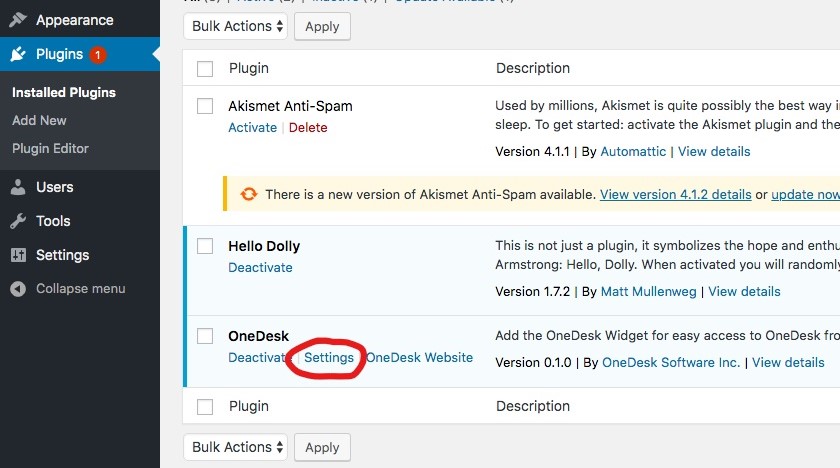
3) Open the plugin Settings.
Navigate to Plugins -> Installed plugins -> OneDesk -> Settings.
In another window, login to your OneDesk account . Navigate to Admin > Company Preferences and copy your URI.
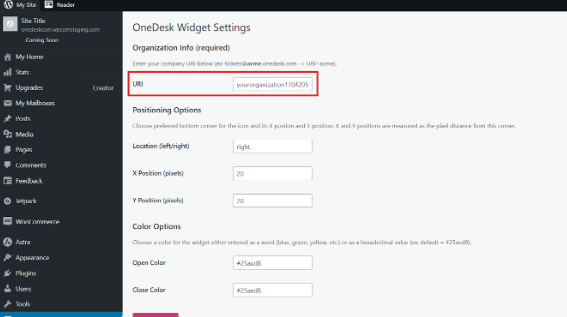
4) Enter your OneDesk URI.
Back in WordPress, enter your organization’s URI from inside OneDesk into the “URI” field in the plugin settings.
Here you can adjust the positioning of the plugin, as well as the color. If you want to change the positioning of the widget to the right-hand side of your website, change the word “left” to “right”.
Once you have adjusted any settings, click on Save Changes.
Installation Part 2 - Block or Classic Theme
After installing the plugin as described above, the next steps will depend on whether your site is using the ‘Block’ theme or a ‘Classic’ theme. (You can determine you theme type from Admin > Appearance> Themes and check the active theme).
If you use the Classic theme, see the next step. If you use the Block theme, skip here.
For WP Classic theme
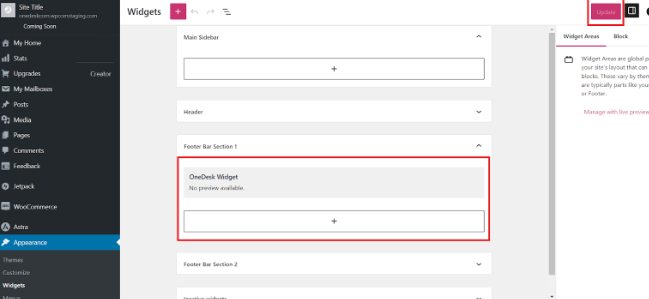
1) In the WordPress admin settings, navigate to Appearance -> Widgets.
Add the OneDesk widget to your footer bar and select save/update
For WP Classic theme
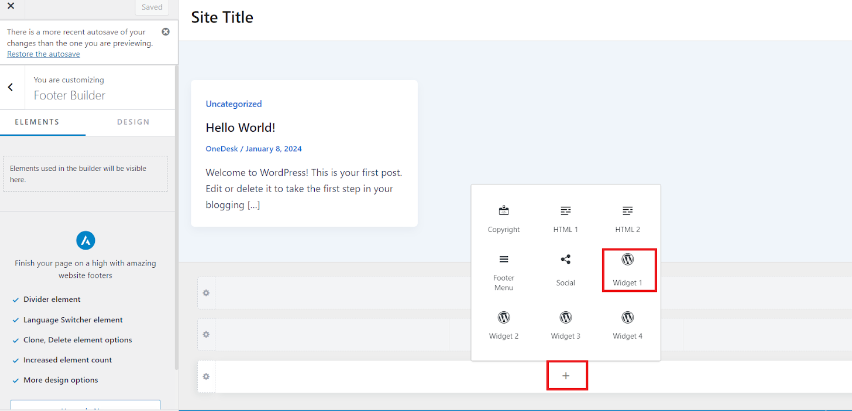
2) Next, in the WordPress admin settings, navigate to Appearance -> Customize.
Select “Footer Builder”, and add the OneDesk widget to your footer
For WP Classic theme
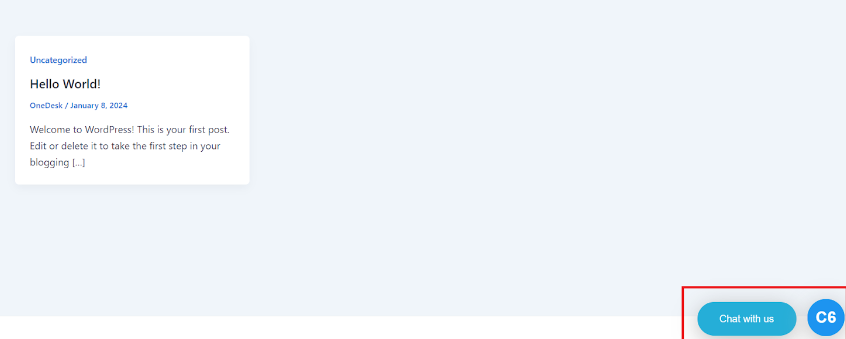
3) Save changes and preview your website. The widget should now be visible.
Note: You may have multiple footers (three footers are visible in the screenshot above. If this is the case, the widget may not appear as you would expect. If the widget does not appear on one footer, try adding the widget to another of your available footers, saving, and previewing your site again.
Install OneDesk WordPress Plugin - Block Theme WP Site
For WP Block theme
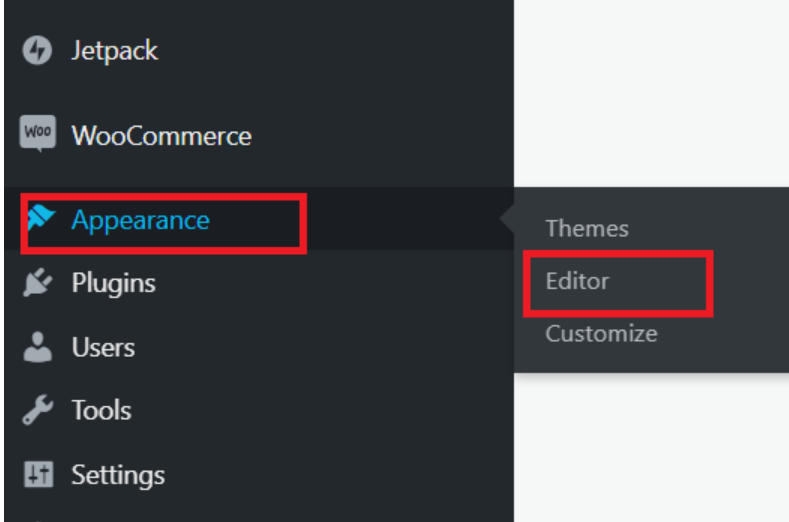
1) In the WordPress admin settings, navigate to Appearance -> Editor
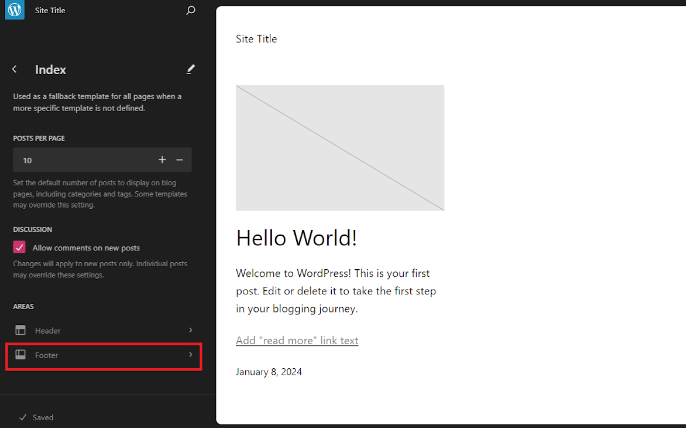
For WP Block theme
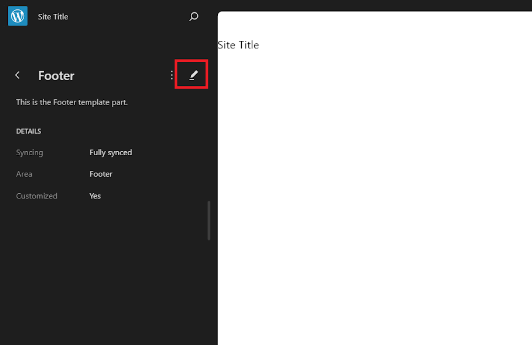
2) On the left-hand panel, select Templates -> Index -> Footer.
Select the edit button (pencil icon) beside “Footer”.

For WP Block theme
3) Add a block using the “+” button.
Search for and add a custom HTML block.
For WP Block theme
4) In a new window, navigate to your OneDesk account. Head to Admin -> Customer Apps -> Mobile Friendly App Settings > Generate Snippet.
Copy the snippet in the window.


For WP Block theme
5) In the added HTML block, paste the generated widget snippet from inside OneDesk.
Save the changes to your site and preview your website. The widget should now be visible.