Shopify is a popular e-commerce platform which allows companies to create online storefronts even with limited tech know-how. OneDesk is an all-in-one work management software. With OneDesk, you can manage multiple aspects of your business, from multi-channel customer support, to employee time tracking and project planning. Open communication channels for your customers and prospects by integrating your Shopify store with the OneDesk customer applications.
How does OneDesk integrate with Shopify
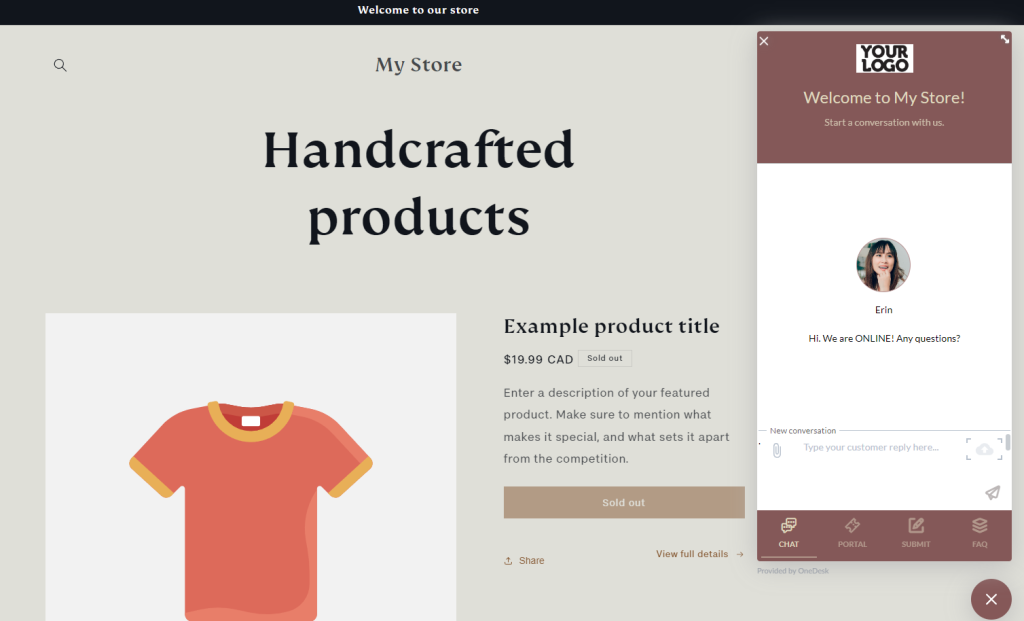
OneDesk includes what we call the customer applications. The customer apps open up communication channels and provide support options. OneDesk apps include the live chat, request forms, a customer portal, and a self-service help center. You can provide easy access to some or all of these applications via the web widget.
The web widget appears as a bubble on your Shopify pages. Your customers or prospective customers can click the bubble to open the web widget. Your web widget includes all the customer apps of your choosing as tabs in the window.
Customer applications can empower your customers and benefit your company with the ability to:
- Proactively support customers with real-time answers via live chat.
- Use chat to increase engagement and conversion.
- Meet your customers where they are by giving them alternative channels and easy ways to reach out.
- Centralize communication through email, chat, form, portal, or other avenues.
- Publish FAQs and guides to the help center and cut down on common questions.
- Boost agent productivity by centralizing communication channels. Agents can stay organized and focused on providing the best support.
Add OneDesk’s web widget to your Shopify site
The OneDesk widget can include:
- Live chat: real-time messaging between your customers and agents.
- Customer portal: allows customers to view and stay up-to-date on their tickets or tasks.
- Request forms: enables customers to submit new tickets (or tasks) using customizable forms.
- Help center: a hub of articles and FAQs customers can use to find answers.
All the customer-facing apps are connected to Onedesk, which offers full-featuring ticketing and work management tools.
Integrate Shopify with help desk software
All your customer communications are centralized in OneDesk. Customers can reach out through email, the live chat, portal, or forms. Tickets are automatically created from emails and forms, while live chat messages can be converted into tickets. A ticket is essentially a customer request or issue. In comparison to just email, tickets contain robust features to help you easily manage, track, and resolve the request. For instance, respond to customers directly from the ticket; easily identify the status and progress; assign tickets to agents; drill down to a customer’s requests; and log time directly to a ticket.
Integrate Shopify with your work management tool
OneDesk lets you manage projects from the same tool you manage support. This unique blend of features is especially useful for companies who deliver customer projects or provide ongoing services. For example, track time on support issues. Build up whole projects around customer requests. Plan your internal tasks and projects. OneDesk has a huge number of features to help your company deliver on-time and exceptional projects.
How to integrate with Shopify
Here’s how to add the web widget to your shopify site. See more detailed instructions on our knowledgebase.
- Go to Administration > Customer Apps > Mobile-Friendly App Settings. Click Generate Snippet and copy the code in the window.
- Step 1: Open your Shopify store admin page.
- Step 2: Select ‘Online Store’ within ‘Sales Channels’.
- Step 3: Select ‘Themes’.
- Step 4: Click on the 3 dots beside your current theme and select ‘Edit Code’.
- Step 5: Within the folder ‘Layout’, select theme.liquid.
- Step 6: Scroll down to the bottom and find the tag ‘</body>’.
- Step 7: Above the tag </body> paste the JavaScript code from OneDeskStep .
- Step 8: Type ‘defer’ in the position shown in the screenshot.
- Step 9: Click Save.