If your company manages multiple services, brands, or a variety of departments each with different workflows, branding or websites, it is important to be sure your clients are receiving properly tailored support. On the other hand, you’ll want your agents to have centralized communication and a streamlined workflow to manage tickets and tasks, even across brands. Luckily, OneDesk’s robust customization options allow companies of all kinds to to set up their apps to best fit their needs. This article will guide you on the considerations and best practices for configuring your customer apps for multiple business services or brands under one account.
Create Multiple Widgets
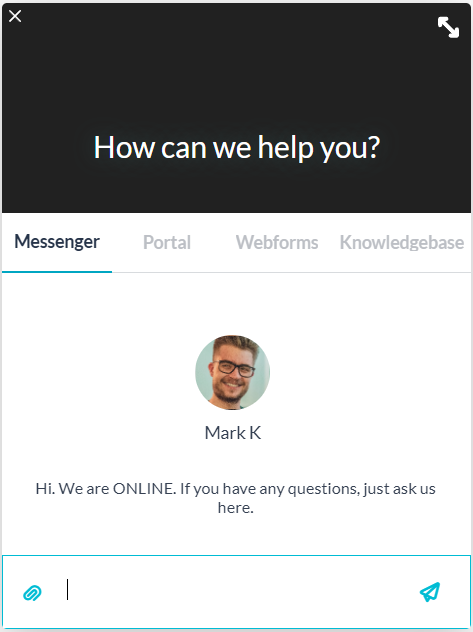
The widget is embeddable on your website and provides the following customer facing apps: Messenger, Portal, Web Forms, Knowledge Base. More information on the widget. It is possible to have multiple separate widgets and embed each on different websites. For details on how to implement multiple widgets, please contact our support team.
Brand Masking
If you have two different services or brands under one umbrella company and would like to mask this from customers, we recommend keeping the colour scheme and logos for your widget neutral. Consider also keeping your Bot name and avatar neutral or using an agent’s profile picture in place of the bot avatar.
To configure your company logo, go to Administration > Company Preferences. Also configure the logo within your messenger under Administration > Messenger
You can create seperate ticket types, webforms, knowledge bases, or portals for your different services, and add the appropriate apps to each widget. This way, customers will be able to submit the right tickets to the right agents, as well as view appropriate information in the knowledge base and customer portals.
Let’s illustrate this scenario with an example. Let’s say we have an apparel company that sells two main products operating under separate brands and websites, ABC Shoes and XYZ Shirts.
Ticket Types for multiple brands
We will create two different ticket types for our brands. With ticket types we have even more context for where our tickets come from. Moreover types allow us the ability to create separate workflows and automations.
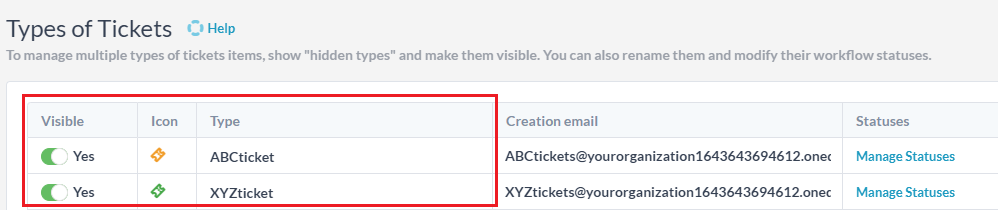
Go to Administration >Tickets then name and enable your ticket types. Above we have created two ticket types, ‘ABC ticket’ and ‘XYZ ticket’ which will be used to easily automate and organize all tickets submitted from each brand to the right agents and projects. We will soon see how the ticket types will help with the organization of our apps in greater detail.
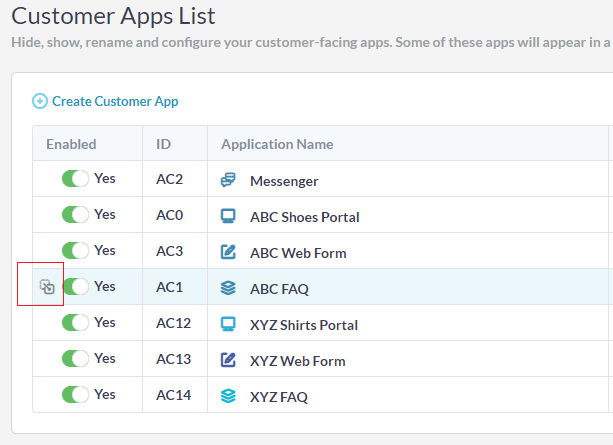
Different Customer Portals for each brand
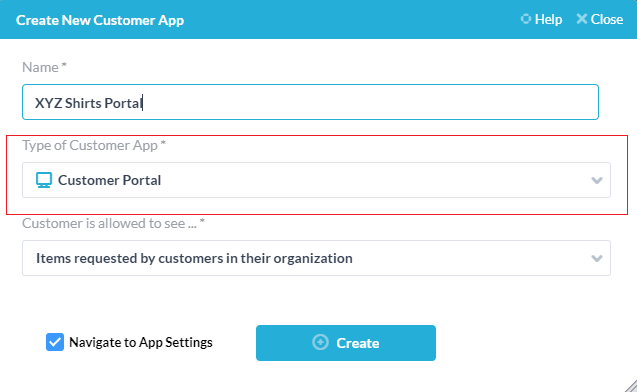
First, let’s create a new portal for the XYZ Shirts brand. Go to Administration > Customer Apps > Create Customer App. Keep the box ‘Navigate to App Settings’ checked and you will be able to configure the details of what appears in your customer portal.
Different Webforms for each brand
Next, let’s also create a webform for our XYZ Shirts brand. Again go to Administration > Customer Apps > Create Customer App. Navigate to the created web form and select which ticket type your webform will create.
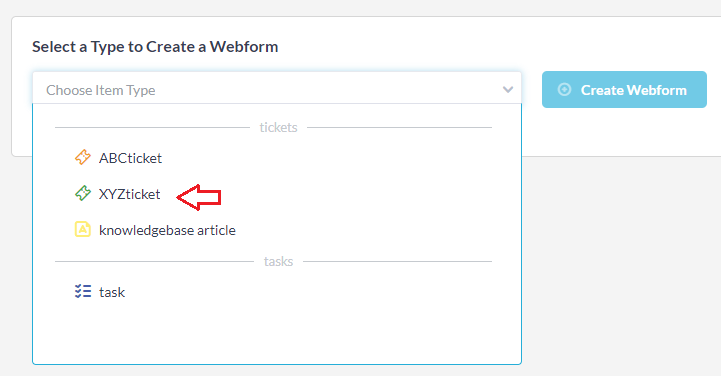
Since this is the form for brand ‘XYZ’ we will select to create the XYZ ticket type. Now when a customer submits a ticket through the form we know what company site it originated from and can route it accordingly.
Different Knowledge bases for each brand
Finally, we will create our knowledge base in the same way. Administration > Customer Apps > Create Customer App. Navigate to the Knowledge base and you can set the categories unique to that brand/company. We can also re-order our apps for better organization, as well as re-name our existing apps to fit our other brand.
Let’s preview our finished widget.
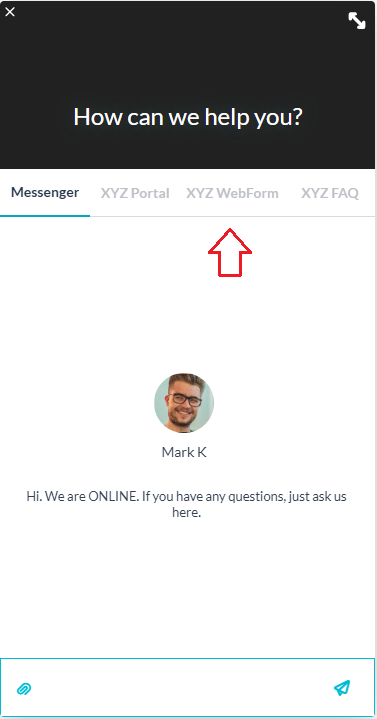
As you can see, our newly created customer apps are available in our widget. Now we can embed the widget! Create a seamless customer experience across all your services with OneDesk’s customer applications. Set up automations to save time and optimize our workflow.
Auto-Routing
Set up routing and automations by going to Administration > Tickets > Create Workflow Automation. Automations are highly flexible and customizable. Here are just a few possibilities to automate your multiple brand workflows:
Auto-Route: Assigning to Team/Agent
Run your automation on the appropriate ticket type for each of your brands. For example, we can set up an automation to run on our ‘XYZ tickets.’ Then we will route these tickets to the team who handles the XYZ brand.
How to Assign Tickets to your Team
Auto-Route: Brand Specific Auto-Replies
Set up automated replies or responses for each of your brands
Auto-Route to Brand/Service Project
Automatically route each brand’s tickets to the right projects. Run your automation on the appropriate ticket type for each brand. For instance, ‘XYZ tickets’ added to the ‘XYZ Support’ Project
Best Practice: Common Workflow Automations
- Related Articles
- Widget Configuration
- Create Items Automatically