OneDesk’s customizable customer portal is a useful tool for customers to see the items which they may be interested in, and the progress that is being made on them.
Accessing the classic customer portal & visibility settings
To access the settings for the customer portal within OneDesk, go to more applications -> administration -> customer apps.
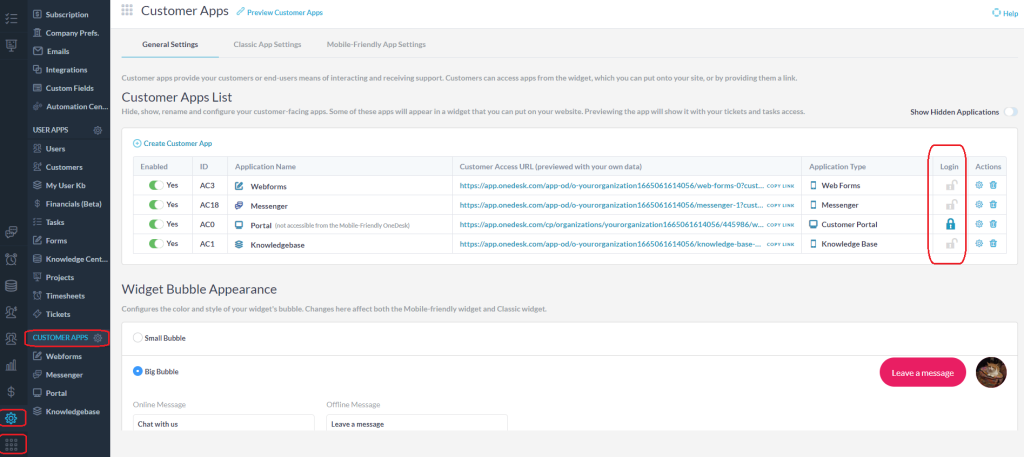
This will bring you to a general overview of the customer apps which OneDesk offers.
From this menu, you can see whether the portal requires users to log-in or not. Additionally, if you select “create customer app”, you can create different portals with different access URLs. This may be useful if you want to have two separate portals with different permissions on what the portal visitors are allowed to see.
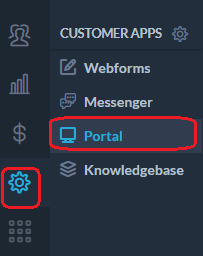
Selecting the cog-wheel icon under “actions” will bring you to the specific settings for the customer portal. You can also access these portal-specific settings by selecting “portal” on the left-hand side of your screen, under “customer apps” – resulting in the following display:
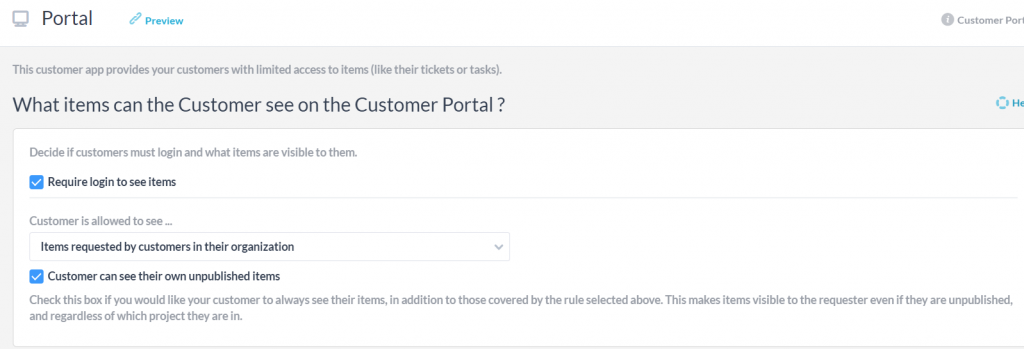
By default, the customer portal requires customers to log-in with the organization to view items, and customers are allowed to view items requested by themselves and other customers within their specific organization. You may want to restrict or open up these visibility settings further.
The classic portal: Different visibility settings & features to display
Under the “Customer is allowed to see …” heading, you can choose what items your customers view within the portal. There are several options, covering a wide range of situations. In addition to these provided options, you can specify unique item-types.
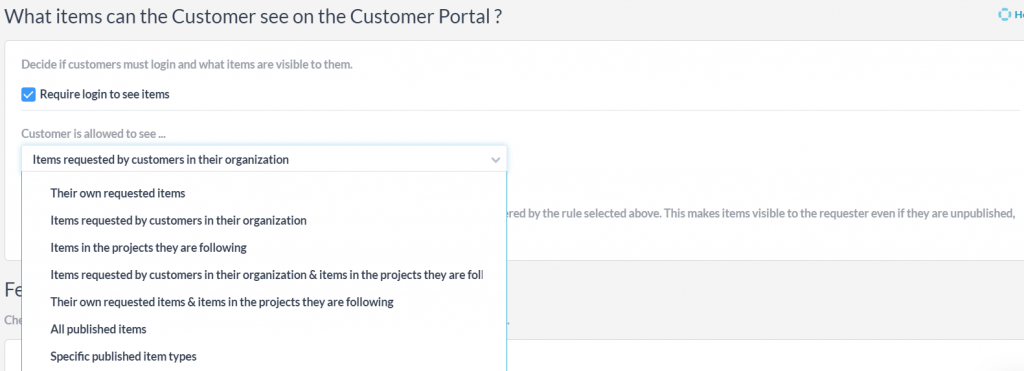
The options you can choose from to restrict or open up your portal visibility are as follows:
- Their own requested items: When the customer accesses the customer portal, they will only be able to see items which they are marked as the requester on.
- Items requested by customers in their organization: The customer can see their own requested items as well as items which other customers within the same organization are marked as requesters for.
- Items in the projects they are following: The customer can see all items in the projects which they are marked as a follower for, regardless of their status as requester or not.
- Items requested by customers in their organization & items in the projects they are following: The customer can see both items that all customers in their organization have requested, as well as items in projects they themselves are following, regardless of requester status
- Their own requested items & items in the projects they are following: The customer can see items which they are marked as a requester for, as well as items in projects they are following, regardless of requester status.
- All published items: The customer can see all items on the portal, even items outside their organization and which they are not a follower or requester of.
- An item can be chosen to be published from its detail panel. If an item is selected to be published on the portal, it will be visible there. If the item is not published anywhere, it will only be visible in the OneDesk interface.
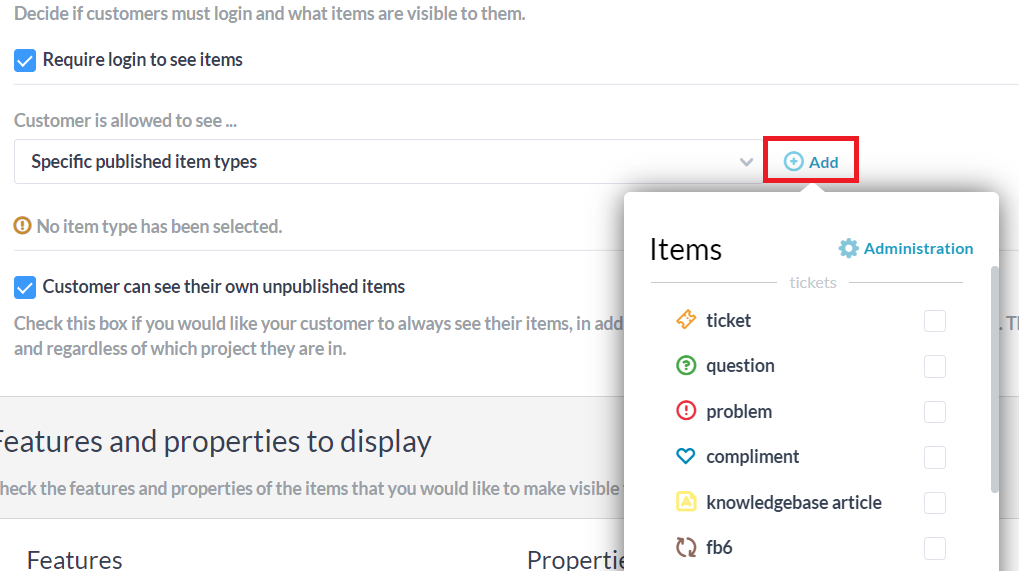
- Specific published item types: The customer can only see published items of a specific item type. When selected, you can choose from a dropdown menu of items to add – shown below.
Underneath the item visibility section is where you choose which features and properties to display on the item’s detail panel in your customer portal.
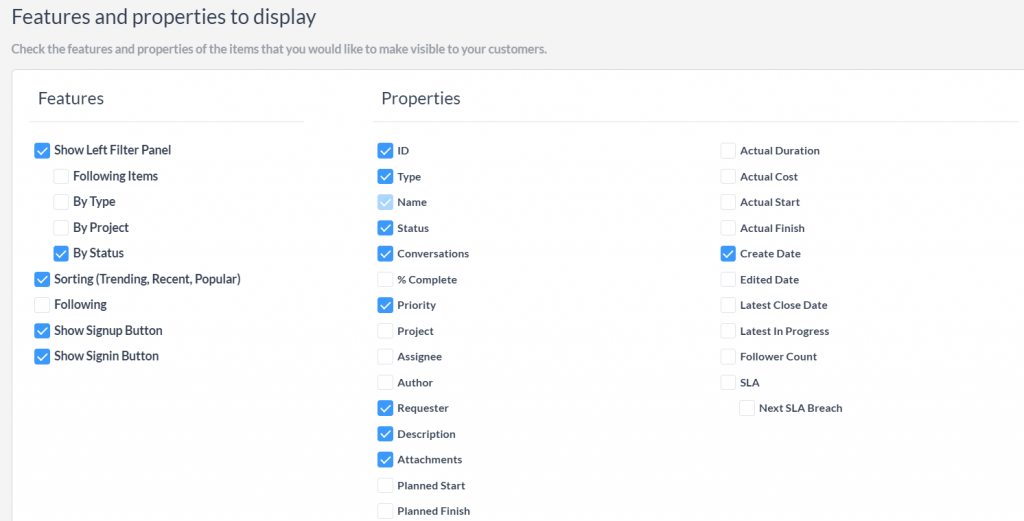
These options allow for you to create a fully customizable customer experience. You can hide properties which do not apply to your business or customers, or which you wish to remain private to your internal users..
Finally, scrolling down to the bottom, we have the webforms section:

Here you can choose which of your created webforms, if any, are also linked to the portal. By default this is set up to show tickets created via webform, but you can change this to your liking by adding other webform items or removing the webforms from view entirely.