OneDesk provides the ability to send messages and emails through automations. Email templates can be set up to send emails to customers or users and can be helpful for updating everyone on progress or changes. There are also system emails, particularly important emails sent from your account which cannot be configured through automations. You can read an in-depth explanation of these emails and messages in: Notifications & Emails. So why would you want to prevent all emails or notifications?
Well, in the case of trying out your new account or some feature, you may want to disable all notifications so as not to spam your customers, your users, or yourself. This article highlights some methods to achieve this, depending on your needs. But don’t forget to turn your notifications back on when you are finished trying things out!
Table of Contents
- Disable automated messages and emails
- Disable system emails
- Disable notifications for an individual user
- Deactive an individual customer
- Turn off all outgoing emails
Turning off all emails and notifications
Automated email and messages trigger based on tickets, tasks, projects or timesheets. If you are testing something involving any of these items you can choose to following this method of preventing notifications.
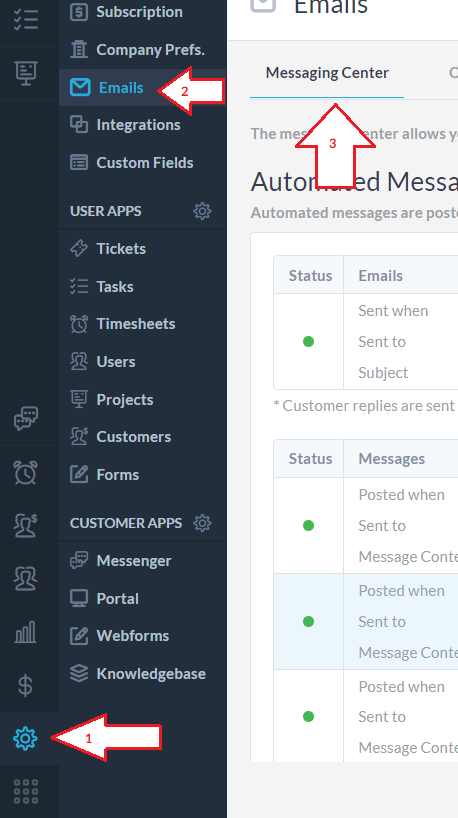
You can find all automated emails and system emails in Administration → Emails → Messaging Center
Automated Messages & Emails
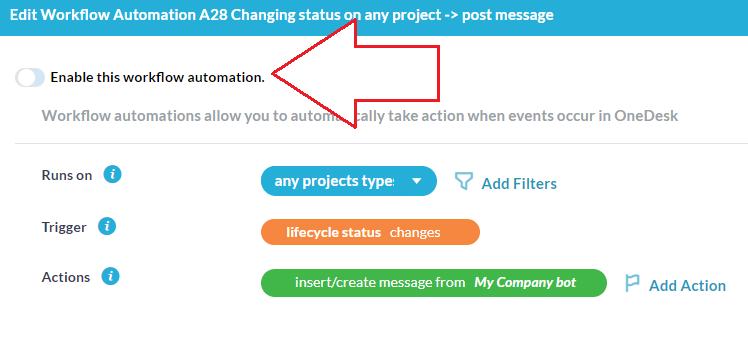
In the first two sections, you will find your automated messages and automated emails. These are run through automations, so to disable these we should disable the automation.
Click on the blue automation ID (e.g. automation A02). Then toggle off “Enable this workflow automation”. Click Save. Repeat this process for the other automated messages and automated emails.

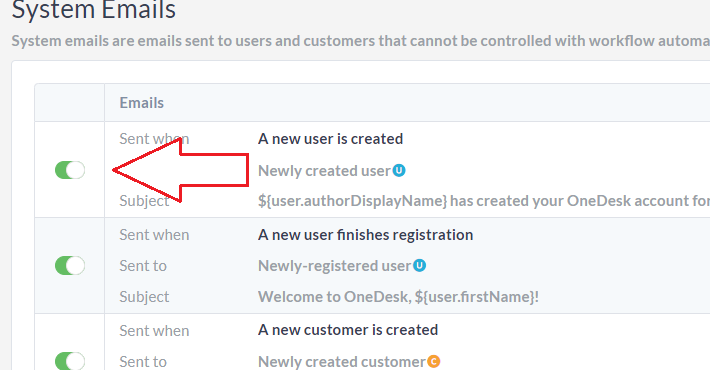
System Emails
System emails are not sent through automations but directly by the system. These emails are generally important and so in some cases cannot be disabled (i.e. the password reset email). The emails that cannot be disabled have a transparent toggle button. Disable the other system emails by toggling each one off.
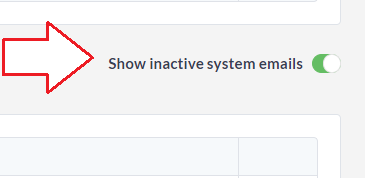
Important: When you are finished testing do not forget to turn your emails back on! To do so follow the same steps and ensure “Show inactive emails” on the top right is toggled on, or else you will not see inactive emails.
Turning off emails and notifications per-user
Instead of disabling all emails or notifications, you can turn them off for just yourself or another user. Go to the Users application and double click on the desired user.
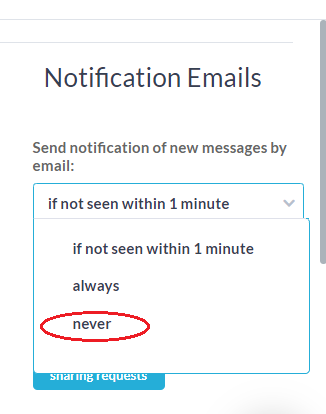
To recieve notifications about messages while inside Onedesk, but recieve NO emails set:
- ‘Send notification of new messages by email’ to Never.
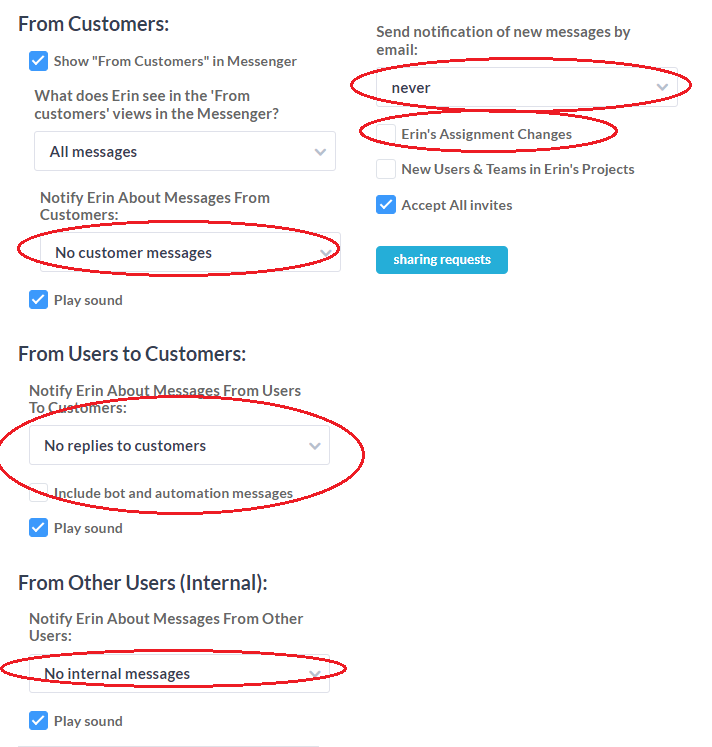
To receive NO notifications at all select:
- “No customer messages”
- “No replies to customers”
- “No internal messages”
- “Send notification of new messages by email: Never”
AND uncheck the following:
- “Include bot and automation messages”
- “User’s Assignment changes”
For more in-depth information on these settings see: User notifications
Note: Don’t forget to turn on the user’s notifications after testing is finished.
Deactivating a customer
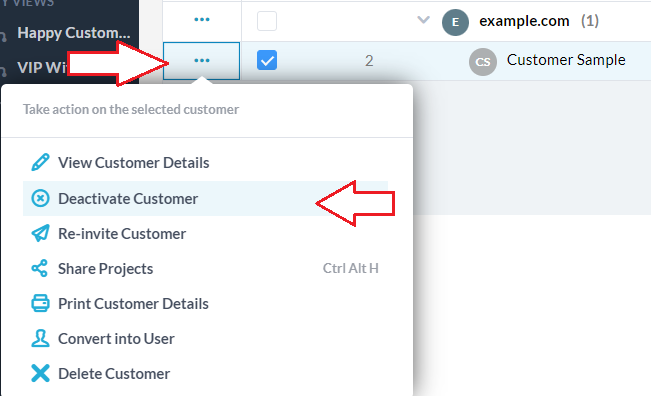
If you want to try something without spamming a customer, but do not want to disable notifications, you can temporarily deactivate the customer. Deactivating does not delete the customer, all their information will be maintained. However, the customer will not receive notifications for as long as they are deactivated. After you are finished you can reactivate the customer. To do this go to your Customers application. Select the action icon (three dots) beside the customer and select deactivate. To reactivate, follow the same steps.
Turn off all outgoing emails
You can turn off all outgoing emails by going to Administration -> Emails -> Settings -> Email Filters. Toggle off ‘Turn off all outgoing emails.’ Any emails sent during this time, will NOT be sent. So, remember to toggle this setting back on after you are done.