
OneDesk ships with some pre-set report templates included. These let you quickly generate reports on tickets, tasks, projects, timesheets, and invoices with just a few clicks. However OneDesk also includes powerful tools to let you create your own report templates, schedule them so that they run without your interaction, and can be automatically emailed out to you, your team, or your management.
How OneDesk’s reporting tools are structured
To get started using OneDesk’s reporting tools, you need to first understand a few basic concepts.
Report Templates:
These describe the report that will be generated when they are run. They cover:
Report metadata
- The report name
- Report description (optional)
The definition of the data to report on:
- The application (tickets, tasks, timesheets, etc…) that the report will be run on.
- Any filters you choose, to refine the data reported on. (eg. a specific team, or customer, time period, etc.)
The information to display in the report:
- The layout to be used (more on this later)
- The columns of properties to be included in the report
- How you want to group the data
Report Schedules:
These describe when and how frequently a specified report template is run and the report created. They cover:
What to run on
- Which template to use (see above).
- What project-level to run on. This allows you to use the same template to generate reports for different project- or portfolio-levels.
The scheduling of the run times:
- The frequency of when the reporting time (daily, weekly, etc.)
- The start date and time of the first report. Afterwards, the frequency will determine the timing of the subsequent reports.
The output
- The output format. Excel by default, but you can convert it to PDF instead.
- Who, if anybody, to email the report document to.
Report Layouts:
This is an Excel spreadsheet (XLS) file that defines how the report is laid out. It covers things like how many columns to display, what charts to include, what columns the charts should be calculated from, styling, and more.
You can select from the list of provided template files (“Layout 1” is a good choice for reports with groupings). You may need to experiment with different ones until you find the best one for your report.
If you are skilled with Excel templates, you can upload your own. Once again some experimentation will be necessary to get this right.
Report Documents:
These are the documents that are output when a report template is run. Currently OneDesk’s reports are generated in XLSX format, but can be automatically converted to PDF is you prefer. When a schedule is run on a template, a report document is generated and may be emailed to whoever you have defined.
So in summary: templates are run on your OneDesk data using schedules, and generate report documents.
How to create your own reports in OneDesk
With those definitions out of the way you are ready to create your own report. I will go through an example that shows how to create a report.
Let’s say that I would like a report on the billable hours my team has logged for a certain customer. I want to send that report to the customer on a weekly basis so they are up to date and pay me for it.
In my example I have organized my work for that customer inside a portfolio (it could have been a single project).
Create a Report Template
Click the ‘Add’ menu and click ‘Report’


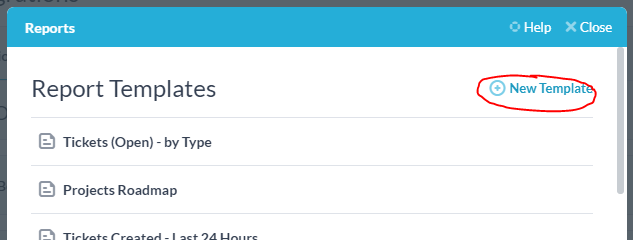
In the ‘Reports’ popup click ‘New Template’

Complete the ‘Report Template’ form.


Here is what I completed above:
- Name: I named my template.
- Application: I will be reporting on the timesheets submitted by my team.
- Layout: I selected the “Layout 1” layout.
- Columns: I would like to display columns for the timesheet date, task name, the actual work performed, the actual cost, and the note on the timesheet.
- Filters: I only want to include timesheets where the billing type is “billable” and that were created more recently than the last 7 days.
- Groups: I would like to group the timesheets, by the projects they are in.
- Description: I entered a short description of the report.
When you are done, click ‘Save’. Your new report template will be shown at the end of your templates list.
Creating a Schedule for your Template
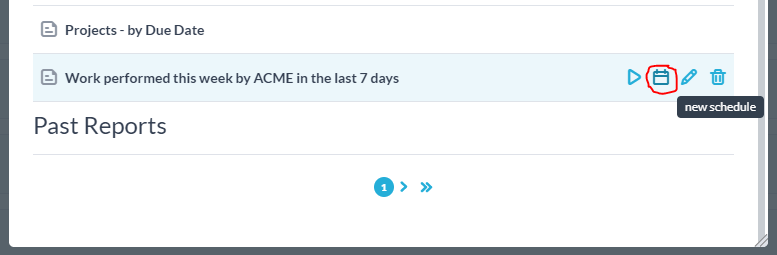
Hover over your new report template and click the “new schedule” icon.

Complete the ‘Schedule’ form.


Here is what I completed above:
- Template: This was already selected. It is the template I created earlier.
- Project level: I have a portfolio of projects I am working on for my customer (Customer X), so I selected the entire portfolio.
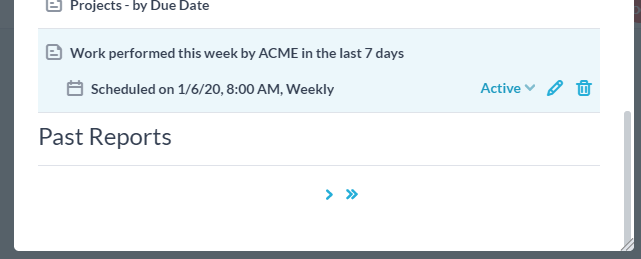
- Frequency: I would like to generate the report weekly.
- Start Date & Time: Jan 6th (Monday) at 8AM.
- Send Email to: I added 2 of my contacts at Customer X. I could have selected them from the list or just add their email addresses.
Click ‘Save’ and the schedule will be saved under the report template.

Let’s take a look at the report:
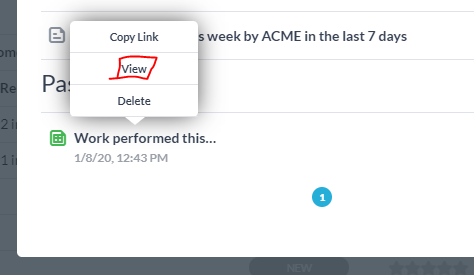
You can run the report template off schedule and get a test report. This will use the currently selected project-level, so make sure you have data at that level. The newly generated report documents will appear at the bottom of the reports popup. Clicking on the document will allow you to view, delete or copy the link to it.

As you can see, we got what we wanted: All the timesheets, that fit the filtering criteria are there, and they are grouped by the projects they are in. The columns we chose are displayed, and the Title and Description are displayed.


Tips, Tricks, Troubleshooting:
- Make sure you have data in your account – While we ship with some sample data, reports will look more complete if they are run on real data.
- Make sure you are at the correct project-level when running the sample – When you do a test run of the report it will use your currently selected project-level. When it is run on a schedule it uses the project-level defined in the scheduler. To make sure you have data in your test reports, make sure you are at the “all projects” level.
- Make sure your filters are not too restrictive – The filters you defined in your template may be too restrictive and are filtering out some or all of your data. As you work on getting the right report it is better to add the filters you need rather than figure out which ones are wrong afterwards.
- Try a different layout – If the report you are using is empty or strangely laid out, try out the other layouts one by one. One of them will probably work for you, but if not, you may need to upload your own.
- In excel you may need to scroll over, and enable edit mode – When you open the report in excel you may find that excel has scrolled the report to the right or bottom. You may need to scroll over and you may need to enable edit mode.
- In PDF if columns or rows are cropped, you will need to generate in Excel and convert to PDF yourself – Our reports are generated as spreadsheets and then converted to PDF if you request it. However, this can lead to cropped columns in PDF. If you find this occurring for you, you may need to create your own XLT layout or convert to PDF from Excel manually.
- We can help you – If you have questions on how to use the reporting tool, just ask us and our support team will do their best to answer. If you would like help with your specific report we offer services for that too.