Scheduling is a key aspect of project management. Effective project management scheduling includes more than just setting the project due date. Rather, for effective planning, a project manager should ensure to define the task and project activities, estimate effort and duration, determine dependencies and monitor everything in real-time. OneDesk offers many options and helpful tools for scheduling and monitoring the progress of your tasks and projects. This article will cover how to go about planning, scheduling, estimating effort, and creating dependencies in OneDesk.
An overview of task and project scheduling capabilities:
- Set planned schedules for tasks and projects from their detail panels, from the Gantt chart, or from calendar. You can schedule tasks for a certain day or across several days, and to start and end at a specific time.
- Estimate the effort for tasks based on days, hours, and/or minutes.
- Estimate effort for tasks and projects using an agile point system.
- Create “scheduling links” between tasks inside the same project, which will connect their start or end times together. These are easy to visualize (and create) on the Gantt chart, but can be created in other ways as well.
- Enable constraints to the schedule of tasks (i.e. a task must start on a specific date).
- Monitor the planned versus the actual work taken on tasks and projects.
Scheduling tasks and projects
Schedule a task on the detail panel
First, you can schedule a task (or project) directly from the detail panel. The detail panel is where your team works on tasks, including viewing a task description, logging time, and communicating with teammates.
Follow these steps:
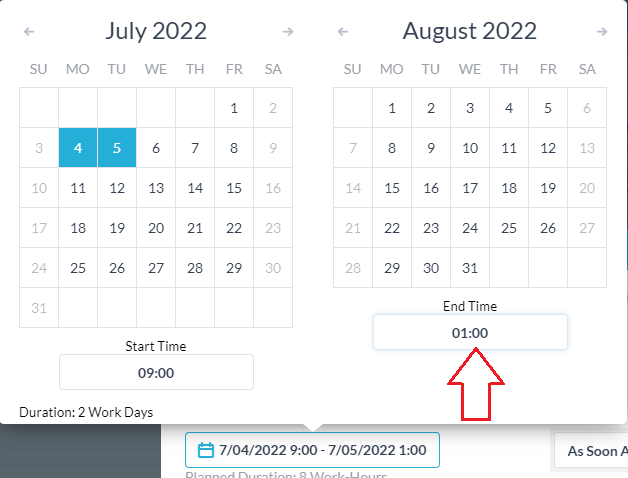
- From the detail panel click the dates next to “Planned schedule.”
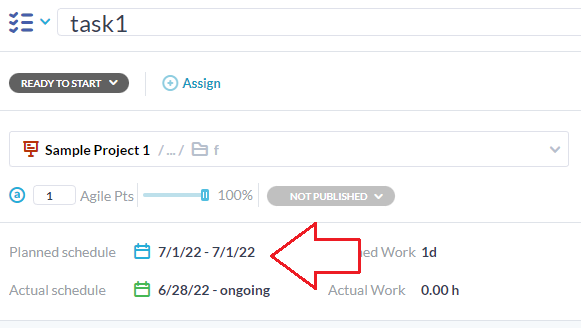
2. Enter the planned effort (how much time you expect the task to take).
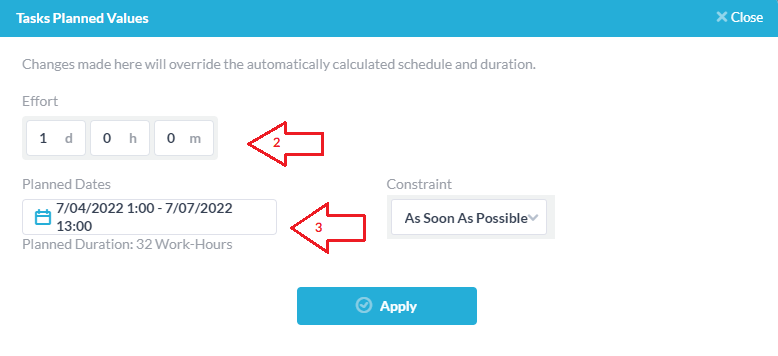
3. Set the planned dates by clicking on the planned dates field. Click on a day to set the task for a specific day. Click and drag to specify a task for multiple days.
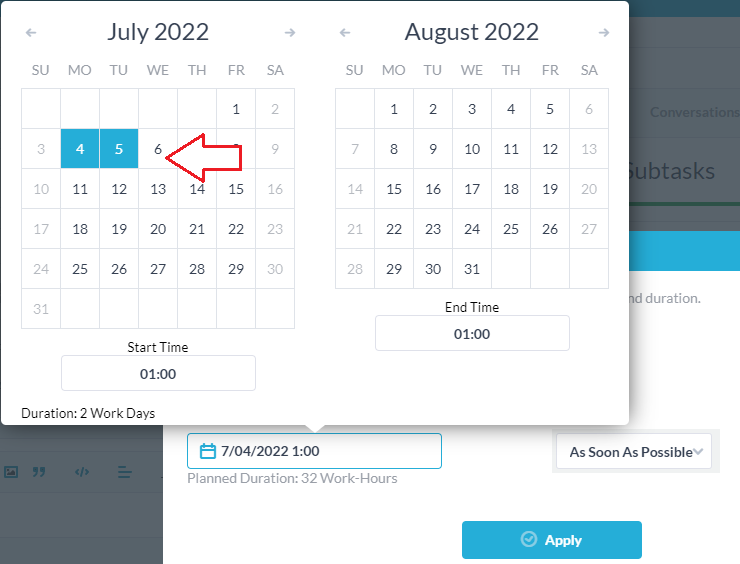
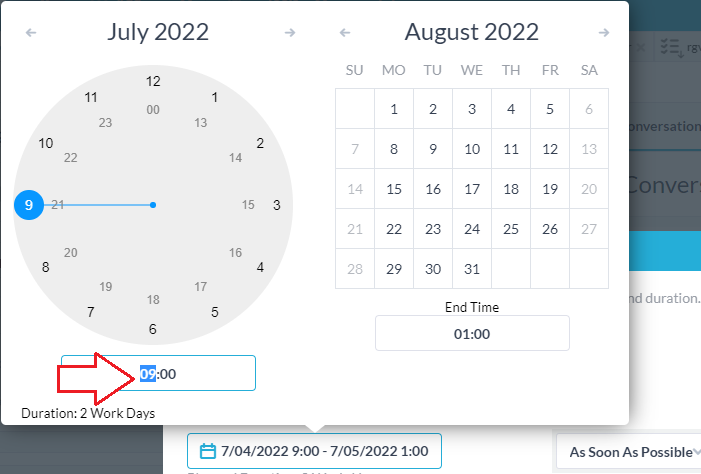
4. Specify the start and end time. Click the hours next to start time. Click an hour on the clock and this will bring you automatically to set the minutes. Alternatively, you can scroll through the hours using your mouse wheel then click outside of the clock. This action will not automatically bring you into the minutes selection.
You can select the minutes independently. Like the hours selection, you can click directly on the minutes to select the minutes and this automatically closes the window. Or, you can scroll through the minutes with your mouse wheel, then click outside the clock to save your selection.
- Follow the same steps as #4 to set your end times.
Schedule a task on the calendar
The calendar has daily, weekly, and monthly views. Select your view level on the top left side of the calendar. Like other views in OneDesk, your calendar can have custom views. Check out the related articles for more detailed explanations on custom views. In summary, you are able to filter which tasks to view on the calendar. For instance you can filter to only see tasks assigned to a specific team. You can have multiple custom views, each with different options applied, then save your views and switch between them. You can also select to view either the planned or actual schedules or both the planned and actual schedules together on the calendar.
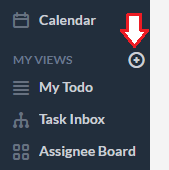
To create a custom view of the calendar select the icon next to ‘My Views’
Calendar functions per view level:
On all view levels (day, week, month) you can:
- Click the task to bring up options: view details, edit, or delete the task.
- Double click to open the detail panel.
- Double click to create a new task or click and drag to create a new task with a schedule.
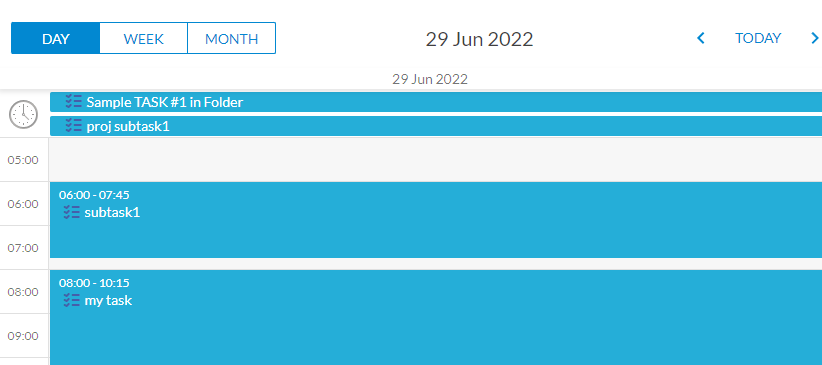
In day view:
- Drag the bottom of the task to increase or decrease the duration (end hours and minutes) of the task.
- Click and drag the task to change its start time.
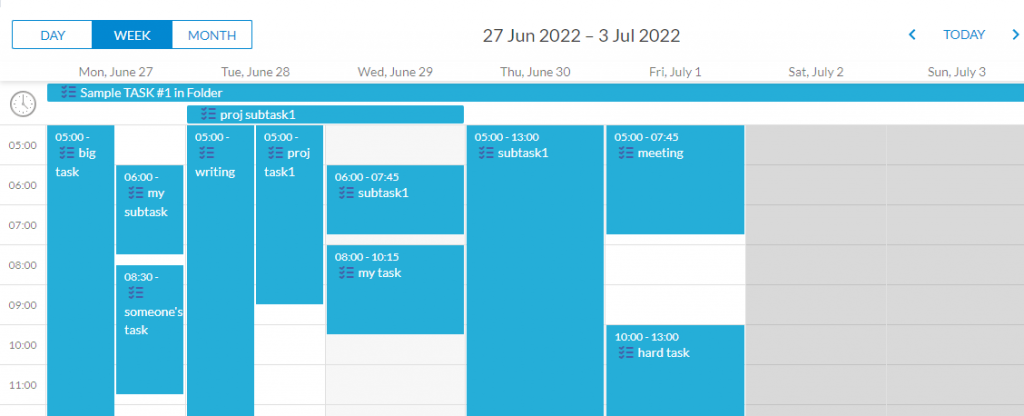
In week view:
- Click and drag the bottom of the task to increase or decrease the duration (end hours and minutes) of the task.
- Click and drag the task up or down to change its start time.
- Click and drag the task left or right to change its planned day.
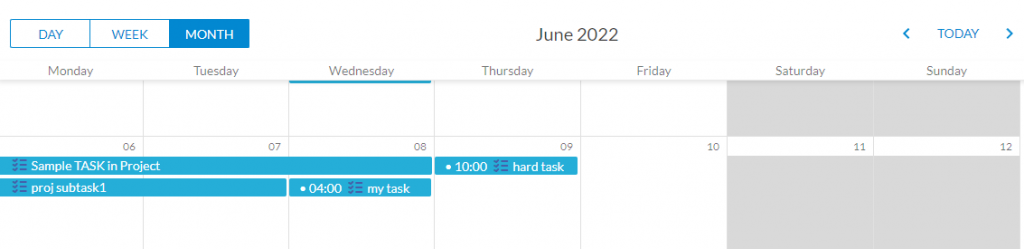
In month view:
- Drag and drop the task along the month with the duration maintained.
Schedule a task on the Gantt chart
The Gantt chart can be scaled to the: minute, hour, day, week, month, quarter, and year. To scale, select the scale option on the left top side of the Gantt chart or hold Ctrl and scroll with your mouse wheel.
Like other views in OneDesk you can filter or group your Gantt view with custom views. For instance, group by team or filter the view to a specific project.

- Drag tasks horizontally along the Gantt to set the start dates.
- Drag the start or end of the task to increase the task duration.
On the Gantt the blue bars represent the planned schedule. The green bars represent the actual progress of the task. This feature allows your team to dynamically monitor the progress of tasks and projects in relation to your plans. You will also notice that as you plan tasks, the bars of your projects and folders get darker blue, representing more tasks scheduled at the same time.
Schedule links on the Gantt chart
You can link together tasks via finish-to-start, start-to-start and finish-to-finish links. OneDesk will make use of these links to schedule your tasks in the shortest project possible.
You can create these links by dragging and dropping from (and to) the circles that appear when you hover or select the task bars. You can remove the constraints on the Gantt by clicking on the constraint lock icon or the linking arrow.
Schedule finish-to-start in Tree or Flat view
Since the finish-to-start link is the most common choice, there is a menu option in the Tree view that lets you link together a string of these with one action. Just multi-select the tasks you wish to link, click the actions menu and select “Schedule Items Finish to Start”. You can also break these links by selecting “Remove Finish to Start link on Items”
Setting date constraints
By default, OneDesk uses the very loose constraint of “Start No Earlier Than” and chooses today’s date or the project’s start date. There are other kinds of constraint that you can pick:
- As Soon As Possible
- As Late As possible
- Must Start On (anchors the start date to a date)
- Must Finish On (anchors the finish date to a date)
- Start no later than (constrains the start date to anytime before a date)
- Finish no later than (constrains the finish date to anytime before a date)
- Start no Earlier than (constrains the start date to anytime after a date)
- Finish no Earlier than (constrains the finish date to anytime after a date)
You can set a date constraint for a task in the Task Planned Values. To bring up the Task Planned Values, click the task to bring up the detail panel and click the dates next to “Planned schedule, as you would for scheduling from the task detail panel. (Note: from Tools on the top panel select “Dock detail panels on right” to open the detail panel without exiting the Gantt chart).