Workload view is a ‘system view’ available in the Tasks and Tickets applications. The workload view is a resource availability tool to help you visualize the work each team member is assigned to during a selected time period.
Add the workload view
In the tasks/tickets application, on the left side panel. You can add the workload view to your ‘system views,’ (your base layouts, such as ‘Tree’ view). Alternatively, you can create a new custom view using the workload layout. A custom view can have filters (if desired) and is saved on your side panel under ‘My Views.’ For details on custom views watch our video on creating custom work views.
Add workload to your system views:
Note: You must be an admin-level user to access the ‘views management’ panel.
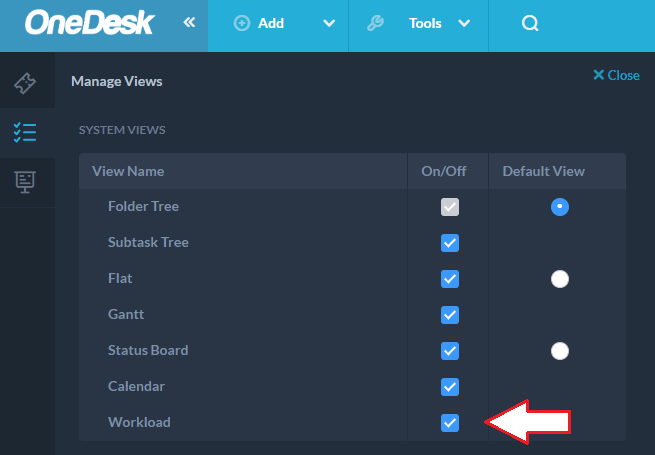
- Click the cogwheel beside ‘Views’ (the icon appears upon hover), this action will open the view management panel.
- Check the Workload view ‘ON’.
- The view will now appear in your list of ‘system views’ for all users in your organization.
See also: Managing Views.
Add workload to your custom views:
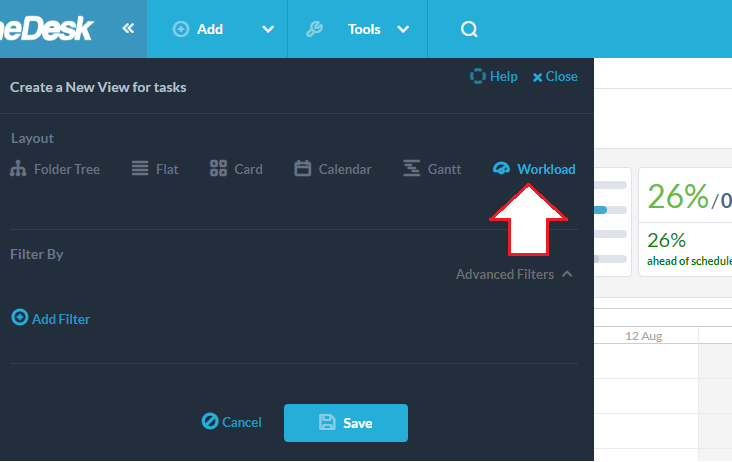
- Click the icon beside ‘My Views’ (it appears upon hover).
- Select ‘Workload’ in the list of layout options. (Optionally, you can apply filters to this view, see below).
- Click save, name your view, and it will be saved on your side panel in your list of custom views.
Note: If you are an admin user, you can share this custom view across your organization. If you are not admin, or do not choose to share the view, the custom view will only be saved on your own side panel.
Understanding the workload view
The Workload view displays each user’s assigned work hours and their total capacity in hours for the given period.
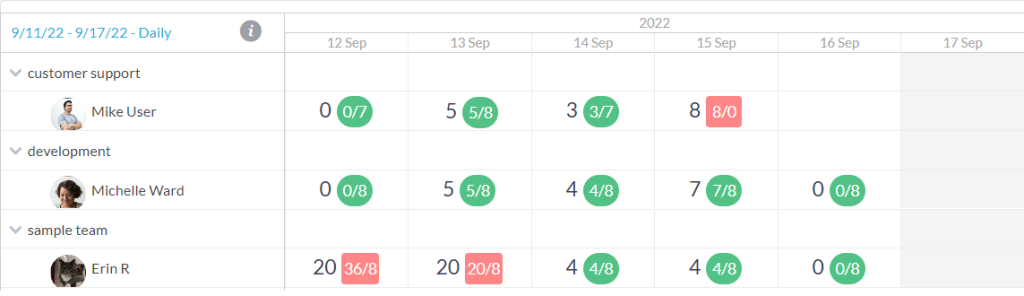
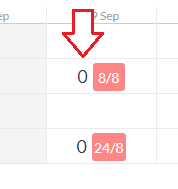
The first number, outside of the bubble, is the total hours assigned for that period and is affected by any applied filters as well as the selected project level.
The numbers in the bubble/square indicate the assigned work hours and the user’s capacity for the period. Capacity is defined as the total working hours for that user (work hours minus vacation/absence events).
For example, below ‘Mike User’ has 4 hours of work assigned to him on Sep 13 and Sep 14. He works 8 hours total on both of those days. Therefore, he has time available. Red square indicates overbooked (the planned work is greater than the capacity). Green bubble indicates available time, or under-booked. We do not prevent you from overbooking a user.

(Users working hours are the same as the company working hours by default. An individual user’s working hours, as well as vacation/absence events can be set on the user calendar. See: User Calendar)
Note: Remember that the bubble displays the hours for a given period. You can use the scale tool on the left side of the view to select a daily, weekly or monthly grouping as well as the date range. The date range also impacts the total. If you select the weekly grouping but a date range of 2 days, you will not see the total for the whole week, only for those 2 days.
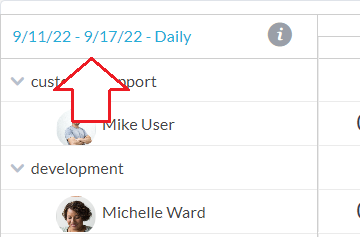
Using the scope tool – groupings and date range
The scope selector on the top left of the view allows you to group availability as well as select the date range. Date range sets which days to count/display. You can choose to group by day, week, or month. Grouping will show you the total in the group AND within the date range. For example you could group the view weekly, but set the date range as three days. In this case the total hours/capacity will be the total of those three selected days and NOT the whole week.
Tip: If you are in the weekly or monthly grouping and you are not seeing the total hours you expect, be sure you have also selected the right date range. I.e. if you want to see the whole month’s assigned work hours and capacity, select the monthly grouping as well as the date range of the whole month you want to see.
Other filters / workload custom views
Like other work views in OneDesk, the workload view can be customized. You can apply the filters at any time or save the view with those filters applied. From the ‘Create Custom View’ panel you can apply various filters to the workload view.
Note: Only the first number of the workload view is affected by custom view filters or the project scope. The numbers in the bubble/square are NOT impacted by filters. These numbers show the total for that period regardless of project scope or view filters.
How to set capacity/ how to set task planned hours
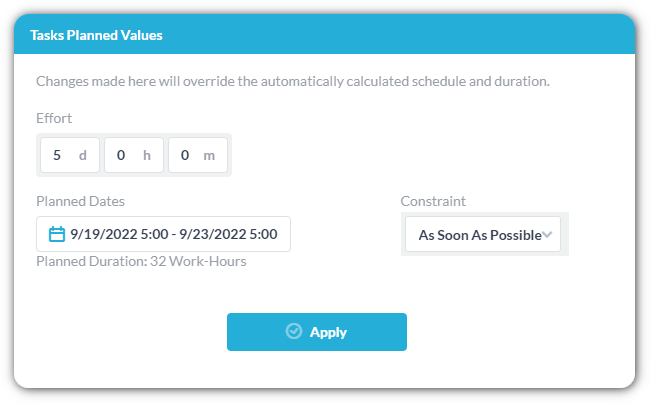
The assigned work hours of a task (or ticket) is determined by the ‘Planned Work’ property. You can set the ‘planned work’ from the task detail panel. Open up the task detail panel and click the dates on ‘planned schedule.’ You can configure what the ‘default planned effort’ is on newly created tasks from Administration → Company Preferences.
You can also add the planned effort to the internal task creation form, in order to set the planned effort upon creation. See: Internal Forms
A user’s capacity is determined by their working hours. By default an individual’s working hours is determined by the company working hours. You can set individual user working hours on the User Calendar. User hours are also determined by vacation or absence events, which are also created in the User Calendar.