What Are Webforms?
Webforms are used to collect information from your customers and translate that information into tickets or tasks in OneDesk. Through webforms, you allow your customers to create different item types in the OneDesk application. You are able to create a webform for every item type (e.g. a ticket, a task, a bug, an error report, etc.) you have enabled.
Item Types
In OneDesk, you can have up to 10 different types of tickets, 10 different types of tasks, and 10 different types of features. For each one of those 30 types, you can create a unique webform. To enable different item types, navigate to your tickets application or task application in your administrative section and toggle them on from the top list.
Custom Fields
OneDesk allows you to edit the Custom Field properties that are collected on each webform.
For example:
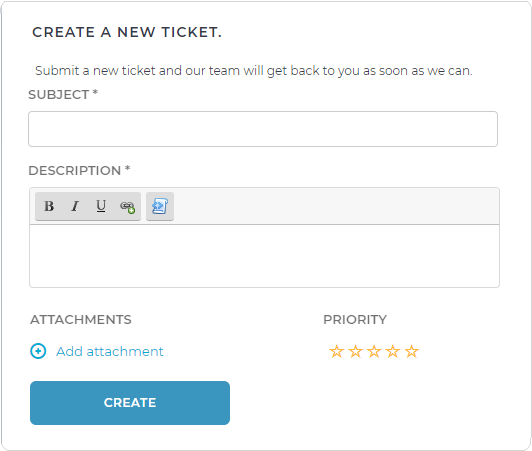
In one webform, you can have your customers submit tickets and ask for the following information:
- Subject
- Description
- Ticket Priority
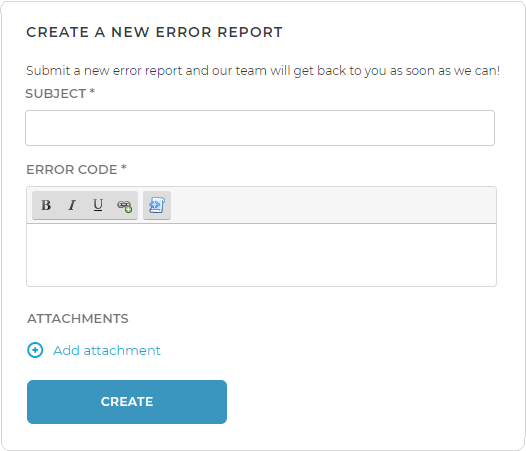
In another webform, you can collect error reports and ask for the following information:
- Subject
- Error Code
- Screenshot of error
How to Create a Webform
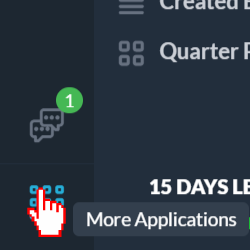
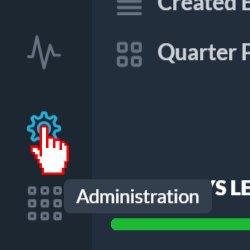
Step 1: Click the More Applications icon on the bottom left side of the OneDesk application.
Step 2: Click the cog icon to navigate to the administration section.
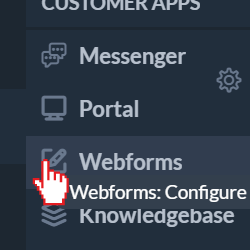
Step 3: Click Webforms from the list of applications.
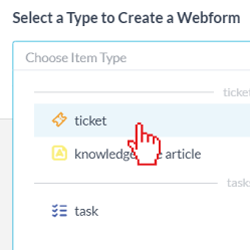
Step 4: In the “Select a Type to Create a Webform”, choose the type of item that your webform will create in OneDesk.
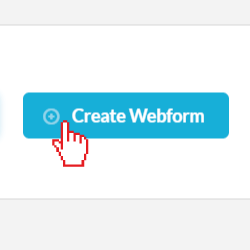
Step 5: Click Create Webform.
Webform Customization
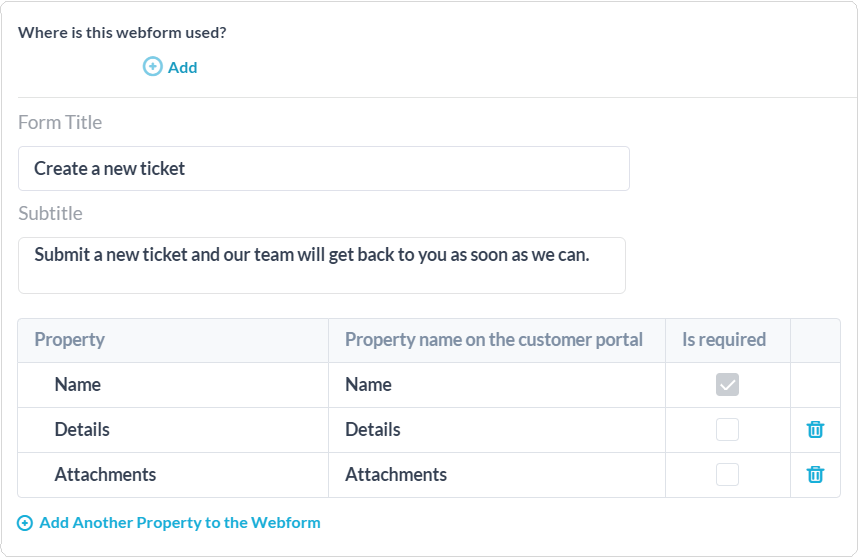
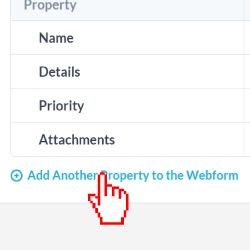
In your webform, you can change the form title and subtitle. You can also add and remove properties from the form and make the properties required or not. You can add properties by clicking Add Another Property to the Webform at the bottom.
How to Allow Customers to Submit Items to Projects
You can allow your customers to submit items directly into your projects in OneDesk. You’re able to decide which projects they submit to on each form and give them access only to the projects you select. To enable this:
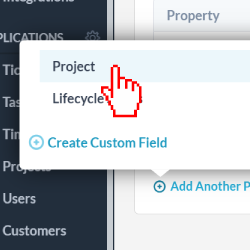
Step 1: Click Add Another Property to the Webform at the bottom of the webform you select.
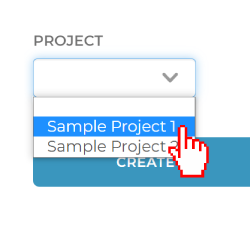
Step 2: Select Project from the options.
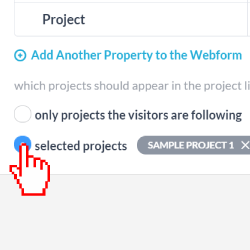
Step 3: Select “only projects the visitors are following” to allow your customers to ONLY submit their items to the project(s) that they are following. Select “selected projects” if you would like to choose which projects you allow your customers to submit items to. Click the Add button to choose from your projects list.
You can preview the Webform to see how your new option looks to your customers.
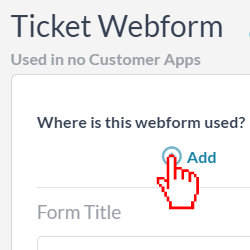
How to Embed a Webform on Customer Portal
To embed a webform onto a Customer Portal:
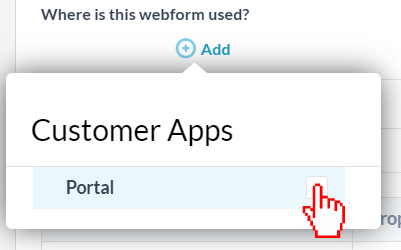
Step 1: Click on the Add button underneath “Where is this webform used?”
Step 2: Select the portal that you want the form to appear in.
How to Put a Webform onto a Website
To embed your webform directly onto your site, you will need to identify the webform URL and insert it into the code below. Follow these steps to find your webform’s URL:
Step 1: Click the More Applications icon on the bottom left side of the OneDesk application.
Step 2: Click the cog icon to navigate to the administration section.
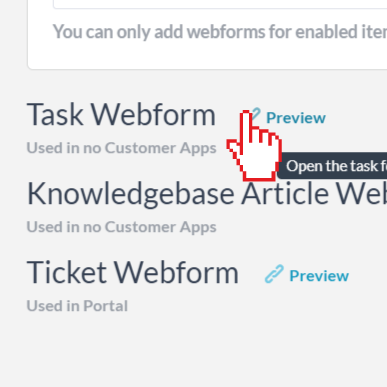
Step 3: Click Webforms from the list of applications.
Step 4: Click the Preview button next to the webform that you wish to embed onto your site.
Step 5: Copy the URL from the preview window and paste it into the HTML code below. This is the code you will use on your site:
<iframe src=”INSERT URL HERE“></iframe>